Applies To: Cloud-managed Fireboxes
DHCP (Dynamic Host Configuration Protocol) is a method to assign IP addresses automatically to network clients. You can configure your Firebox as a DHCP server for an Internal or Guest network. If you have a DHCP server, we recommend that you continue to use that server for DHCP. To configure the Firebox to relay DHCP requests to a DHCP server on another network, enable DHCP Relay.
In the DHCP settings for an internal or guest network, you can set the DHCP Mode to one of these options:
- DHCP Disabled — The Firebox does not handle DHCP requests on this network.
- DHCP Server — The Firebox assigns IP addresses through DHCP to clients on this network.
- DHCP Relay — The Firebox forwards DHCP requests from clients on this network to a DHCP server.
For a cloud-managed Firebox, the default Internal and Guest networks have DHCP Server enabled. For more information, go to Firebox Default Networks.
Configure DHCP Server
Enable DHCP Server if you want the Firebox to assign IP addresses on a network.
DHCP clients use the IP address of the Firebox as the DNS server by default. The Firebox forwards DNS requests from DHCP clients to a DNS server specified in your configuration. For more information about DNS server configuration, go to Configure a DNS Server for DHCP.
Cloud-managed Fireboxes support DHCP ranges that exceed the class C maximum of 256 IP addresses.
To configure the Firebox as a DHCP Server for a network, from WatchGuard Cloud:
- Select Configure > Devices.
- Select the cloud-managed Firebox.
- Click Device Configuration.
- Click the Networks tile.
The Networks configuration page opens. - On the Networks page, click the tile of an Internal or Guest network.
The network configuration page opens. - Select the DHCP Settings tab.
- From the DHCP Mode drop-down list, select DHCP Server.

- (Optional) To change the DNS suffix the Firebox gives to DHCP clients on this network, type a Domain Name.
- To change the DHCP lease time, in the Lease Time text box, type the number of hours.
This is the time interval that a DHCP client can use an IP address that it receives from the Firebox. The default value is eight hours.
When the lease time is about to expire, the client sends a request to the Firebox to get a new lease.
After you set the DHCP Mode to DHCP Server, you must add at least one IP address range to the Address Pool. You can also optionally add reserved addresses and configure DHCP options.
When you enable DHCP Server for a network, you must add an IP address range. This is the range of IP addresses the Firebox assigns to clients on this network. You can add more than one IP address range to the address pool. Each IP address range must be on the same subnet as a primary or secondary network address.
To add an IP address range, from WatchGuard Cloud:
- In the Address Pool section, click Add IP Address Range.

- Specify the Starting IP Address and Ending IP Address on the same subnet as the primary or secondary network address.
You can configure a maximum of six address ranges. Address groups are used from first to last. Addresses in each group are assigned by number, from lowest to highest. - Click Add.
- To save the configuration update to the cloud, click Save.
To delete an IP address range, from WatchGuard Cloud:
- In the row for the reserved address, click
 .
. - To save configuration changes to the cloud, click Save.
When you enable DHCP Server for a network, you can reserve a specific, static IP address for a specific client. The reserved DHCP address must be on the same subnet as the primary or secondary network address.
To reserve a DHCP address on an internal or guest network, from WatchGuard Cloud:
- Select the DHCP Settings tab.
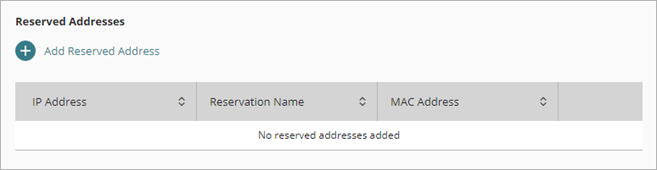
- In the Reserved Addresses section, click Add Reserved Address.
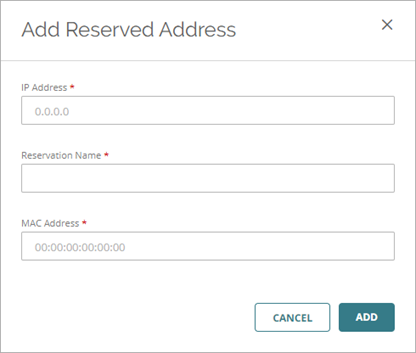
- In the IP Address text box, type the static IP address to reserve. It must be on the same subnet as the primary or secondary network address.
- In the Reservation Name text box, type a name to identify this reservation.
- In the MAC Address text box type the MAC address of the network card on the client.
Enter the MAC address using lower-case characters only. - Click Add.
The reservation is added to the list. - To save configuration changes to the cloud, click Save.
To delete a reserved address, from WatchGuard Cloud:
- In the row for the reserved address, click .
- To save configuration changes to the cloud, click Save.
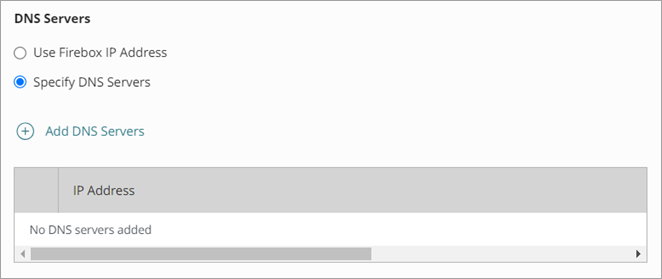
A DNS server resolves DNS requests from the network. When you configure the Firebox as a DHCP server, DHCP clients use the IP address of the Firebox as the DNS server by default. If you want DHCP clients to use a different DNS server, you can add DNS servers to the configuration.
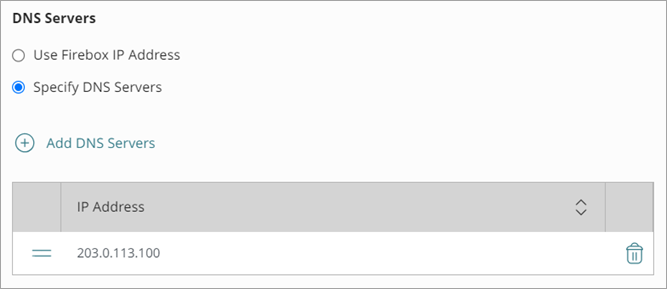
In the DNS Servers section of the DHCP settings, you can select one of these options:
Use Firebox IP Address
Use the IP address of the Firebox as the DNS server.
Specify DNS Servers
Specify a new DNS server for DHCP.
For redundancy, you can configure up to three DNS servers. The Firebox uses the DNS servers in the order they show in the list, and sends DNS requests to the first server in the list. If a DNS server does not respond, the Firebox uses the next DNS server in the list.
To specify a DNS server for DHCP, from WatchGuard Cloud:
- Select the DHCP Settings tab.
- In the DNS Servers section, click Specify DNS Servers.
The Add DNS Servers option appears.
- Click Add DNS Servers.
The Add DNS Servers dialog box appears.
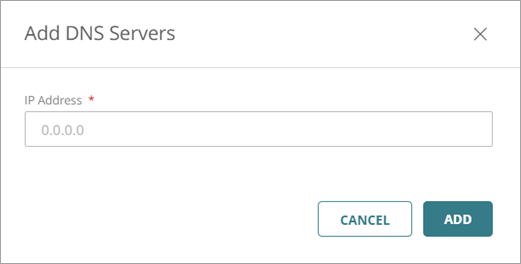
- Type the IPv4 address of the DNS server in the IP Address text box. Click Add.
The DNS server is added to the DNS Servers list.
- To add any additional DNS servers, click Add DNS Servers.
You can add up to three DNS servers. - (Optional) To change the order of the DNS servers:
- In the DNS Servers list, click the move handle
 for the server you want to move.
 - Drag the DNS server up or down in the list.
- In the DNS Servers list, click the move handle
- To save configuration changes to the cloud, click Save.
To delete a DNS server for DHCP, from WatchGuard Cloud:
- In the row for the DNS server, click .
- To save configuration changes to the cloud, click Save.
By default, the Firebox IP address is the default gateway. To specify a different IP address as the default gateway, select Specify Gateway IP Address and type the IP address.

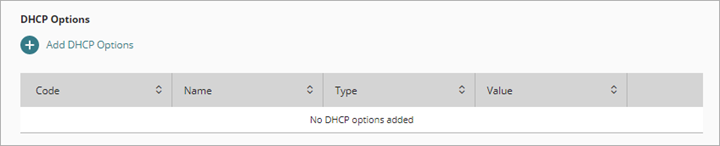
DHCP options, also known as vendor extensions, enable you to specify DHCP configuration parameters and other control information, as described in RFC 2132.
The predefined DHCP options are:
| DHCP Option Code | Name | Type | Description |
|---|---|---|---|
| 150 | TFTP Server IP | IP address(es) | The IP address of the TFTP server where the DHCP client can download the boot configuration. |
| 66 | TFTP Server Name | Text | The name of the TFTP server where the DHCP client can download the boot configuration. |
| 67 | TFTP Boot Filename | Text | The name of the boot file. |
| 2 | Time Offset | 4 byte integer | Time offset in seconds from Coordinated Universal Time (UTC). Option 2 is deprecated. We recommend that you add a custom DHCP option and specify code 100 or 101. These options are described in RFC 4833. |
| 43 | Vendor specific information | Text | This option is used by clients and servers to exchange vendor-specific information. |
| 120 | SIP Servers | IP address(es) | IPv4 addresses of one or more Session Initiation Protocol (SIP) outbound proxy servers. This option is described in RFC 3361. |
| 138 | CAPWAP Access Controller | IP address(es) | IPv4 addresses of one or more CAPWAP Access controllers. This option is described in RFC 5417. |
| 156 | DHCP State | 1 byte integer (Unsigned) | State of the IP address. This option is used by ShoreTel phones for an FTP boot option. |
You can configure DHCP option reserved codes 1, 3, 6, 15, 28, 44, 46, and 51 in the DHCP settings or interface configuration. The network configuration handles these reserved codes and they cannot be defined in the DHCP Options dialog box.
DHCP option codes 43 (text), 66 (text), 67 (text), 120 (ip), 138 (ip), 150 (ip), 2 (int) and 156 (byte) are predefined option codes that can use alternate types.
To add a DHCP option, from WatchGuard Cloud:
- Select the DHCP Settings tab.
- In the DHCP Options section, click Add DHCP Options.
The Add DHCP Options page opens.
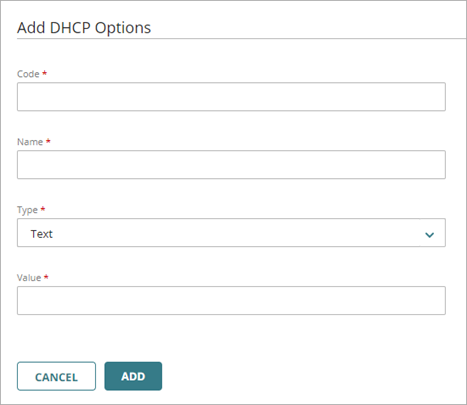
- In the Code text box, type the DHCP option code.
- In the Name text box, type a name to describe this DHCP option.
- From the Type drop-down list, select the type of value required by this option.
- In the Value text box, type the value to assign to this option. It must match the Type you selected.
- Click Add.
- To save configuration changes to the cloud, click Save.
To delete a DHCP option, from WatchGuard Cloud:
- In the row for the DHCP option, click .
- To save configuration changes to the cloud, click Save.
Configure DHCP Relay
When you enable DHCP Relay on an Internal or Guest network, the Firebox sends DHCP requests to the IP address of up to three DHCP servers.
Make sure the Firebox has a route to the IP addresses you specify for the DHCP servers. If the DHCP server you want to use is not on a network protected by your Firebox, you must set up a VPN tunnel between your device and the network where the DHCP server is for this feature to operate correctly.
If you have configured two DHCP servers for failover, add the IP addresses of both the primary and secondary DHCP servers to the configuration for DHCP Relay. The Firebox sends DHCP requests to the IP addresses of all DHCP servers you specify.
To configure DHCP Relay, from WatchGuard Cloud:
- Select Configure > Devices.
- Select the cloud-managed Firebox.
- Click Device Configuration.
- Click the Networks tile.
The Networks configuration page opens. - On the Networks page, click the tile of the Internal or Guest network.
The network configuration page opens. - Select the DHCP Settings tab.
- From the DHCP Mode drop-down list, select DHCP Relay.
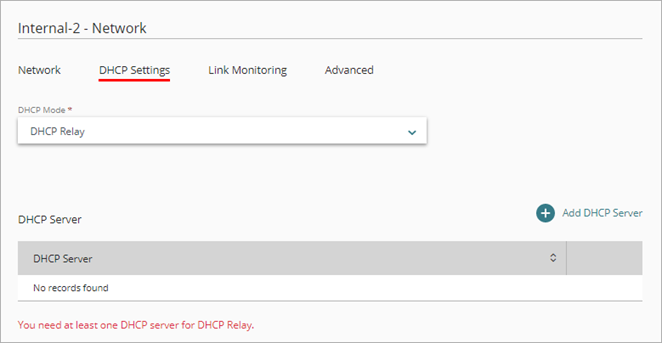
- Click Add DHCP Server.
The Add DHCP dialog box opens.
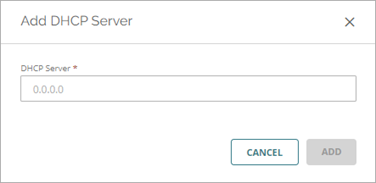
- In the DHCP Server text box, type the IP address of a DHCP server.
- Click Add.
- To save configuration changes to the cloud, click Save.
To delete a DHCP server, from WatchGuard Cloud:
- In the row for the DHCP server, click .
- To save configuration changes to the cloud, click Save.