Applies To: Cloud-managed Fireboxes
Firebox policies use dynamic NAT to map private IP addresses to public IP addresses. By default, all policies use the dynamic NAT rules configured in the Network settings. For information about the network dynamic NAT rules, see Configure Dynamic NAT.
When dynamic NAT is enabled, you can select one of these options in the policy dynamic NAT settings:
Use Network NAT Settings
This option configures the policy to use the dynamic NAT rules configured in the Network settings for the Firebox. This is selected by default.
All traffic in this policy
This option configures the policy to use dynamic NAT for all traffic in this policy. When you select this option, the Firebox changes the source IP address for each packet handled by this policy to the primary IP address of the outgoing network, the source IP address in the network dynamic NAT settings.
You can optionally set a specific source IP address for traffic handled by this policy. If you set the source IP address, the source IP address you specify must be on the same subnet as the primary or secondary IP address of the outgoing network.
For more information about how the Firebox assigns dynamic NAT source IP addresses, see About Dynamic NAT Source IP Addresses.
To configure dynamic NAT settings in a policy:
- Add or edit a policy. For more information, see Configure Firewall Policies in WatchGuard Cloud.
- In the policy configuration, select the Advanced tab.
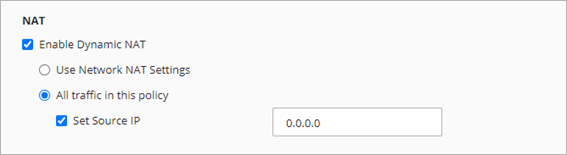
- To enable dynamic NAT, select the Enable Dynamic NAT check box.
This is selected by default. - Select how to apply dynamic NAT for traffic handled by this policy:
- To use the network dynamic NAT rules, select Use Network NAT Settings.
This option is selected by default. - To apply dynamic NAT to all traffic in this policy, select All Traffic in This Policy.
- To use the network dynamic NAT rules, select Use Network NAT Settings.
- (Optional) If you selected All Traffic in This Policy, optionally set the source IP address:
- Select the Set Source IP check box.
- In the text box, type an IP address on the same subnet as the primary or secondary IP address of the outgoing network.
- To save configuration changes to the cloud, click Save.
Caution: If you select the Set Source IP check box, make sure the policy allows traffic out through only one network.
Configure Advanced Firewall Policy Settings for a Cloud-Managed Firebox