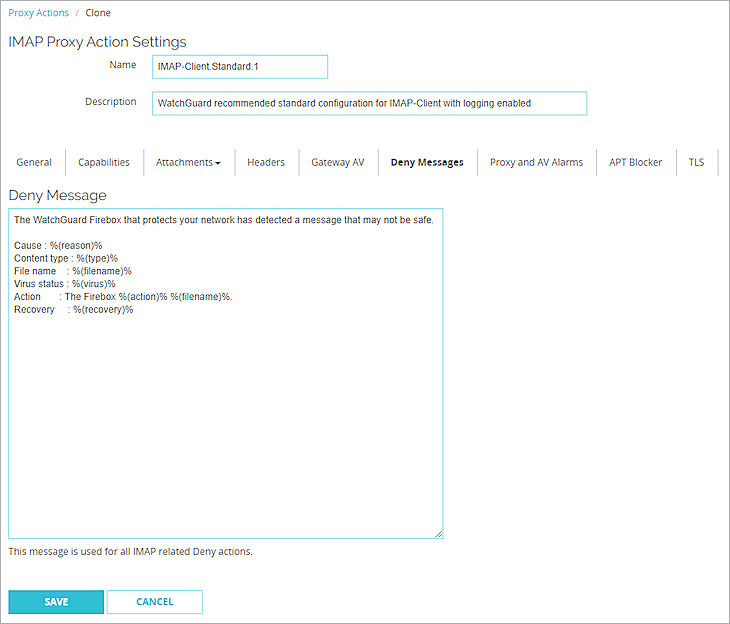
IMAP-Proxy: Deny Message
Applies To: Locally-managed Fireboxes
When content is denied, the Firebox sends a default deny message that replaces the denied content. This message appears in a recipient's email message when the proxy blocks an email. You can change the text of that deny message. The first line of the deny message is a section of the message header. You must include an empty line between the first line and the body of the message.
The default deny message appears in the Deny Message text box. To change this to a custom message, use these variables:
%(reason)%
Includes the reason the Firebox denied the content.
%(filename)%
Includes the file name of the denied content.
%(virus)%
Includes the name or status of a virus for Gateway AntiVirus users.
%(action)%
Includes the name of the action taken. For example, lock or strip.
%(recovery)%
Includes whether you can recover the attachment.
To configure the deny message:
- In the IMAP proxy action configuration, select Deny Message.
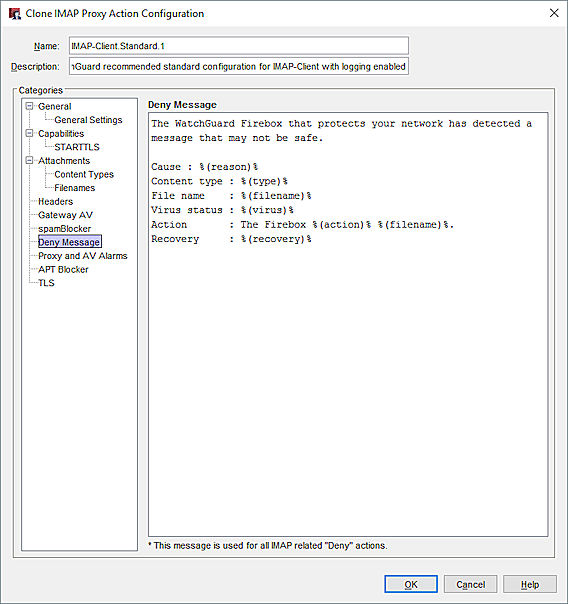
IMAP action deny message configuration in Policy Manager
- In the Deny Message text box, type a custom message.
- To change settings for another category in this proxy, see the topic for that category.
- Save the settings.
If you modified a predefined proxy action, when you save the changes you are prompted to clone (copy) your settings to a new action.
For more information on predefined proxy actions, go to About Proxy Actions.