Define a Route for All Internet-Bound Traffic Through a Branch Office VPN Tunnel
Applies To: Locally-managed Fireboxes
When you enable remote users to access the Internet through a VPN tunnel, the most secure setup is to require that all remote user Internet traffic is routed through the VPN tunnel to the Firebox. From the Firebox, the traffic is then sent back out to the Internet. With this configuration (known as a hub route or default-route VPN), the Firebox is able to examine all traffic and provide increased security, although more processing power and bandwidth on the Firebox is used. When you use a default-route VPN, a dynamic NAT policy must include the outgoing traffic from the remote network. This allows remote users to browse the Internet when they send all traffic to the Firebox.
When you define a default route through a BOVPN tunnel, you must do three things:
- Configure a BOVPN on the remote Firebox (whose traffic you want to send through the tunnel) to send all traffic from its own network address to 0.0.0.0/0.
- Configure a BOVPN on the central Firebox to allow traffic to pass through it to the remote Firebox.
- Add a route on the central Firebox from 0.0.0.0/0 to the network address of the remote Firebox.
Before you begin the procedures in this topic, you must have already created a manual branch office VPN between the central and remote Fireboxes. For information on how to create this VPN tunnel, go to About Manual IPSec Branch Office VPNs.
WARNING: If you use a default route to send traffic to the Internet through a hub Firebox, and the hub Firebox uses an HTTP-proxy or HTTPS-proxy to examine the outbound traffic, you must enable TCP MTU probing in the global networking settings on the hub Firebox for web browsing to function correctly for clients connected to the remote Firebox. For more information, go to Define Firebox Global Settings.
Configure the BOVPN Tunnel on the Remote Firebox
- Connect to the Web UI for the remote Firebox.
- Select VPN > Branch Office VPN. Find the name of the tunnel to the central Firebox and click Edit.
The Tunnel page appears. - Click Add.
The Tunnel Route Settings dialog box appears.

- In the Local IP section, from the Choose Type drop-down list, select Network IPv4.
- In the Network IP text box, type the trusted network address of the remote Firebox.
- In the Remote IP section, from the Choose Type drop-down list, select Any (0.0.0.0/0)
- Click OK.
- Select any other tunnel to the central Firebox and click Remove.
- Click Save to save the configuration change.
- Open the configuration file on the remote Firebox.
- Select VPN > Branch Office Tunnels. Find the name of the tunnel to the central Firebox and click Edit.
The Edit Tunnels dialog box appears. - Click Add.
The Tunnel Route Settings dialog box appears.
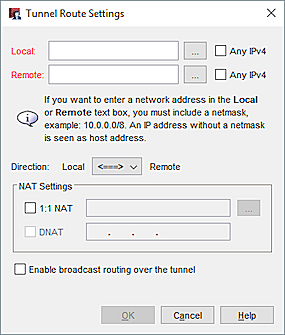
- In the Local text box, select or type the trusted network address of the remote Firebox.
- In the Remote text box, type 0.0.0.0/0.
- Click OK.
- Select any other tunnel to the central Firebox and click Remove.
- Click OK and save the configuration file.
Configure the BOVPN Tunnel on the Central Firebox
- Connect to the Web UI for the central Firebox.
- Select VPN > Branch Office VPN. Find the name of the tunnel to the remote Firebox and click Edit.
The Tunnel page appears. - Click Add.
The Tunnel Route Settings dialog box appears. - In the Local IP section, from the Choose Type drop-down list, select Any (0.0.0.0/0).
- In the Remote IP section, from the Choose Type drop-down list, select Network IPv4.
- In the Network IP text box, type the trusted network address of the remote Firebox
- Click OK.
- Select any other tunnel to the remote Firebox and click Remove.
- Click Save to save the configuration change.
- From Policy Manager, open the configuration file on the central Firebox.
- Select VPN > Branch Office Tunnels. Find the name of the tunnel to the remote Firebox and click Edit.
The Edit Tunnels dialog box appears. - Click Add.
The Tunnel Route Settings dialog box appears. - In the Local text box, type 0.0.0.0/0.
- In the Remote text box, type the trusted network address of the remote Firebox.
- Click OK.
- Select any other tunnel to the remote Firebox and click Remove.
- Click OK and save the configuration file.
Add a Dynamic NAT Entry on the Central Firebox
To allow a computer with a private IP address to access the Internet through the Firebox, you must configure the central Firebox to use dynamic NAT. With dynamic NAT, the Firebox replaces the private IP address included in a packet sent from a computer protected by the Firebox with the public IP address of the Firebox itself. By default, dynamic NAT is enabled and active for the three RFC-approved private network addresses:
192.168.0.0/16 - Any-External
172.16.0.0/12 - Any-External
10.0.0.0/8 - Any-External
When you set up a default route through a branch office VPN tunnel to another Firebox, you must add a dynamic NAT entry for the subnet behind the remote Firebox if its IP addresses are not within one of the three private network ranges.
- Select Network > NAT.
The NAT page appears.
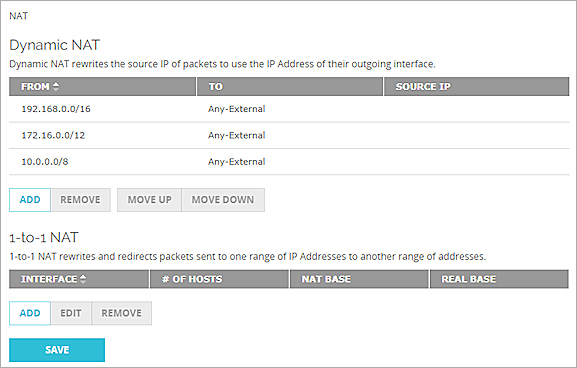
- In the Dynamic NAT section of the NAT page, click Add.
The Dynamic NAT configuration page appears.
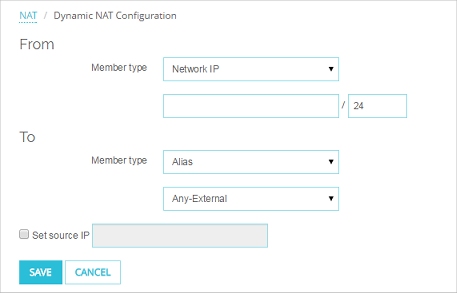
- In the From section, select Network IP from the Member Type drop-down list.
- Type the network IP address of the network behind the remote Firebox.
- In the To section, select Any-External from the second drop-down list.
- Click Save.
- Select Network > NAT.
The NAT Setup dialog box appears.
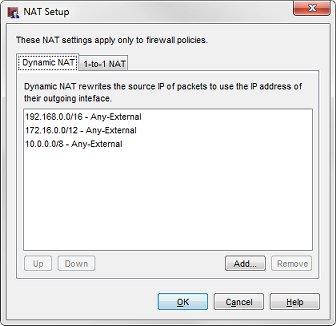
- On the Dynamic NAT tab of the NAT Setup dialog box, click Add.
The Add Dynamic NAT dialog box appears.
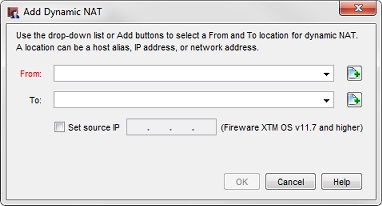
- Adjacent to the From drop-down list, click
 .
. - From the Choose Type drop-down list, select Network IP. Type the network IP address of the network behind the remote Firebox in the Value text box. Click OK.
- From the To drop-down list, select Any-External.
- Click OK to close the Add Dynamic NAT dialog box.
- Click OK.
- Save the configuration file to the central Firebox.