CrowdStrike Falcon is a cloud-native endpoint security and XDR platform that provides endpoint detection and response, threat intelligence, incident management, and real-time visibility.
This document describes the steps to integrate CrowdStrike Falcon in ThreatSync, which enables you to view and manage incidents generated by CrowdStrike Falcon in the ThreatSync Management UI. This centralizes detection and response activities across environments and provides broader incident visibility.
Contents
Integration Summary
The hardware and software used in this guide includes:
- CrowdStrike Falcon
Before You Begin
Before you begin these procedures, make sure that:
- You have ThreatSync enabled in WatchGuard Cloud.
- You have a ThreatSync Open license allocated in WatchGuard Cloud.
- You have a CrowdStrike Falcon global administrator or user management administrator account.
Create the CrowdStrike Falcon API Client
Before you configure the integration in ThreatSync, you must create an OAuth 2.0 API client in CrowdStrike Falcon. You will use the Client ID and Secret values to connect to CrowdStrike Falcon from ThreatSync.
- Log in to the CrowdStrike Falcon management console as an administrator.
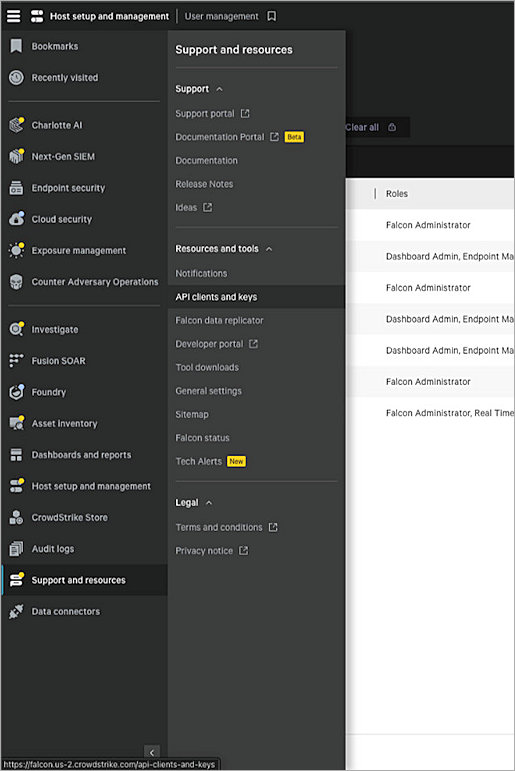
- Select Support and Resources > API Clients and Keys.
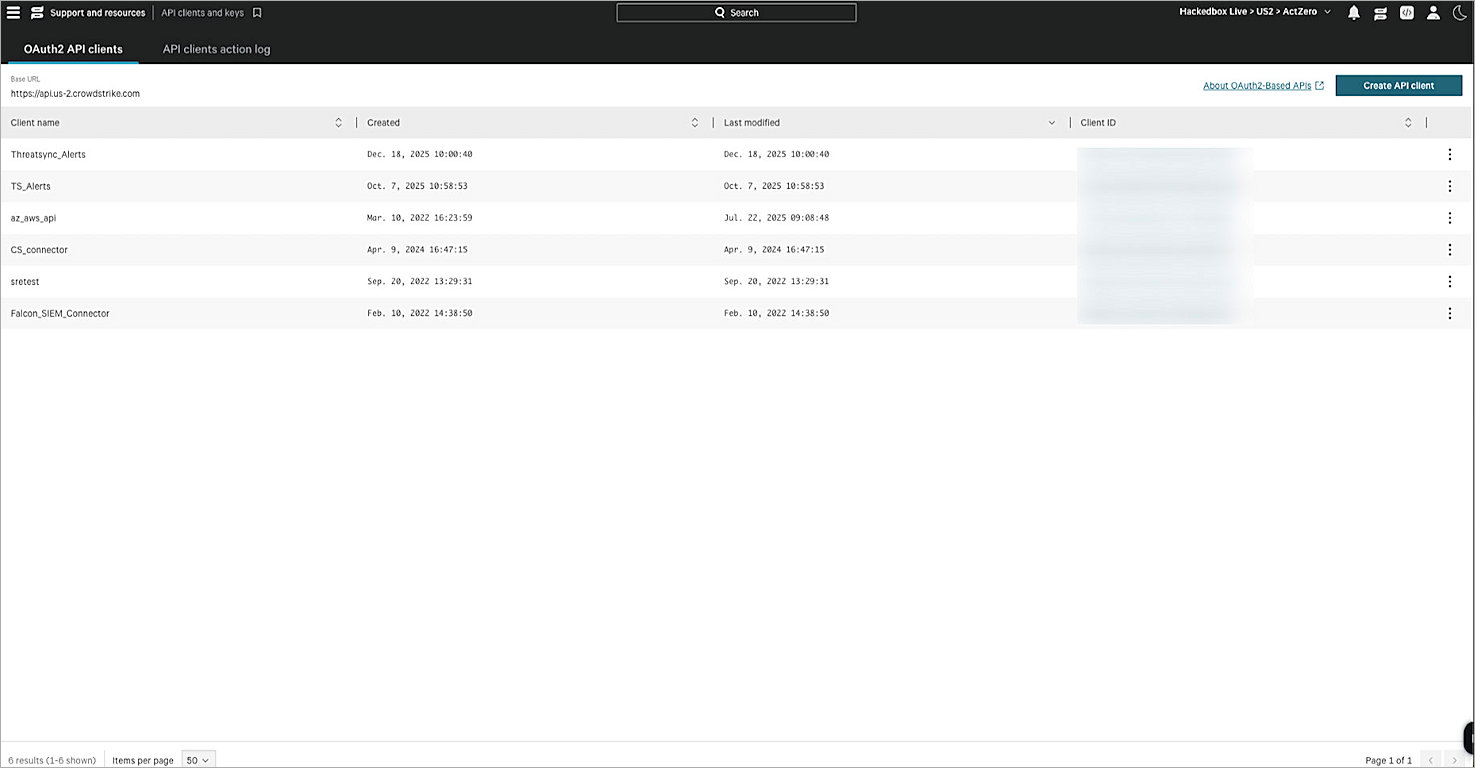
- On the OAuth2 API Clients page, select Create API Client.
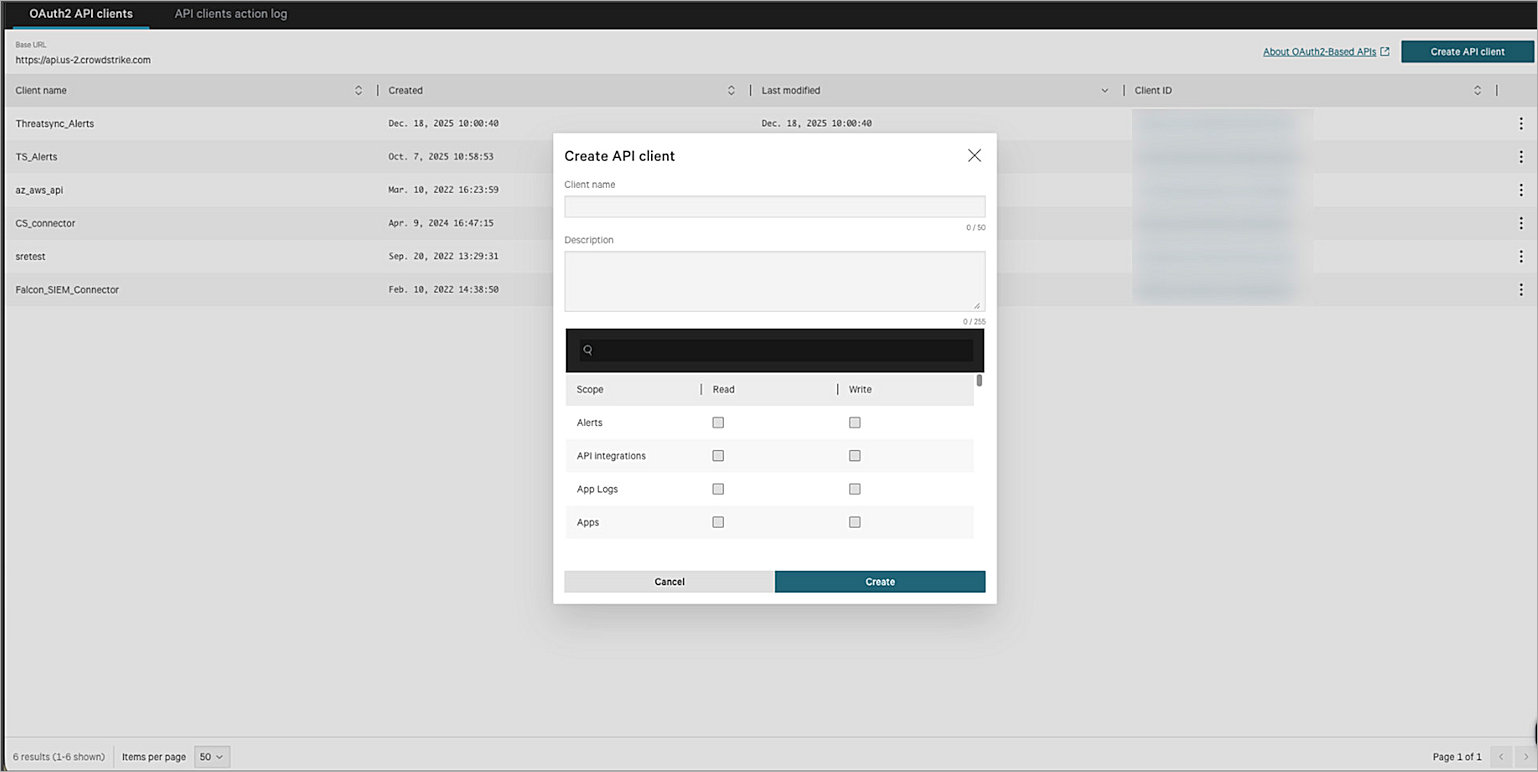
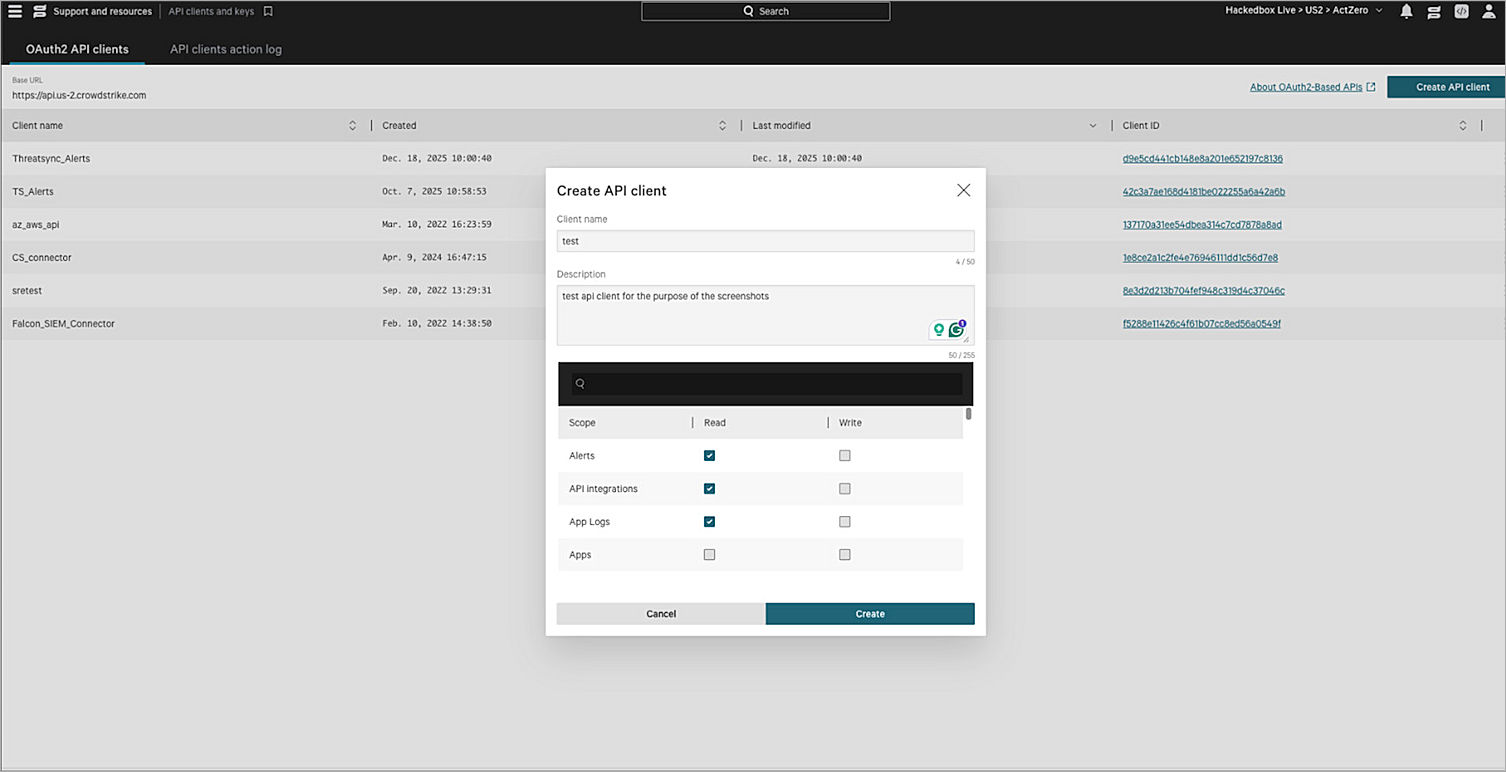
- In the Create API Client dialog box, enter a client name and description.
- In the Scope section, enable the Readcheck box forAlerts, API Integrations, and App Logs.
- Click Create.
- The API Client Created dialog box appears.
- Copy the Client ID, Secret, and Base URL values to a secure location.
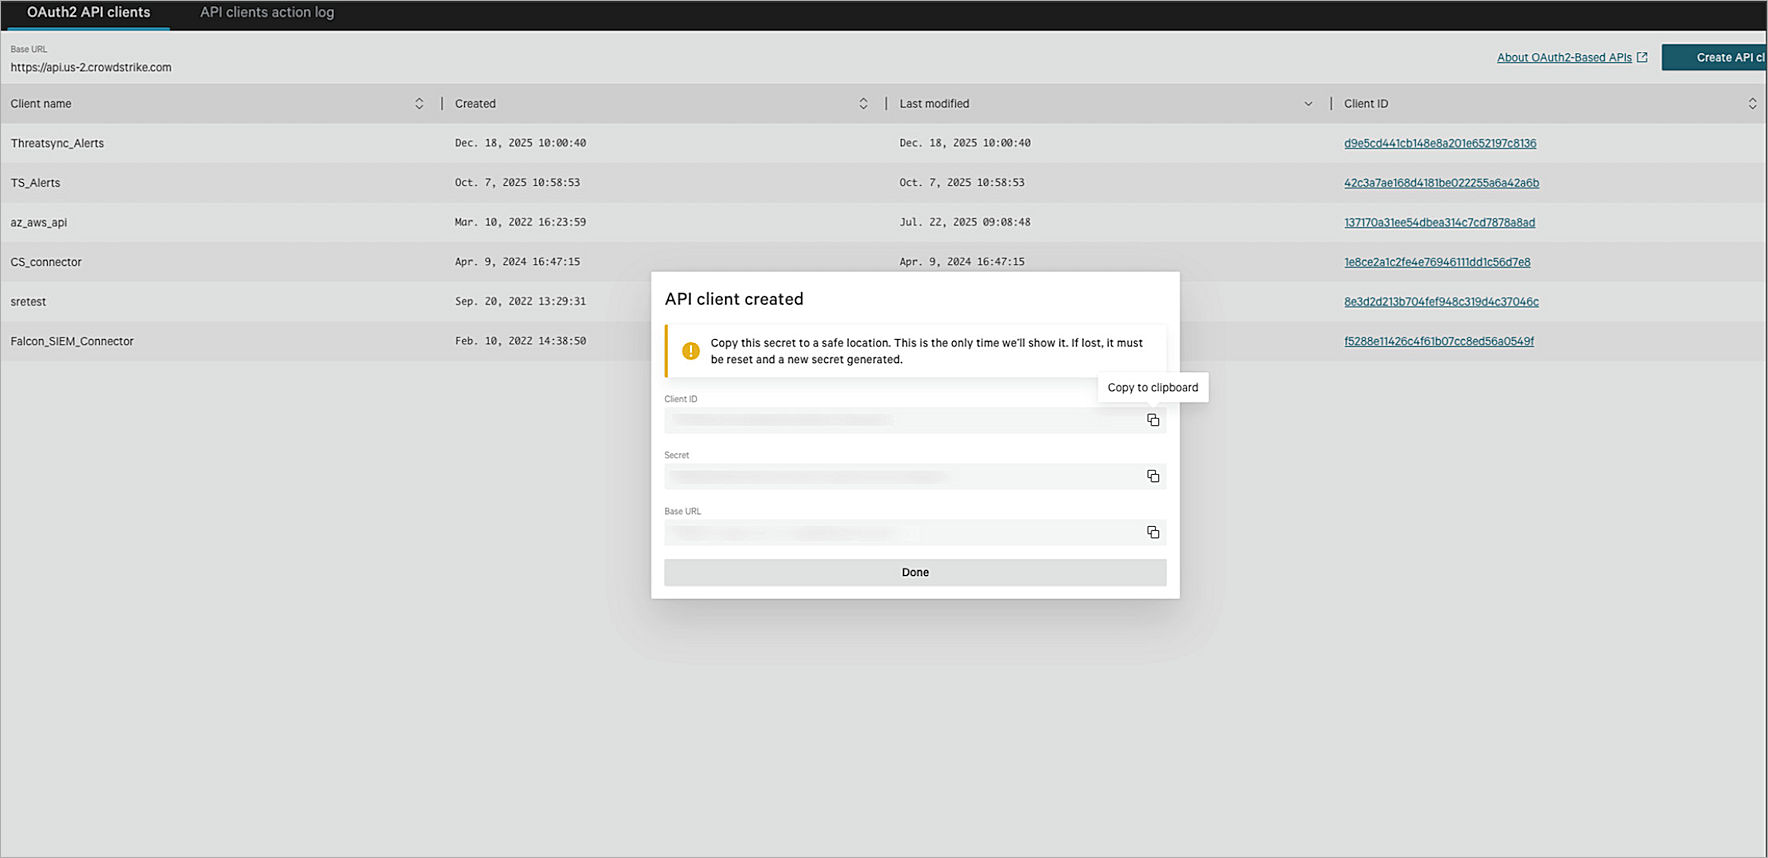
Paste the copied information to a secure location. The information is only shown once; if you lose it you must reset the client and generate a new Secret.
- Click Done.
Configure the Integration in ThreatSync
- Log in to WatchGuard Cloud with WatchGuard Cloud operator account credentials.
If you log in as a Service Provider, select a Subscriber account from Account Manager. - Select Configure > ThreatSync > Integrations.
- Click Add Integration.
- From the Product drop-down list, select CrowdStrike Falcon.
- In the Name text box, enter a name for the integration. For example, CrowdStrike Integration.
- In the Client ID text box, enter the client ID you retrieved from the CrowdStrike management console.
- In the Secret Key text box, enter the API token you retrieved from the CrowdStrike management console.
- (Optional) In the Description text box, enter a description for the integration.
- Click Save.
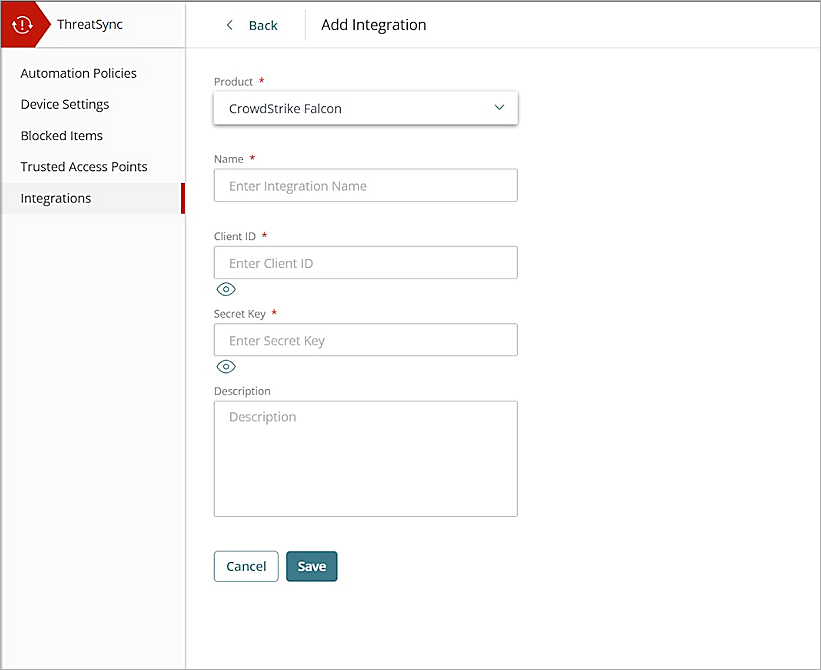
After you save, the new integration appears in the Integrations table on the Integrations page.
Test the Integration
- Log in to WatchGuard Cloud.
If you log in as a Service Provider, select a Subscriber account from Account Manager. - Select Configure > ThreatSync > Integrations.
- In the table, locate the integration you created. Verify the Status of the integration is Success.