The Cisco networks firewall uses the NetFlow protocol to export data about IP traffic that enters its interfaces and exports this data as NetFlow fields to a NetFlow collector. The NetFlow collector is a server used to collect and upload network traffic to WatchGuard NDR to analyze for security, administration, accounting, and troubleshooting.
WatchGuard provides integration instructions to help customers configure WatchGuard products to work with products created by other organizations. If you want more information or technical support about how to configure a third-party product, go to the documentation and support resources for that product.
This document describes how to integrate Cisco Firepower with WatchGuard NDR using the NetFlow protocol.
Contents
Integration Summary
The hardware and software used to complete the steps outlined in this document include:
- Cisco Firepower 1010E Threat Defense with v7.4.2.2-28
- WatchGuard Cloud account with a WatchGuard NDR or Total NDR license
- WatchGuard NDR Collection Agent (for more information, go to About WatchGuard NDR Collection Agents)
Topology
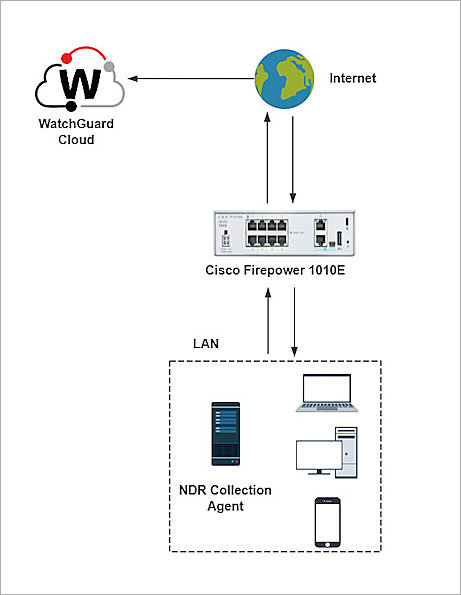
This diagram shows the integration topology of Cisco Firepower and WatchGuard NDR.
Configure the WatchGuard NDR Collection Agent
Make sure the WatchGuard NDR Collection Agent is installed on your Windows or Linux computer, and the status of the collection agent is Success. For detailed instructions about the WatchGuard NDR Collection Agent installation, go to Configure Collection Agents for WatchGuard NDR (Windows Computers) or Configure Collection Agents for WatchGuard NDR (Linux Computers).
Configure the Cisco Firewall
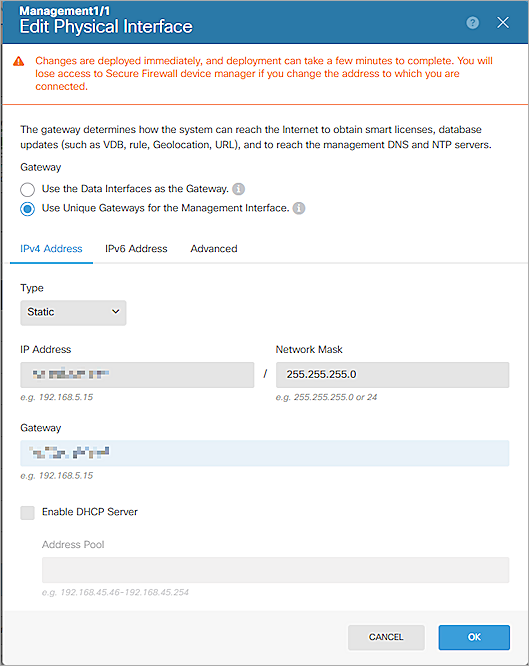
Before you can configure Firewall NetFlow, configure these basic settings.
- Log in to the Firepower Web UI at https://<Management IP address of the Firepower device>.
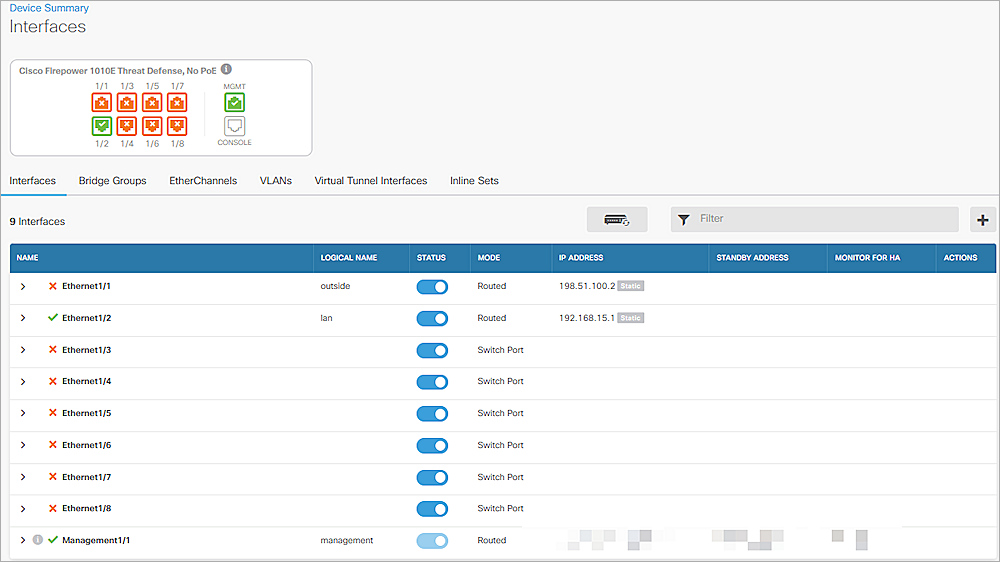
- Configure the interfaces. In this example, we configured two interfaces: Ethernet1/1 is the interface outside the firewall, named outside and Ethernet1/2 is the interface inside the firewall, named lan.
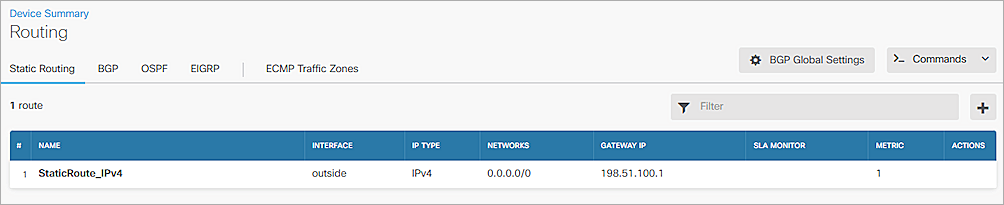
- Configure the static route to the Internet.
- Configure zones for network distinction.
- Configure NAT for traffic from the trusted zone to the untrusted zone.
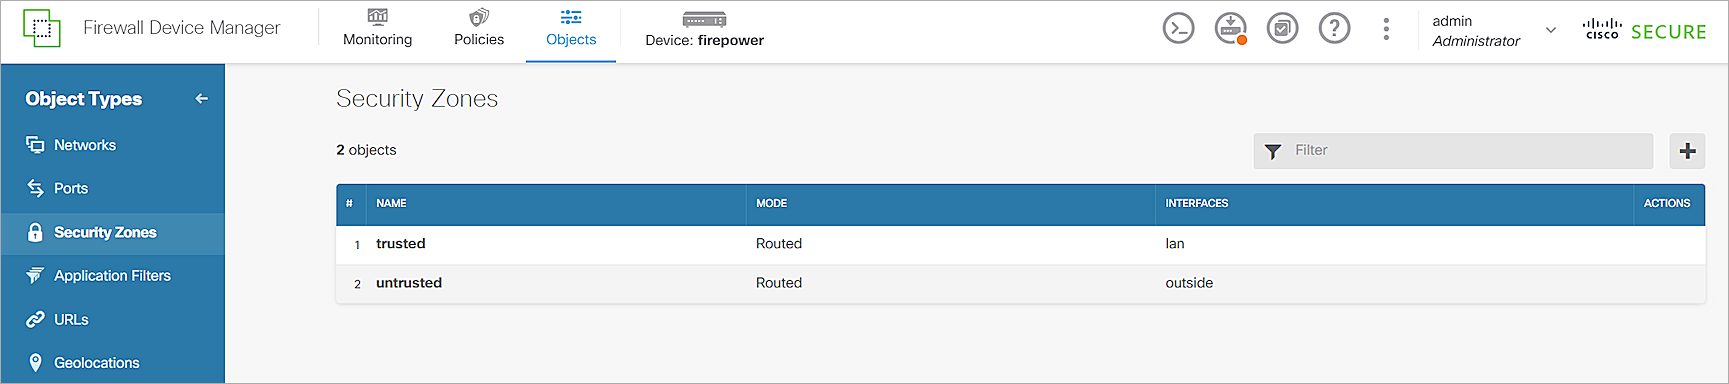
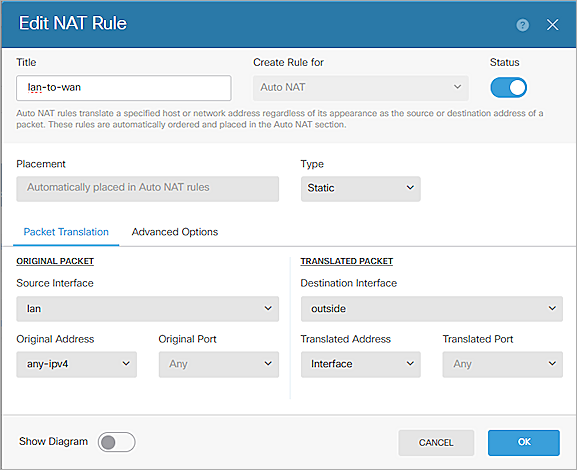
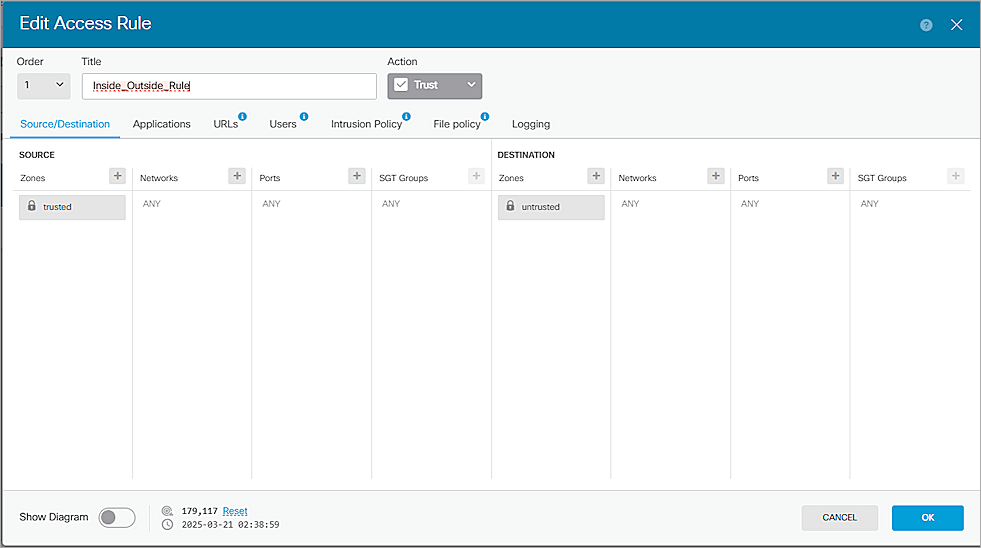
- Configure the Access Rule to allow the traffic from the trusted zone to the untrusted zone.
- Click
 to deploy the configuration.

For more information, go to the Cisco documentation.
Configure NetFlow on Cisco Firepower
To configure your Cisco firewall as a NetFlow exporter:
- Log in to the Cisco Firepower Web UI.
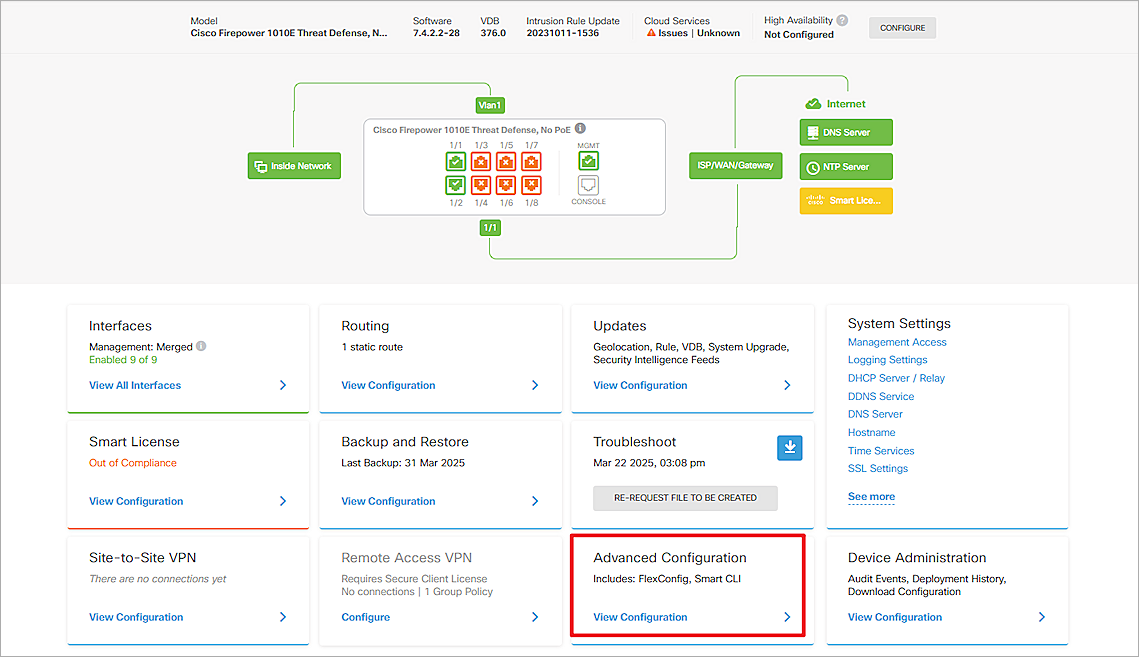
- From the navigation menu, select Device: firepower.
- In the Advanced Configurations section, click View Configuration.
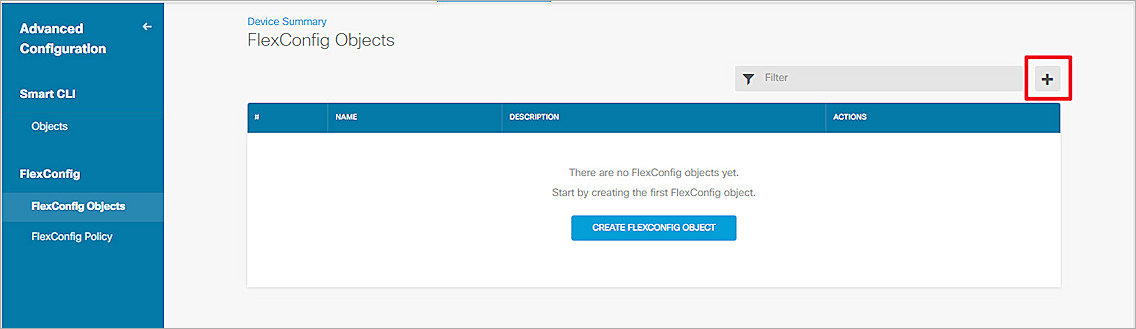
- From the left navigation pane, select FlexConfig Objects.
- Click + to add a FlexConfig object.
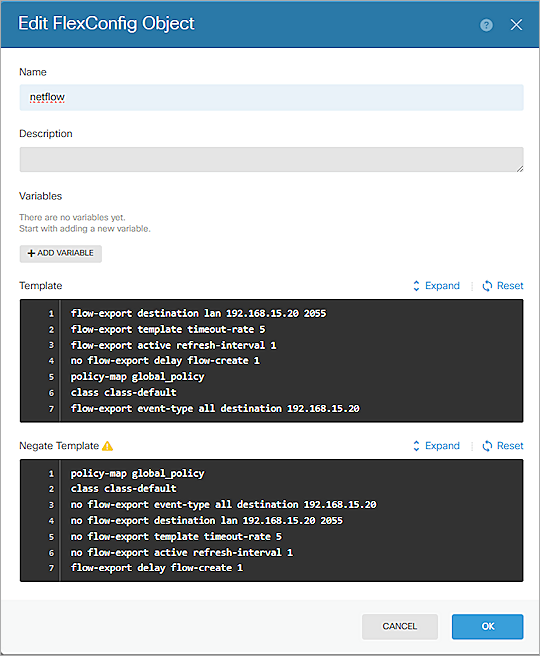
- In the Name text box, enter a descriptive name for the for the new object. For example, netflow.
- In the Template section, enter the following commands to configure the NetFlow collection agent and related attributes. Replace the source interface name and collector-ip in the commands to match your configuration.
Set the collector-ip, collector-port, and the NetFlow traffic source interface:
flow-export destination <source interface name> <collector ip> <collector port>
flow-export destination lan 192.168.15.20 2055We recommend these settings:
flow-export template time-out 5
flow-export active refresh-interval 1
no flow-export delay flow-create 1
policy-map global_policy
class class-defaultSet the traffic destination:
flow-export event-type all destination 192.168.15.20
-
In the Negate Template section, enter these commands.
These commands are used to define the commands that should be run when you want to remove or undo a configuration that was previously applied.policy-map global_policy
class class-default
no flow-export even-type all destination 192.168.15.20
Set the collector-ip, collector-port and the source interface that you configured in Step 7.
no flow-export destination <source interface> <collector ip> <collector port>
no flow-export destination lan 192.168.15.20 2055We recommend these settings:
no flow-export template timeout-rate 5
no flow-export active refresh-interval 1
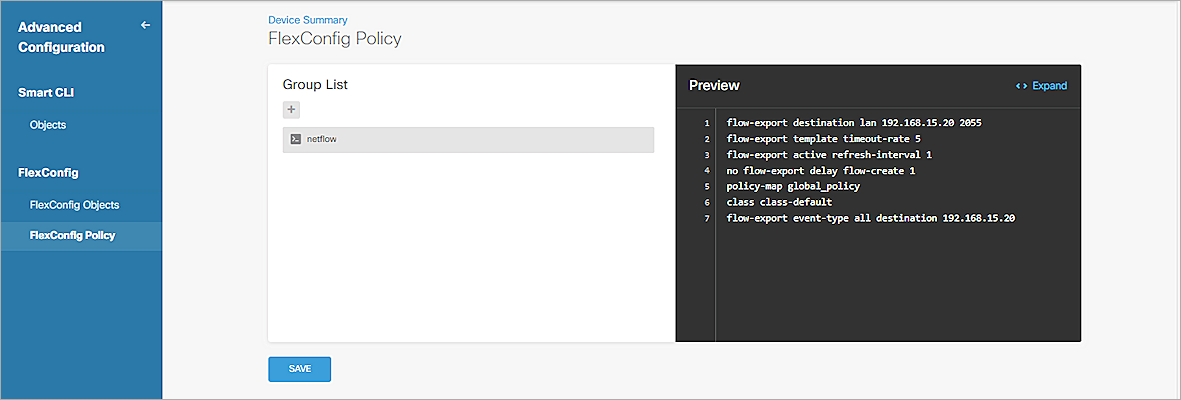
flow-export delay flow-create 1 - From the left navigation pane, select FlexConfig Policy.
- In the Group List section, click +. Select the FlexConfig Object you created.
- Click OK.
- Click SAVE.
-
Click
to deploy the configuration.
For more information about FlexConfig policies and objects, go to the Cisco documentation.
Test the Integration
To test the Cisco Firepower integration with WatchGuard NDR:
- Log in to your WatchGuard Cloud account.
- Select Configure > NDR Integrations > Collection Agents. If you have a Service Provider account, you must select an account from Account Manager.
- Select the NDR Collection Agents tab to view the Last Activity column of your collection agent. This column shows the last time the collection agent uploaded the NetFlow records to WatchGuard NDR. It might take a few hours for the first upload.
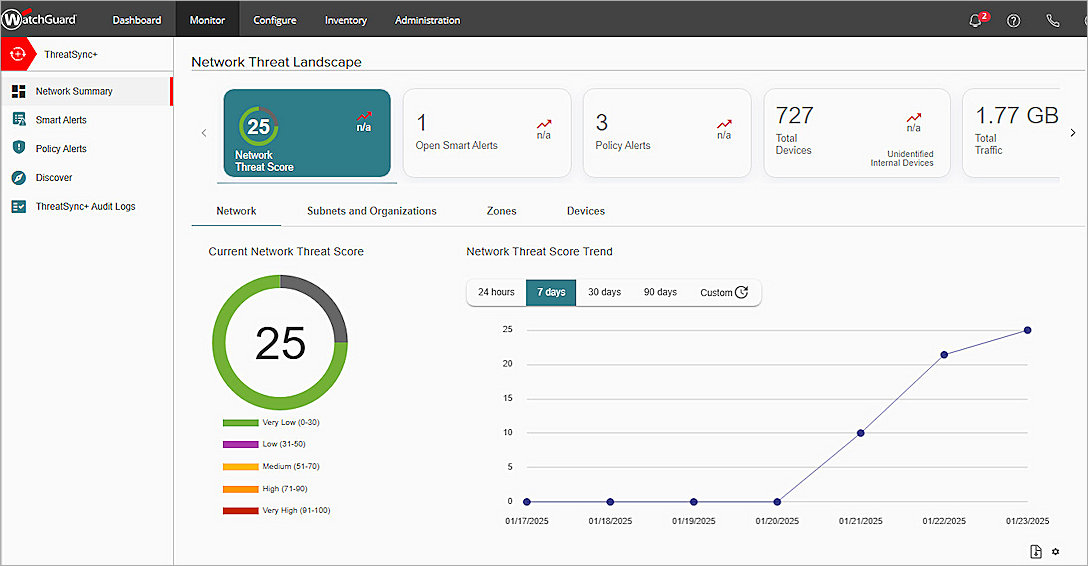
- Select Monitor > NDR to view the Network Summary page.

For more information about NDR, go to NDR.