This document describes how to integrate a Juniper SRX firewall with WatchGuard Open MDR to enable the WatchGuard MDR team to monitor data from your firewall.
Contents
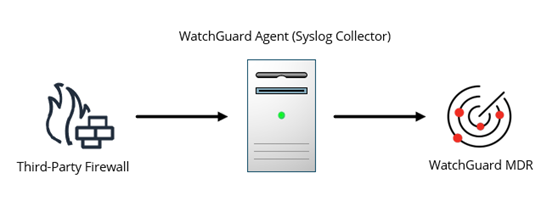
Firewall Syslog Data Flow to WatchGuard MDR
The WatchGuard MDR Syslog Collector sends logs from your third-party firewall to WatchGuard MDR. To install the Syslog Collector on a computer, you must first install the WatchGuard Agent. This diagram shows the data flow of third-party firewall syslogs to WatchGuard MDR.
Before You Begin
Before you begin these procedures, make sure that:
- You have a WatchGuard Open MDR license allocated in WatchGuard Cloud.
- You have the required access and permissions on your Juniper SRX firewall to configure syslog forwarding.
- You have access to a Linux server to install the WatchGuard Agent and the Syslog Collector.
Install the WatchGuard Agent and Syslog Collector
The WatchGuard MDR Syslog Collector collects the syslog data sent from your third-party firewall. You must install the WatchGuard Agent and the Syslog Collector on a supported Linux server to collect the syslogs. To configure your third-party firewall for syslog forwarding, you must have the IP address of your Syslog Collector server.
For steps to install the WatchGuard Agent and Syslog Collector, go to Configure Third-Party Firewall Syslog Collection for WatchGuard Open MDR in Help Center.
Configure a Juniper SRX Firewall to Forward Syslogs
WatchGuard provides interoperability instructions to help our customers configure WatchGuard products to work with third-party products created by other organizations. The steps to configure syslog forwarding on your device might be different, based on the version of your firewall management software. For the latest syslog forwarding instructions, go to your third-party firewall documentation.
To configure a Juniper SRX firewall to forward syslogs to the Syslog Collector:
- Log in to your Juniper SRX firewall UI.
- Select Configure > Device Settings > Security Logging.
The Security Logging page opens..
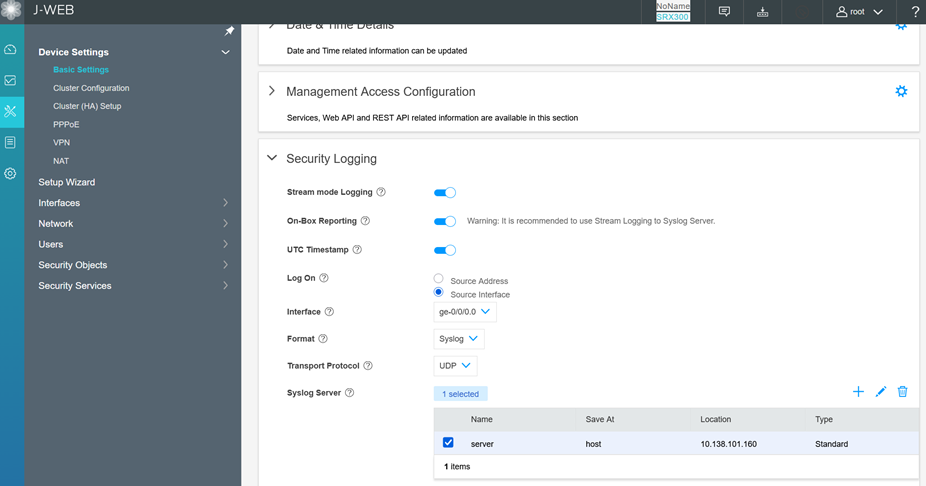
- Enable Stream Mode Logging.
- Enable On-Box Reporting.
- In the Log On section, select Source Interface.
- From the Interface drop-down list, select the interface to send syslogs to the WatchGuard MDR Syslog Collector.
- From the Format drop-down list, select Syslog.
- From the Transport Protocol drop-down list, select UDP.
- In the Syslog Server section, Click Add.
The syslog configuration page opens. - In the Name text box, type a descriptive name for your WatchGuard MDR Syslog Collector server.
- From the Type drop-down list, select Standard.
- In the Host text box, type the IP address of your WatchGuard MDR Syslog Collector server.
- Click OK.
- In the upper-right corner, click Commit.
It might take several minutes for the changes to take effect.
For more information about Juniper SRX firewall remote logging options, go to Configure Traffic Logging (Security Policy Logs) for SRX Branch Devices in the Juniper Networks documentation (external link).
Verify the Integration
To verify the integration of WatchGuard Open MDR and the configuration of your third-party firewall, view the Connections > Service Status > Network Device List in the Managed Service portal in WatchGuard Cloud.
It can take up to six hours for incident data to appear in the Managed Services portal after you complete the integration steps.
To verify the integration:
- In WatchGuard Cloud, select Monitor > Managed Services.
The Managed Services portal opens in a new browser tab. - If you are a Service Provider, select your Subscriber account from the drop-down list.
- Select Connections > Service Status.
The Service Status page opens.
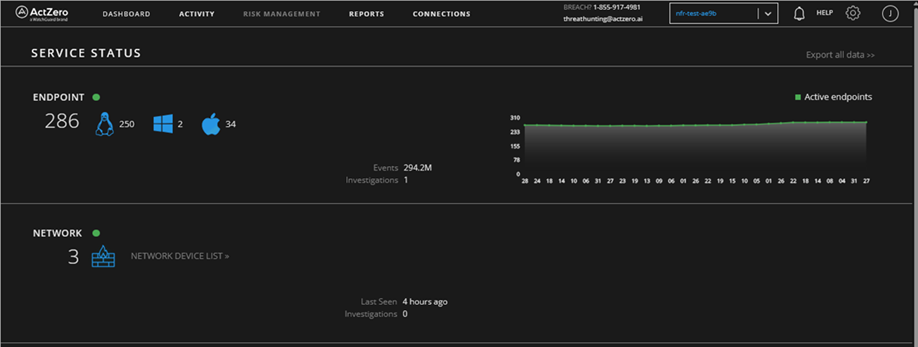
- From the Network tile, click Network Device List.
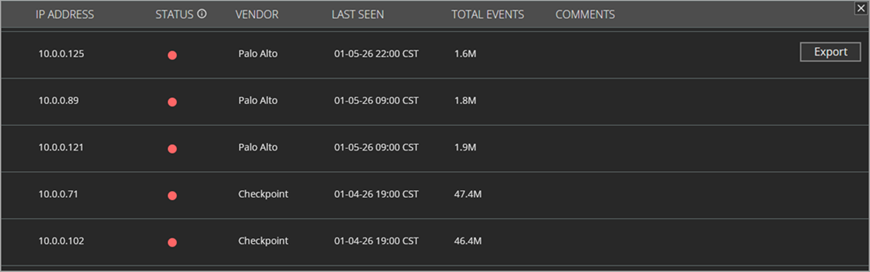
- Confirm that the IP address of your third-party firewall shows in the list.