You can configure your WatchGuard Firebox to support RADIUS single sign-on (RSSO) for Meraki® AP devices. This document describes the steps to integrate a Meraki AP for RSSO with your WatchGuard Firebox.
Platform and Software
The hardware and software used to complete the steps outlined in this document include:
- Firebox installed with Fireware v12.3 or higher
- Meraki MR32
- FreeRADIUS v2.1.10 on Ubuntu 12.04.1
Test Topology and Workflow
This diagram shows the topology used to test this integration.
You can connect to either an Optional or Trusted Firebox interface.
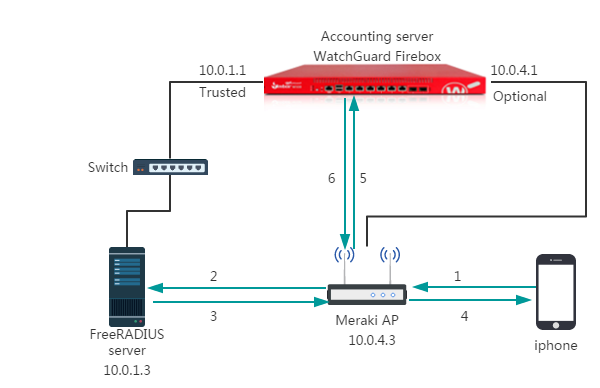
Authentication workflow:
- A mobile device connects to the AP device with WPA/WPA2 enterprise authentication.
- The user authenticates with credentials that exist on the RADIUS server.
- The AP communicates with the RADIUS server to authenticate the user.
- The mobile device connects to the network.
- The AP sends an accounting message to the Firebox. This message includes the user name and client IP address.
- The Firebox creates an SSO session for the user.
Set Up the Firebox
- Log in to Fireware Web UI (https://<your firebox IP address>:8080).
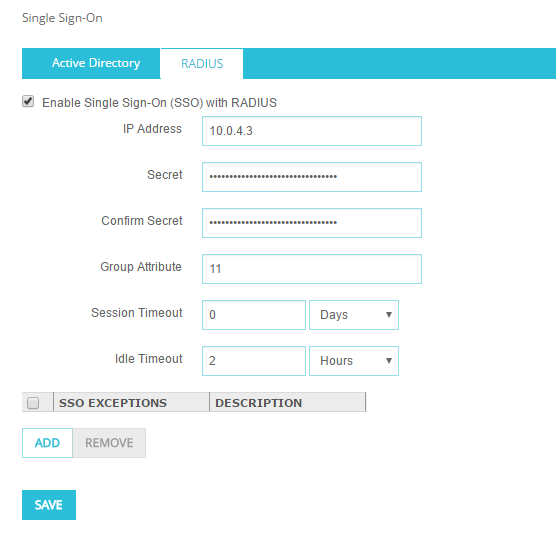
- Select Authentication > Single Sign-On.
- Select the RADIUS tab.
- Select the Enable Single Sign-On (SSO) with RADIUS check box.
- In the IP Address text box, type the IP address of the RADIUS server.
- In the Secret and Confirm Secret text boxes, type a shared secret to use to communicate with the RADIUS server.
- Keep the default values for all other settings.
- Select Firewall > Firewall Policies.
- Click Add Policy.
- Add a RADIUS-RFC packet filter policy for connections from Any-Optional to Any-Trusted.

- Enable the DHCP server in the settings for the optional interface so that the Firebox can provide an IP address to the Meraki AP.
Set Up the Meraki AP
Connect to the Meraki AP through the Meraki Dashboard at https://n155.meraki.com. Use your Meraki email address and password to connect.
- Select Wireless > Monitor > Access points.
- Add the AP.
- Select Wireless > Configure > SSID.
- Enable an SSID.
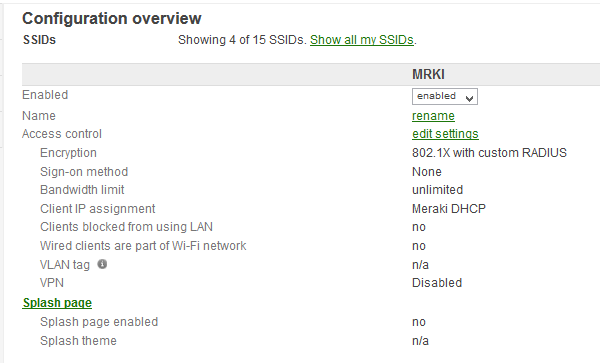
- Click Edit settings to configure the SSID settings.
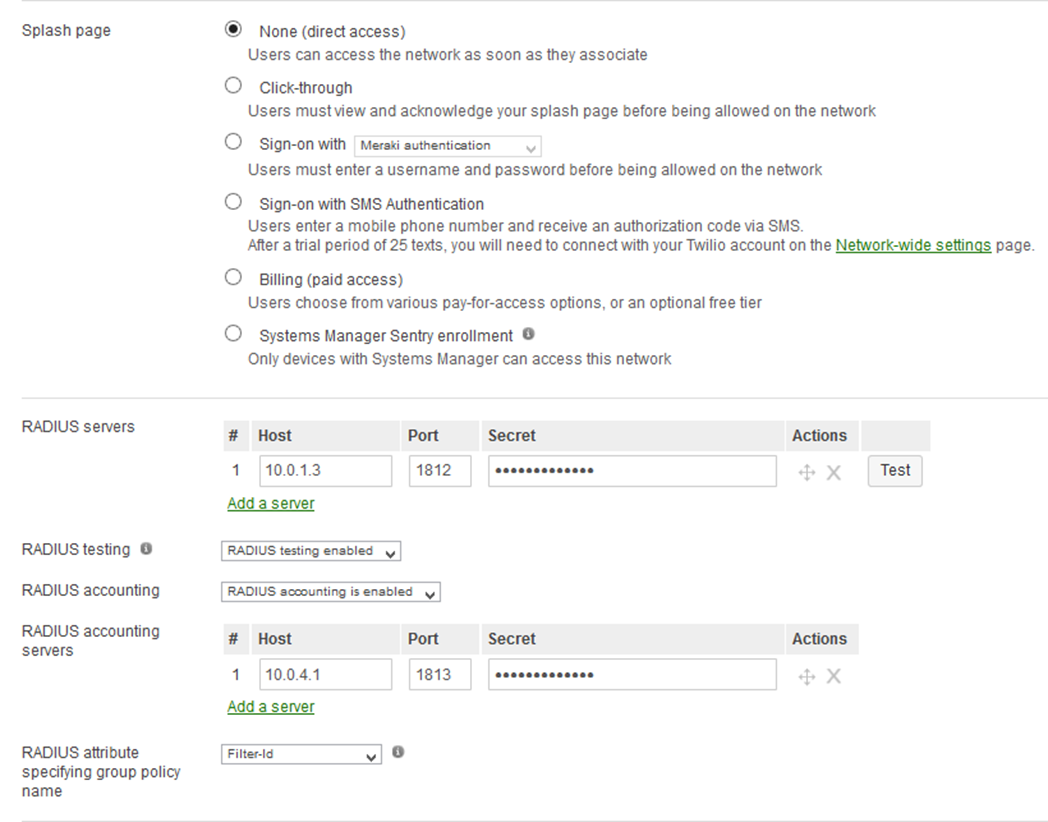
- Select WPA2-Enterprise with and select the RADIUS server.
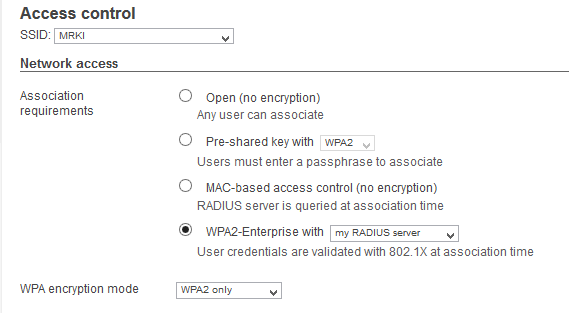
- In the RADIUS servers section, click Add a server.
- In the Host text box, type the IP address of the FreeRADIUS server.
- In the Port text box, type the port used to communicate with the FreeRADIUS server.
- In the Secret text box, type the shared secret used for communication with the FreeRADIUS server.
- In the RADIUS accounting servers section, click Add a server.
- In the Host text box, type the IP address of the Firebox interface.
- In the Port text box, type the port used to communicate with the Firebox.
- In the Secret text box, type the shared secret used for communication with the Firebox.
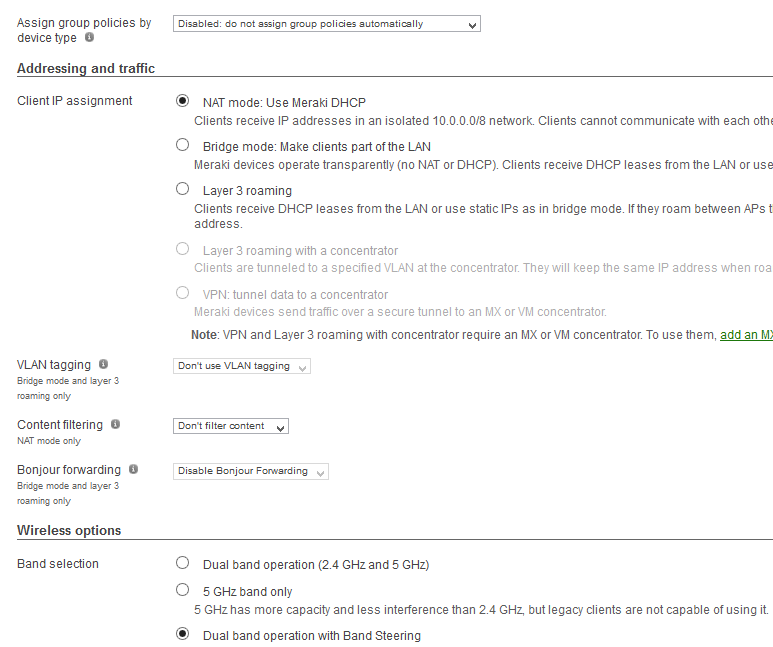
- In the Addressing and traffic section, for Client IP assignment, select NAT mode: Use Meraki DHCP.
- From the VLAN tagging drop-down list, select Don't use VLAN tagging.
- From the Content filtering drop-down list, select Don't filter content.
- From the Bonjour forwarding drop-down list, select Disable Bonjour Forwarding.
- In the Wireless options section, for Band selection, select Dual band operation with Band Steering.
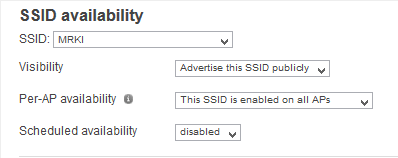
- Select Wireless > Configure > SSID availability.
- From the Visibility drop-down list, select Advertise this SSID publicly.
- From the Per-AP availability drop-down list, select This SSID is enabled on all APs.
- From the Scheduled availability drop-down list, select disabled.
Test the Integration
Use a phone or tablet to make a WiFi connection to the SSID you configured (in our example, this is SSID: MRKI). Then type the credentials of a user that exists on the RADIUS server.
To verify that the user was automatically authenticated to the Firebox:
- Log in to Fireware Web UI (https://<your firebox IP address>:8080).
- Select System Status > Authentication List.
The list of authenticated user appears.

- Verify that the user name appears in the Authenticated Users list, with the Client shown as Single Sign-On.
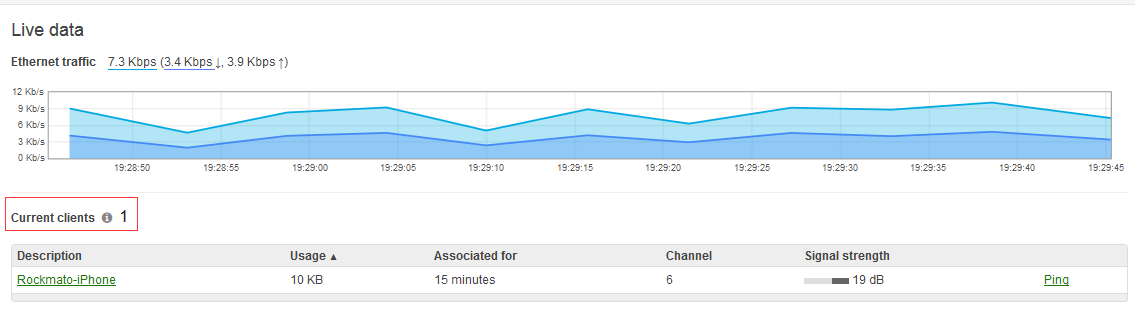
To see information about the authenticated user on the Meraki AP:
- Log in to the Meraki Dashboard at https://n155.meraki.com.
- Select Wireless > Access point.
- Select the AP.
- Verify that the connected device appears in the Current clients list.