Deployment Overview
This document describes how to use Chocolatey to install WatchGuard endpoint software on Windows computers. This document describes how to use Chocolatey to install:
Before You Begin
Before you begin:
- Install Chocolatey on your computer. To test this integration, we used v0.10.15.
- Download the install file for the WatchGuard endpoint software you want to install.
- Record the information required to install each type of WatchGuard endpoint software.
For information about how to download and install the required software, see the Chocolatey and WatchGuard documentation.
AuthPoint Logon App
To install the AuthPoin Logon App, you must first create a Chocolately install package, and then use that package to install the software.
Create the AuthPoint Chocolatey Install Package
- Open the Command Prompt as administrator.
- To generate package specification and template files, run this command:
choco new AuthPoint_Logon_App
A new /AuthPoint_Logon_App subdirectory is created that contains package and template files.
- In the \AuthPoint_Logon_App subdirectory, open the file authpoint_logon_app.nuspec with a text editor, and edit it to look like the image below. In the <version> parameter, specify the version of the installer you downloaded. Make sure to delete all annotations.

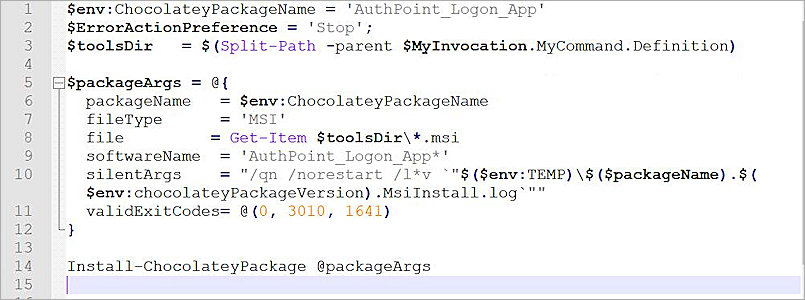
- In the \AuthPoint_Logon_App\tools subdirectory, open chocolateyInstall.ps1 and edit it to look like the image below, Make sure to delete all annotations.
Install the AuthPoint Logon App
- From your AuthPoint account, download the AuthPoint Logon App installer .MSI file and config file to the subdirectory \AuthPoint_Logon_App\tools.
- In the Administrator Command Prompt, change to the \AuthPoint_Logon_App subdirectory
- Run this command:
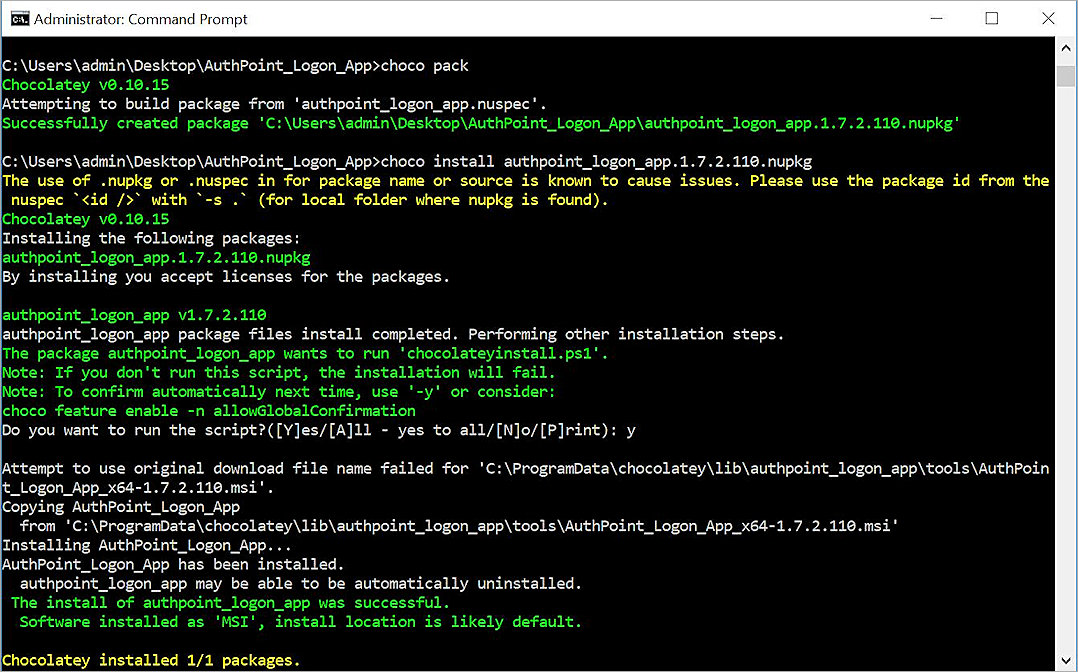
choco install authpoint_logon_app.1.7.2.110.nupkg
Specify the name of your nupkg file, which may have a different version number.
- To finish installation, reboot the computer.
Mobile VPN with SSL Client
To install the Mobile VPN with SSL client, you must first create a Chocolately install package, and then use that package to install the software.
Create the Mobile VPN with SSL Chocolatey Install Package
- Open the Command Prompt as administrator.
- To generate package specification and template files, run this command:
choco new Mobile_VPN_with_SSL
A new /Mobile_VPN_with_SSL subdirectory is created that contains package and template files.
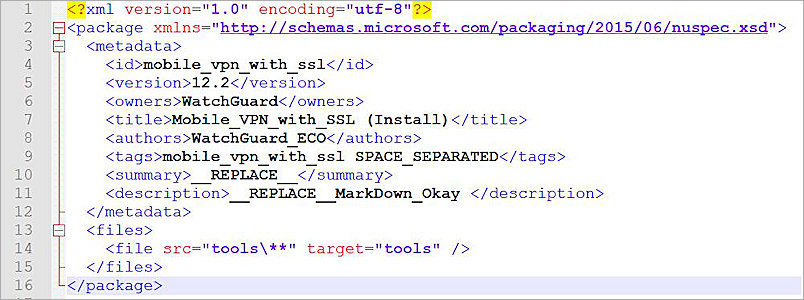
- In the \Mobile_VPN_with_SSL subdirectory, open the file mobile_vpn_with_ssl.nuspec with a text editor, and edit it to look like the image below. In the <version> parameter, specify the version of the Mobile VPN with SSL client installer you downloaded. Make sure to delete all annotations.
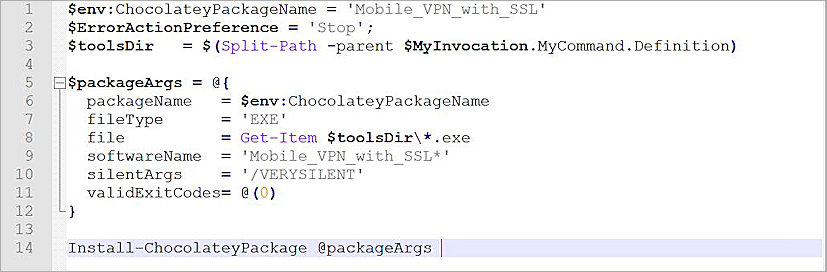
- In the \Mobile_VPN_with_SSL\tools subdirectory, open chocolateyInstall.ps1 and edit it to look like the image below, Make sure to delete all annotations.
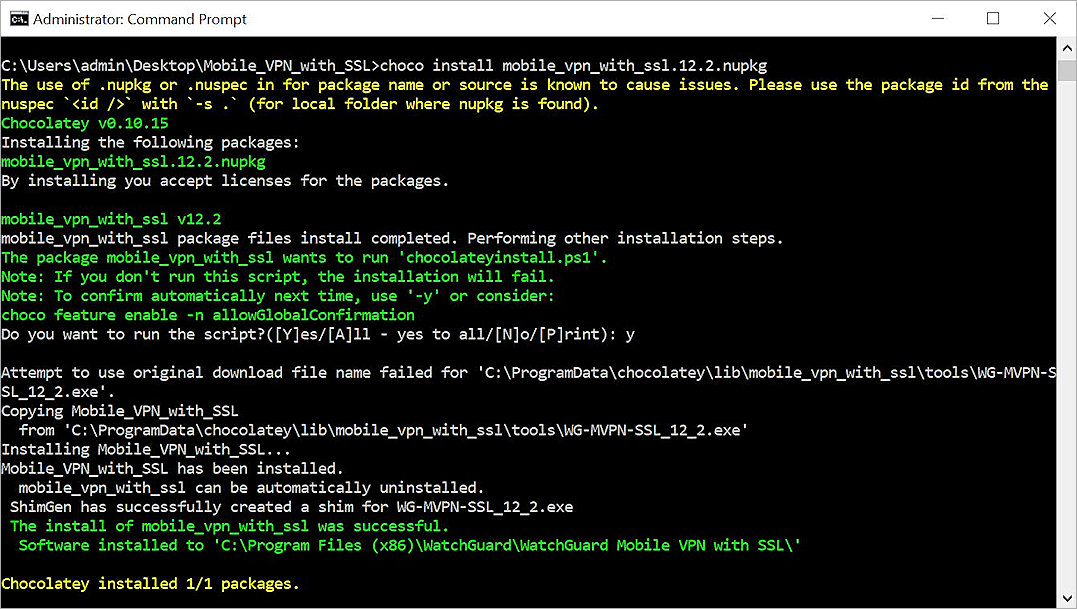
Install the Mobile VPN with SSL Client
- In the Administrator Command Prompt change to the \Mobile_VPN_with_SSL subdirectory.
- Run this command:
choco install mobile_vpn_with_ssl.12.2.nupkg
Specify the name of your nupkg file, which may have a different version number.
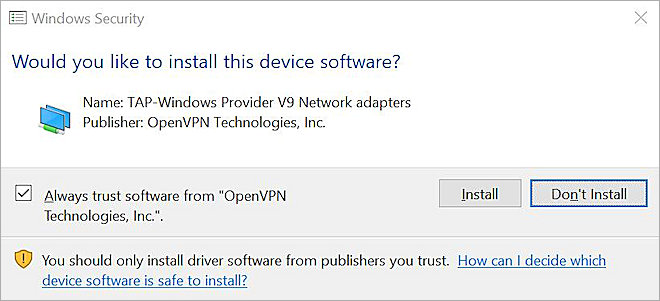
- If the confirmation dialog box shown below appears, click Install to continue。
IPSec Mobile VPN Client
To install the IPSec Mobile VPN Client, you must first create a Chocolately install package, and then use that package to install the software.
Create the IPSec Mobile VPN Chocolatey Install Package
- Open the Command Prompt as administrator.
- To generate package specification and template files, run this command:
choco new Mobile_VPN_with_SSL
A new /Mobile_VPN_with_SSL subdirectory is created that contains package and template files.
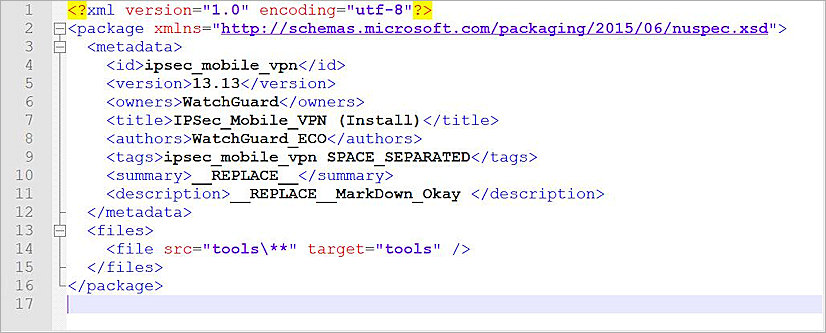
- In the \IPSec_Mobile_VPN subdirectory, open the file ipsec_mobile_vpn.nuspec with a text editor, and edit it to look like the image below. In the <version> parameter, specify the version of the IPSec Mobile VPN client installer you downloaded. Make sure to delete all annotations.
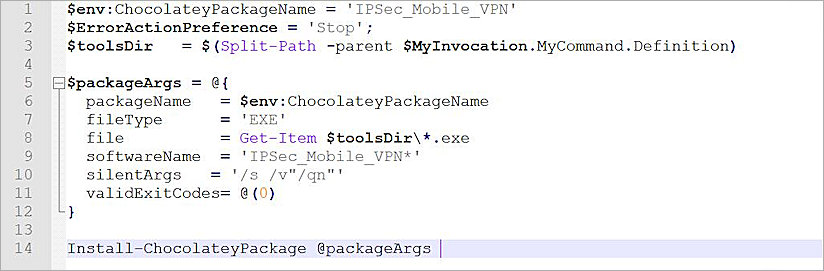
- In the \Mobile_VPN_with_SSL\tools subdirectory, open chocolateyInstall.ps1 and edit it to look like the image below, Make sure to delete all annotations.
Install the IPSec Mobile VPN Client
- In the Administrator Command Prompt, change to the \IPSec_Mobile_VPN_with_SSL subdirectory.
- Run this command:
choco install ipsec_mobile_vpn.13.13.nupkg
Specify the name of your nupkg file, which may have a different version number.
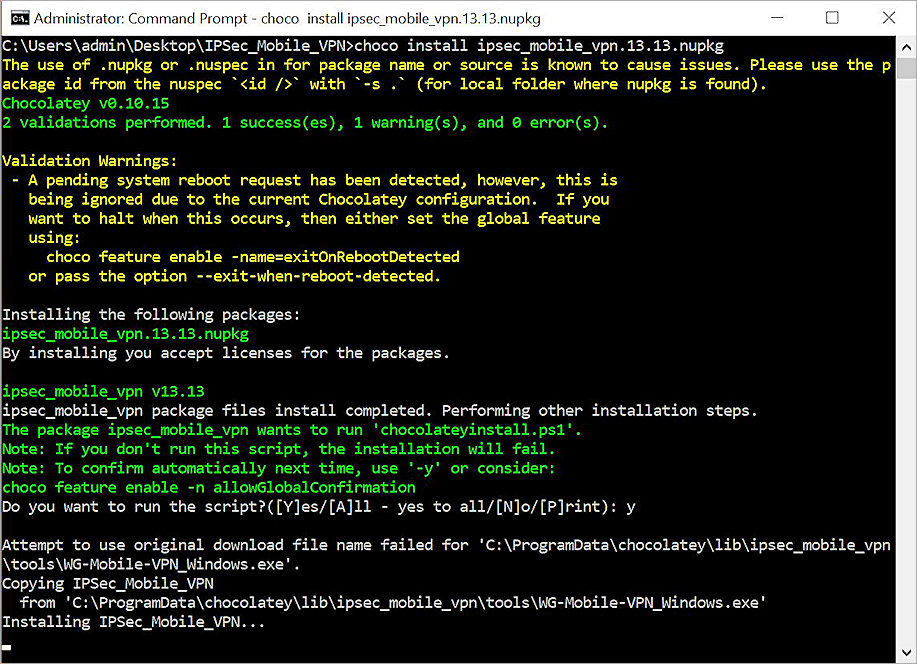
- The computer reboots automatically during the installation.