Deployment Overview
The Swivel Secure AuthControl Sentry® is RADIUS compatible and can be used as a RADIUS server. This document describes the steps necessary to integrate the WatchGuard Mobile VPN with the SSL client software download process and Mobile VPN with SSL client authentication with Swivel Security’s AuthControl Sentry two-factor authentication solution.
Swivel Secure AuthControl Sentry supports several user authentication methods. This integration uses email.
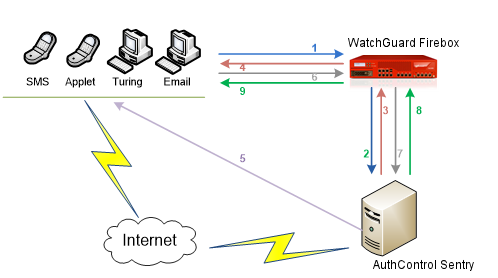
This diagram shows the workflow for two-factor authentication through integration with Swivel AuthControl Sentry:
- A user initiates primary authentication to the WatchGuard Firebox.
- The Firebox sends an authentication request to AuthControl Sentry.
- AuthControl Sentry checks the password. If it is correct, it responds with a RADIUS challenge (one-time code) to the Firebox.
- The user is prompted with a second dialogue box.
- If the user types a correct passphrase and AuthControl Sentry is set to Dual Challenge On Demand, AuthControl Sentry sends a dual channel security string message as a one-time code to the user in a specified format (SMS text message, Turing image, mobile phone client application, or email).
- The user submits their one-time code in the second dialogue box and sends a second authentication request to the Firebox.
- AuthControl Sentry authenticates the user based on the password submitted in the first authentication request and the one-time code submitted in the second authentication request.
- The Firebox receives the authentication results from AuthControl Sentry.
- The Firebox grants the user access.
Integration Summary
The hardware and software used in this guide include:
- WatchGuard Firebox
- Fireware v12.8.1
- Swivel Secure AuthControl Sentry
- Version 4.1.3.6468
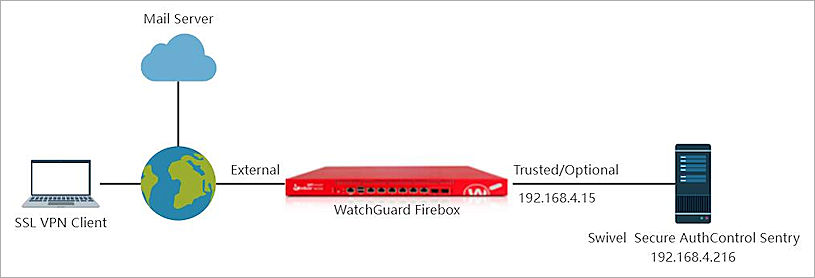
Test topology
Configure Swivel Secure AuthControl Sentry
Configure RADIUS Settings
To configure RADIUS settings:
- Log in to Swivel Secure AuthControl Sentry web UI at https://X.X.X.X:8080/sentry.
- From the left navigation bar, select RADIUS > Server.

- From the Server enabled drop-down list, select Yes.
- For the other options, do not change the default settings.
- From the left navigation bar, select RADIUS > NAS.
- Click New Entry.
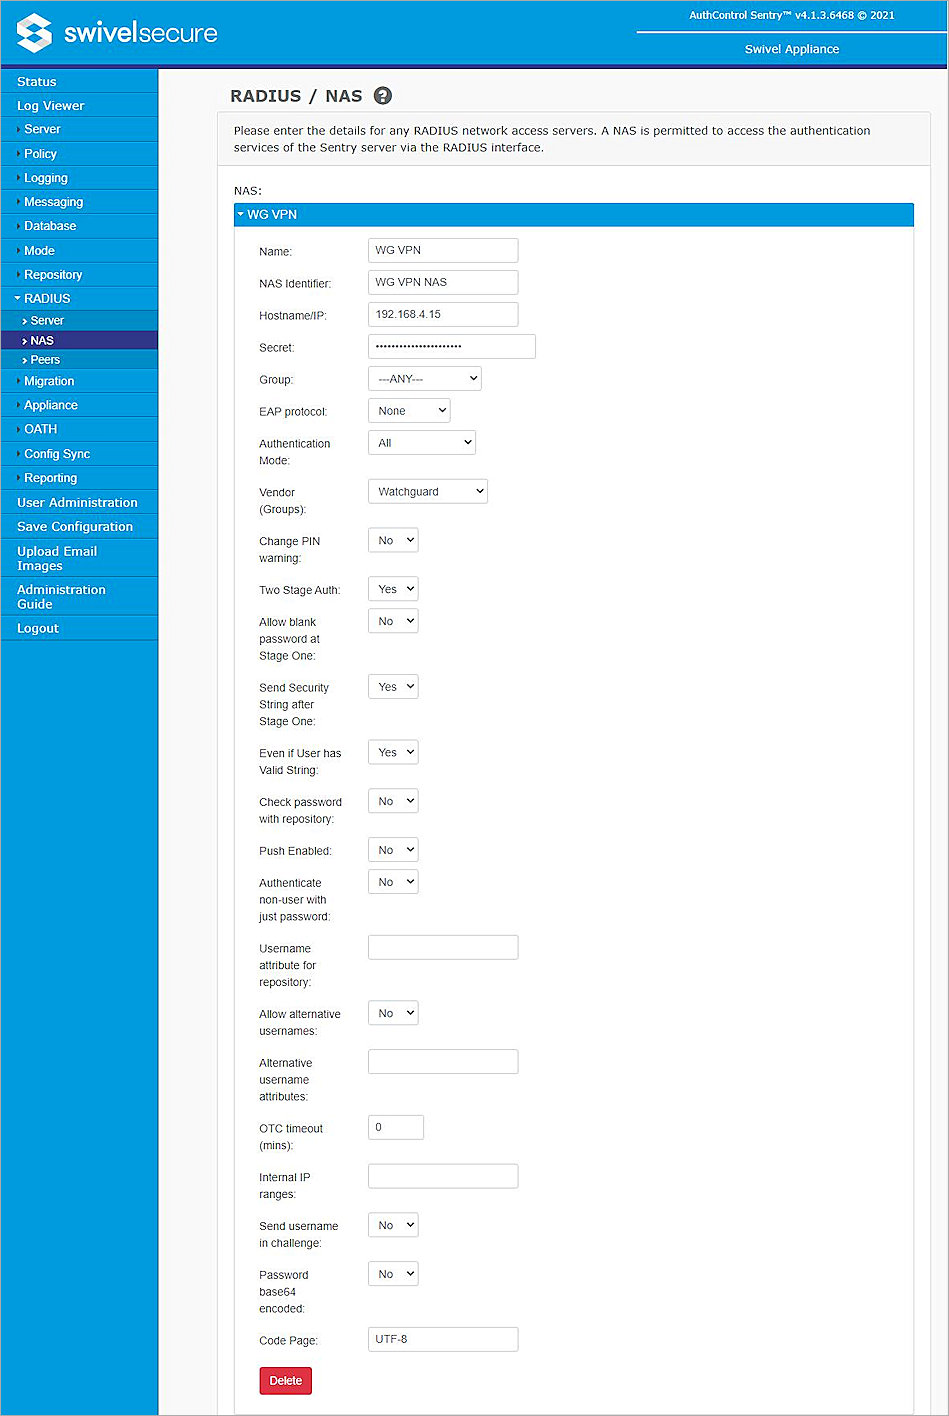
- In the Name text box, type a name.
- In the NAS Identifier text box, type the NAS name.
- In the Hostname/IP text box, type the trusted or optional interface IP address of the Firebox.
- In the Secret text box, type the shared secret to use for communication between the Firebox and RADIUS NAS.
- From the Vendor (Groups) drop-down list, select WatchGuard.
- From the Two Stage Auth drop-down list, select Yes.
- For the other options, do not change the default settings.
- Click Apply.
Configure Dual Channel Settings
To configure Dual Channel settings:
- From the left navigation bar, select Server > Dual Channel.

- From the On-demand authentication drop-down list, select Yes.
- For the other options, do not change the default settings.
- Click Apply
Configure SMTP
To configure SMTP:
- From the left navigation bar, select Messaging > General.

- Expand the SMTP settings.
- From the Destination attribute drop-down list, select email.
- From the Strings Repository Group drop-down list, select SwivelSMTP.
- From the Alert repository group drop-down list, select SwivelSMTP.
- For the other options, do not change the default settings.
- Click Apply.
- From the left navigation bar, select Messaging > SMTP.

- In the From email address: text box, type the email address used to deliver the email message.
- For the other options, do not change the default settings.
- Click Apply.
- From the left navigation bar, select Server > SMTP.
The SMTP Server settings page opens.

- In the Hostname/IP text box, type the FQDN or the IP address of the SMTP server.
This is the SMTP server that delivers email messages with a one-time authentication code. - From the Authentication enabled drop-down list, select Yes.
- In the Username text box, type the user name of the SMTP server.
- In the Password text box, type the password of the SMTP server.
- For the other options, do not change the default settings.
- Click Apply
Add a User
To add a user:
- From the left navigation bar, select User Administration.
- Click Add User.
The user settings page opens.
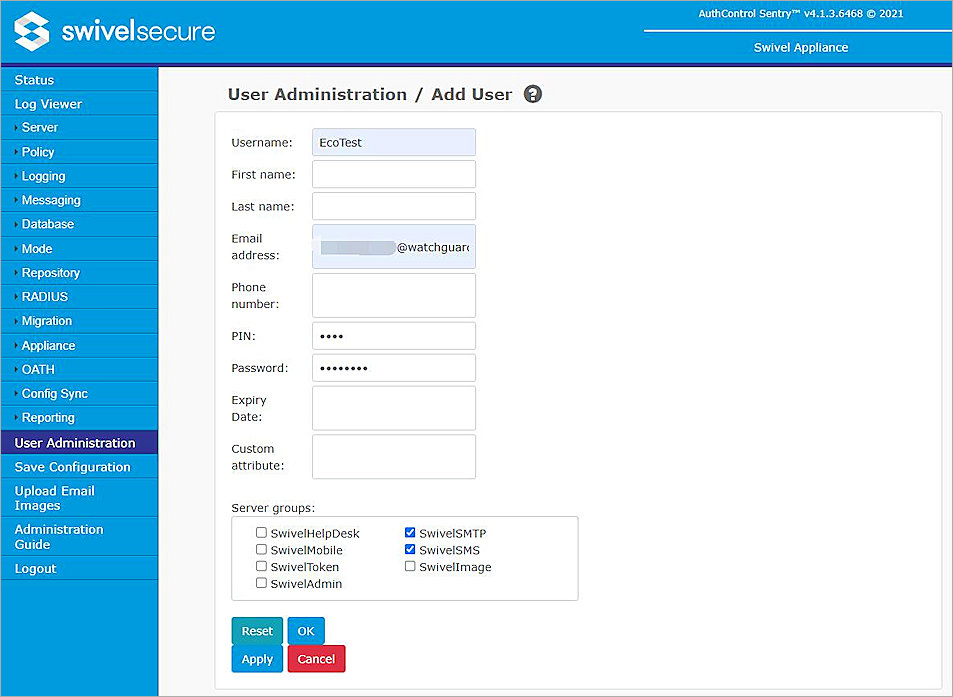
- In the Username text box, type a name for the authentication user.
- In the Email address text box, type the email address for user authentication. This email address receives an email with the one-time code when the user authenticates.
- In the PIN text box, type a PIN number for this user.
- In the Password text box, type a password for this user.
- In the Server groups panel, select SwivelSMTP.
- In the Server groups panel, select SwivelSMS.
- Click Apply.
Dual authentication is enabled.
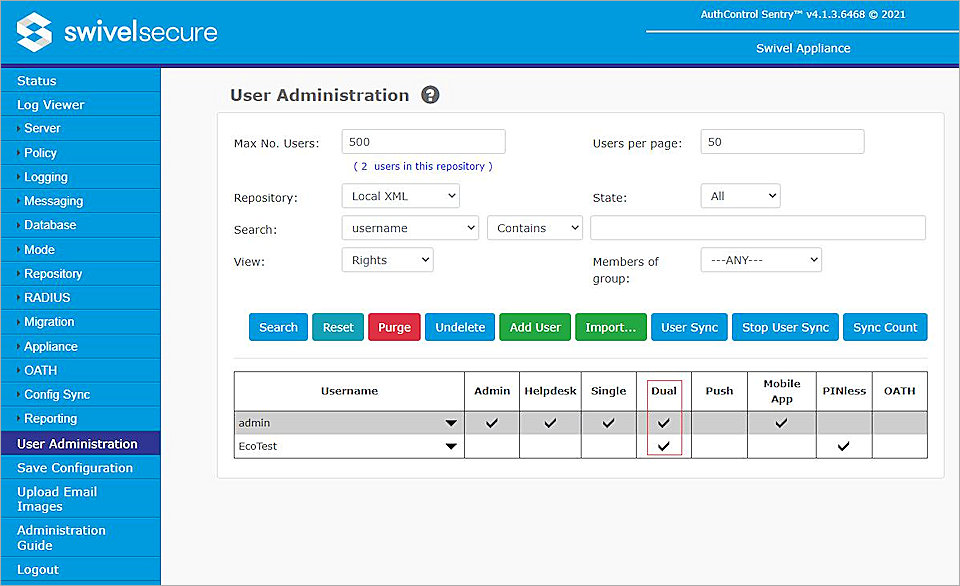
For Swivel to send an email message with a one-time code, you must enable Dual authentication. To enable Dual authentication, you must select SwivelSMTP and a second authentication method, in this case, SwivelSMS.
Configure the WatchGuard Firebox
Configure the RADIUS Server
To configure the RADIUS Server:
- Log in to Fireware Web UI.
- Select Authentication > Servers > RADIUS.
- Click Add.
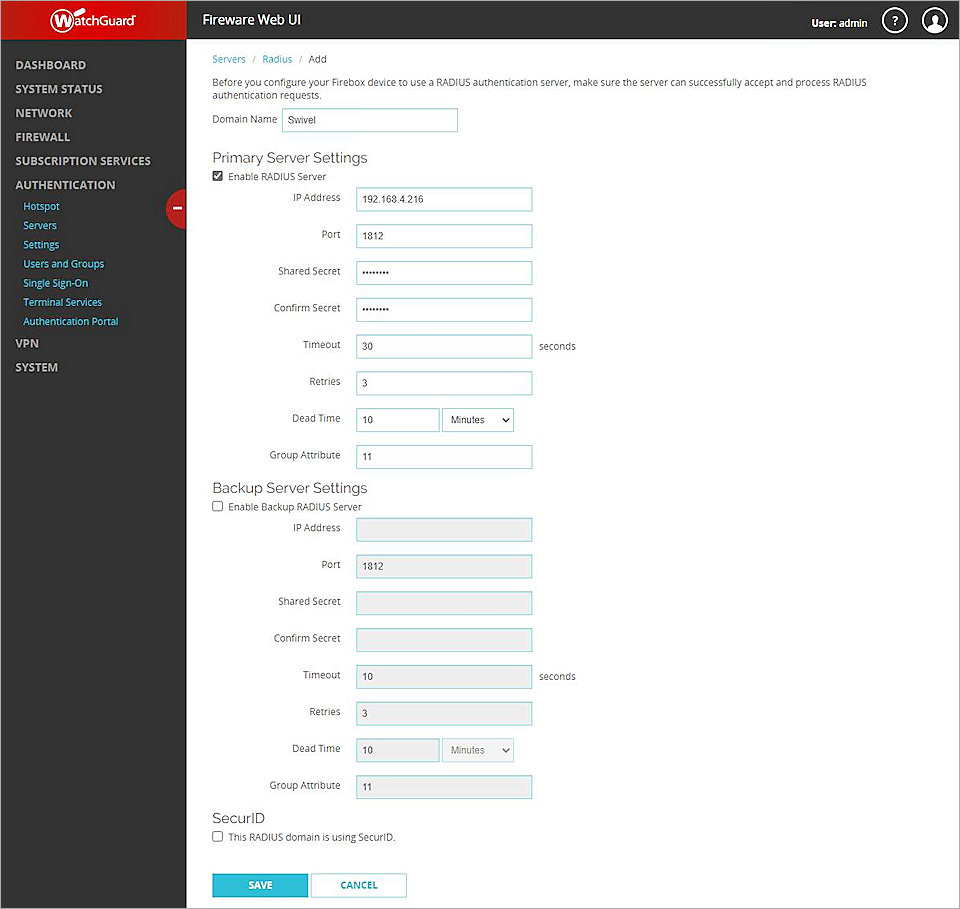
- In the Domain Name text box, type the domain name. In our example, we use Swivel.
- In the Primary Server Settings section, select Enable RADIUS Server.
- In the IP Address text box, type the IP address of the RADIUS server. In this guide, we use the IP address of the Swivel Secure AuthControl Sentry.
- In the Shared Secret and Confirm Secret text boxes, type the shared secret used by the RADIUS client (Firebox) and the Swivel Secure AuthControl Sentry.
- In the Timeout text box, type 30.
- For the other options, do not change the default settings.
- Click Save.
Configure SSL VPN
To configure SSL VPN:
- Select VPN > Mobile VPN.
- In the SSL section, click Configure.
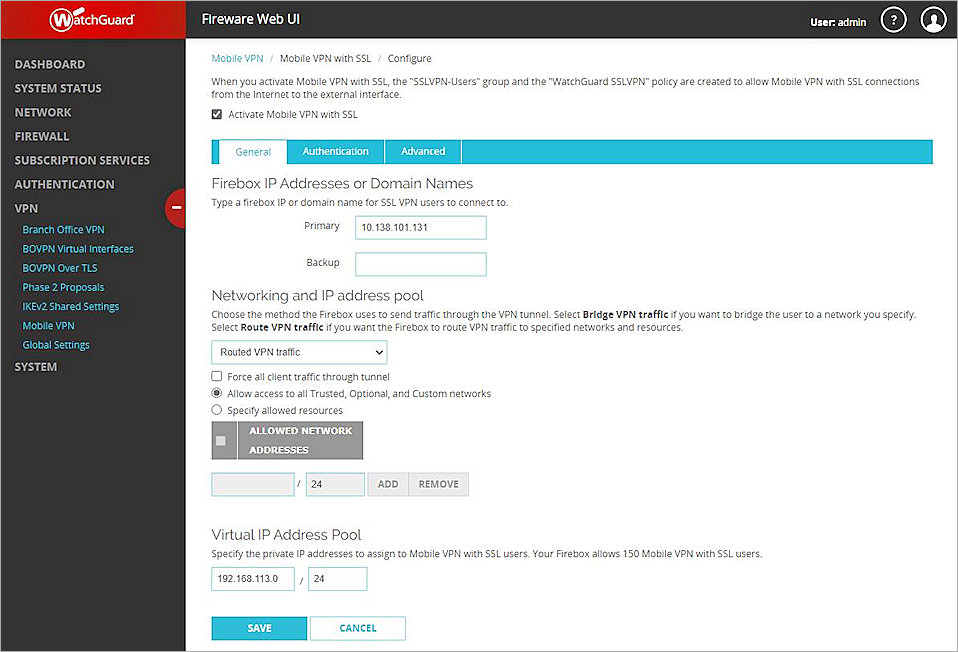
- Select the Activate Mobile VPN with SSL check box.
- In the Primary text box, type the IP address of the Firebox external interface.
- Select the Authentication tab.
- To make Swivel the default authentication server, select Swivel. Click Move Up.
- In the Users and Groups section, from the Create New drop-down list, select Swivel and User.
- Click Add.
The Add User or Group dialogue box opens.
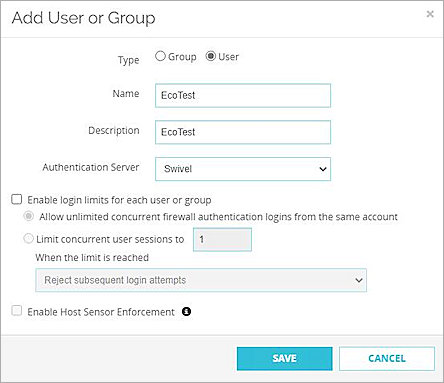
- In the Name text box, type the user name.
- In the Description text box, type the description.
- From the Authentication Server drop-down list, select Swivel.
- Click Save.
A new user appears in the User and Groups list.
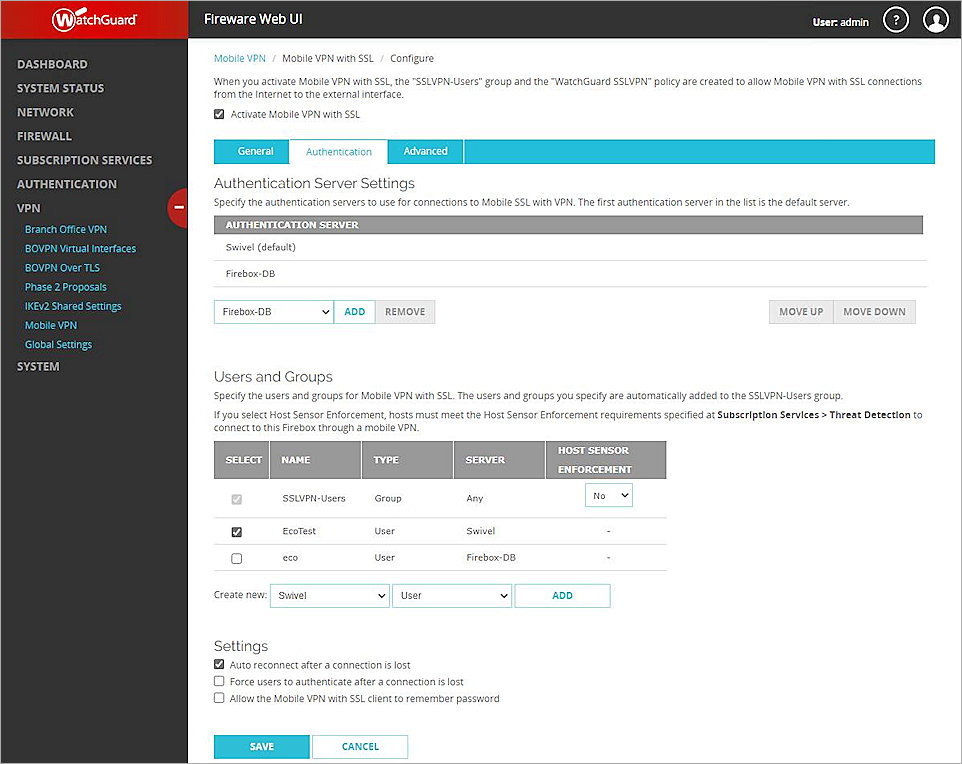
- Click Save.
Download the SSL VPN Client
To download the SSL VPN client:
- Select VPN > Mobile VPN.
The Mobile VPN page opens.

- To downland the Mobile VPN with SSL VPN client, in the SSL section, click Download Client.
Mobile VPN with SSL Client Authentication
After downloading and installing the Mobile VPN with SSL client on the computer, use the same authentication process to connect to the Firebox with the SSL VPN client.
To connect to the Firebox:
- Launch the Mobile VPN with SSL client.

- In the Server text box, type the FQDN or IP address of the Firebox external interface.
- In the User name text box, type the user name.
- In the Password text box, type the password.
- Click Connect.
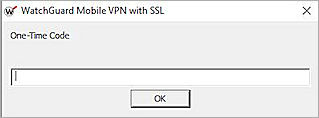
An email is sent that contains the One-Time code. - When prompted, enter the One-Time Code from the email.