Deployment Overview
LoginTC® provides cloud-based authentication through the RADIUS protocol.
This document describes how to integrate LoginTC two-factor authentication with a WatchGuard Firebox and the WatchGuard Mobile VPN with SSL client.
Integration Summary
The hardware and software used in this guide include:
- WatchGuard Firebox
- Fireware v12.8.1
- LoginTC RADIUS Connector
- Version 3.0.5
- LoginTC Cloud
- LoginTC Token
- RADIUS Server
Test Topology

Before You Begin
Before you begin these procedures, make sure that you configure the user and client on the RADIUS server.
The user name on the RADIUS server must be the same as the user name in LoginTC Cloud and the WatchGuard Firebox.
Configure LoginTC Cloud
To configure LoginTC Cloud:
- Log in to LoginTC Cloud.
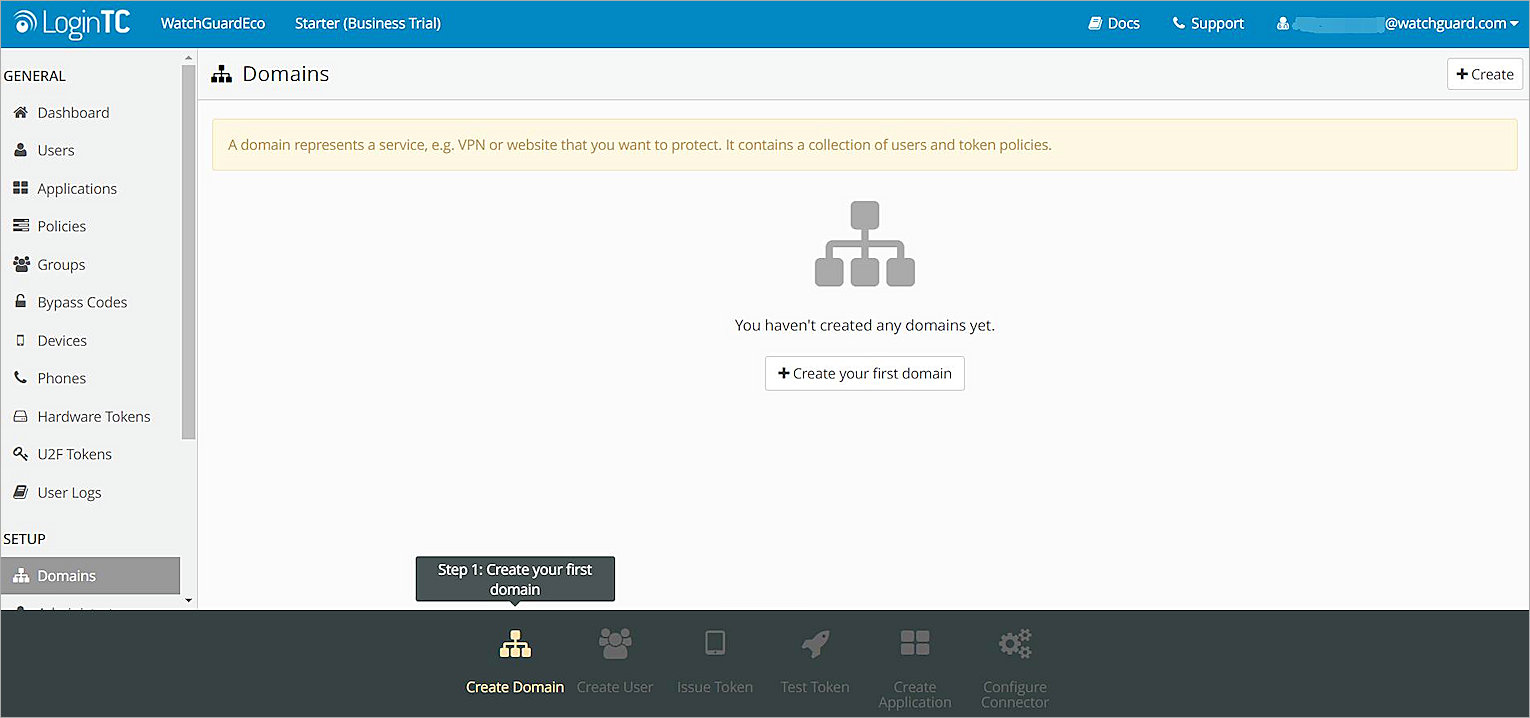
- Click Create Your First Domain.
The Create Domain page opens.

- In the Name text box, type the domain name.
- In the Icon section, select an icon from the list, or to use a custom icon, select Upload from Computer.
- Click Create.
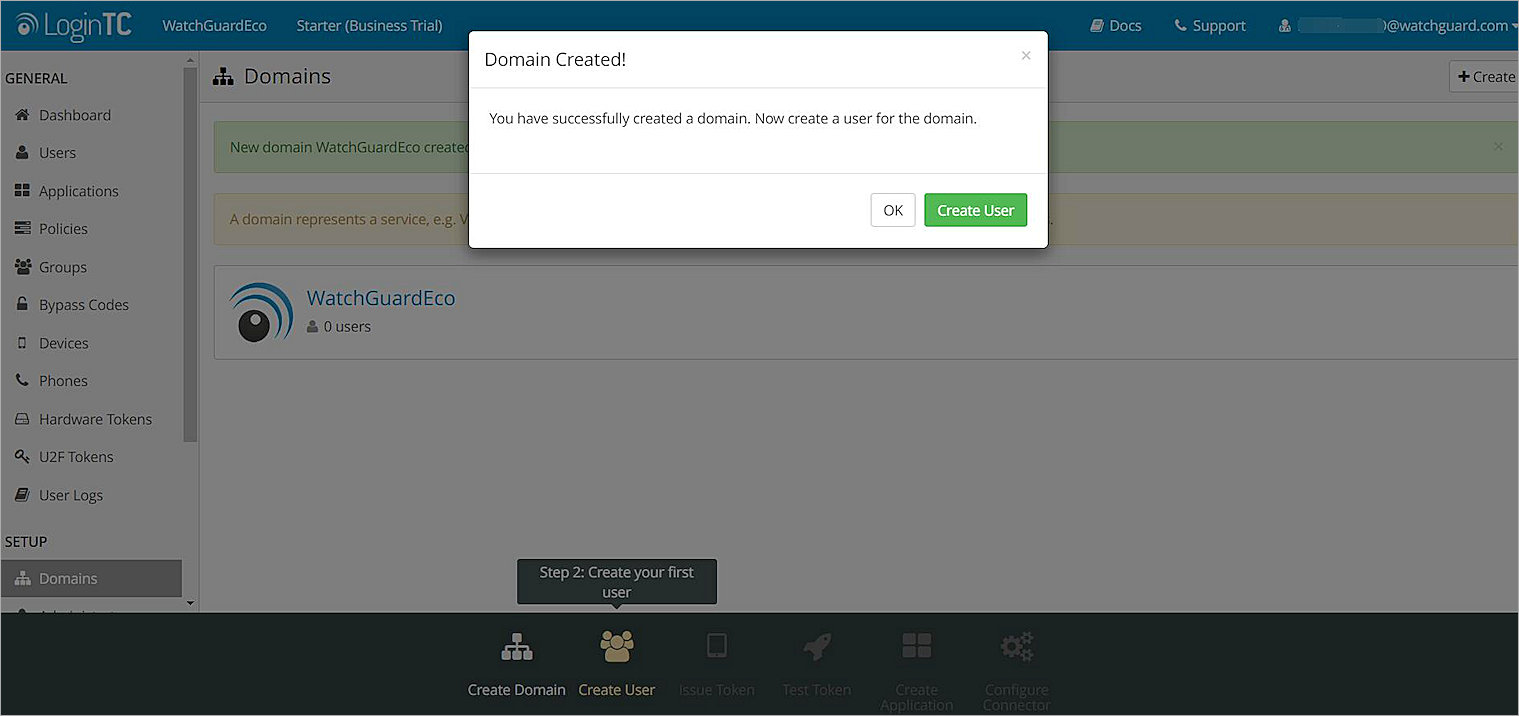
- Click Create User.
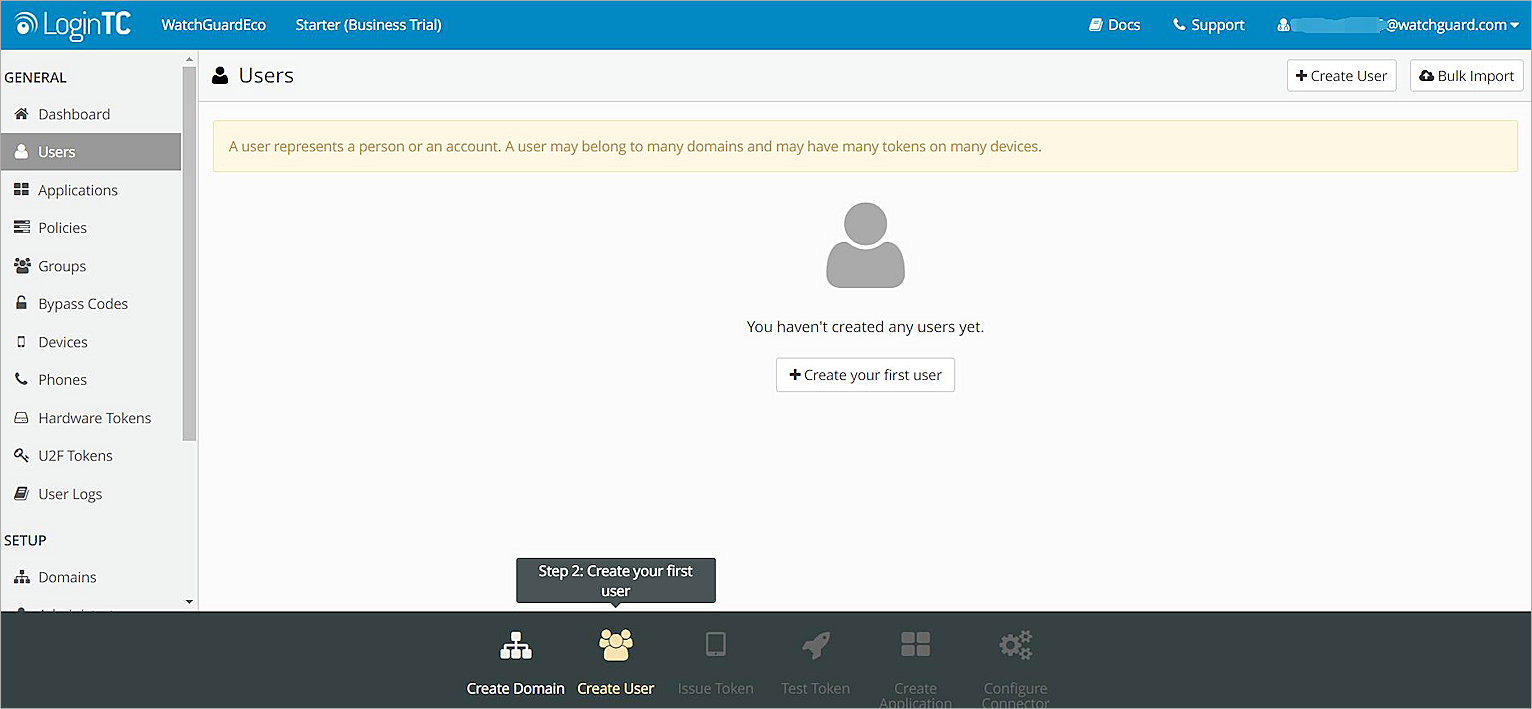
- Click Create Your First User.
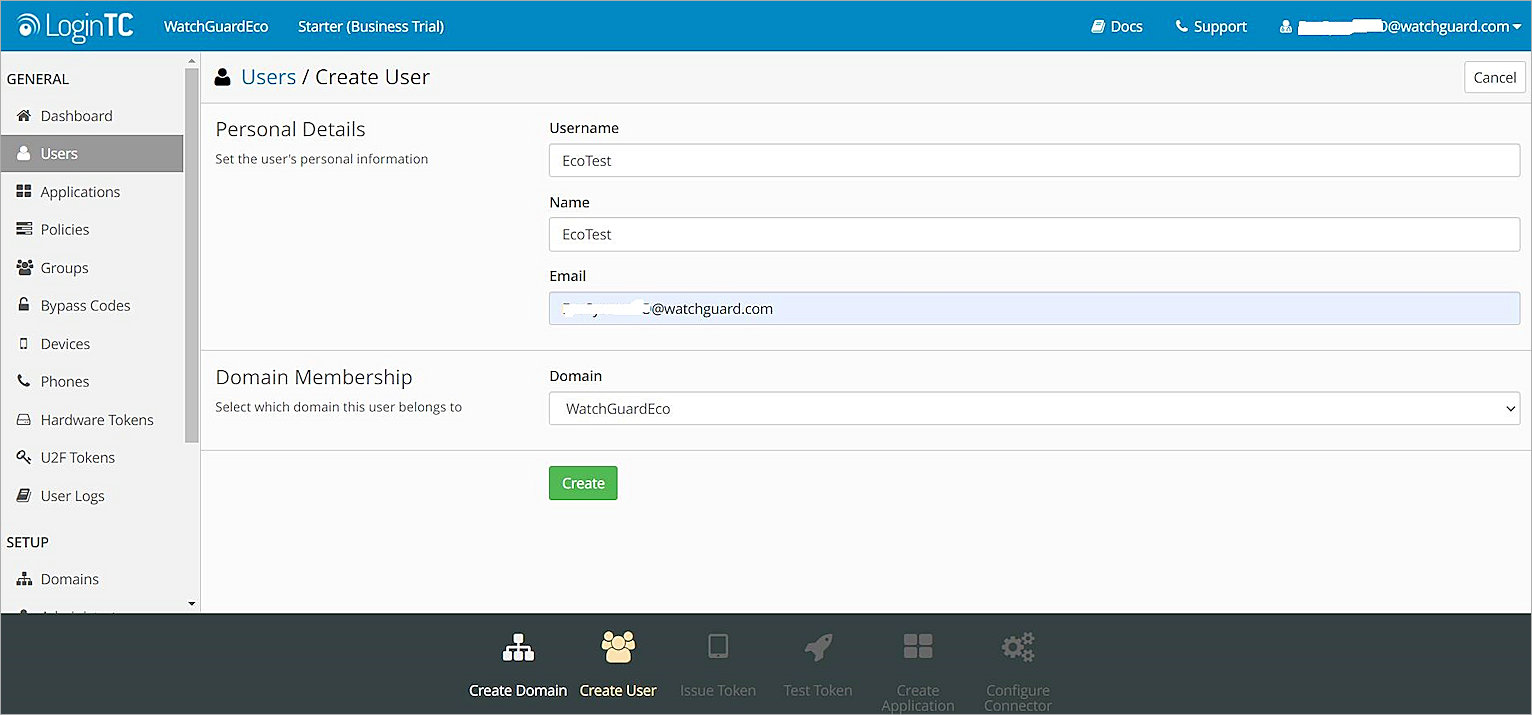
- In the Personal Details section, type the Username, Name, and Email address of the user.
- Click Create.
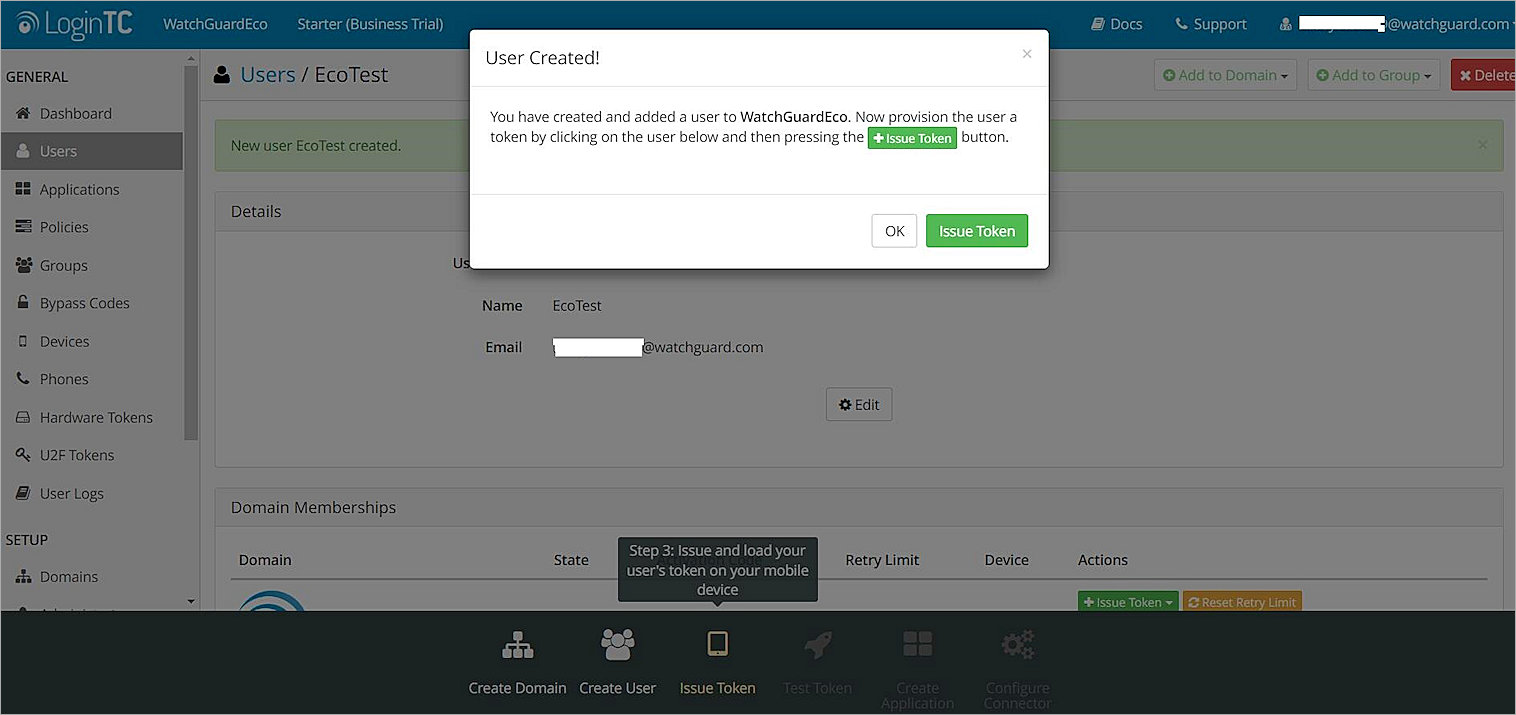
- Click Issue Token.

- In the Actions column, click Issue Token.
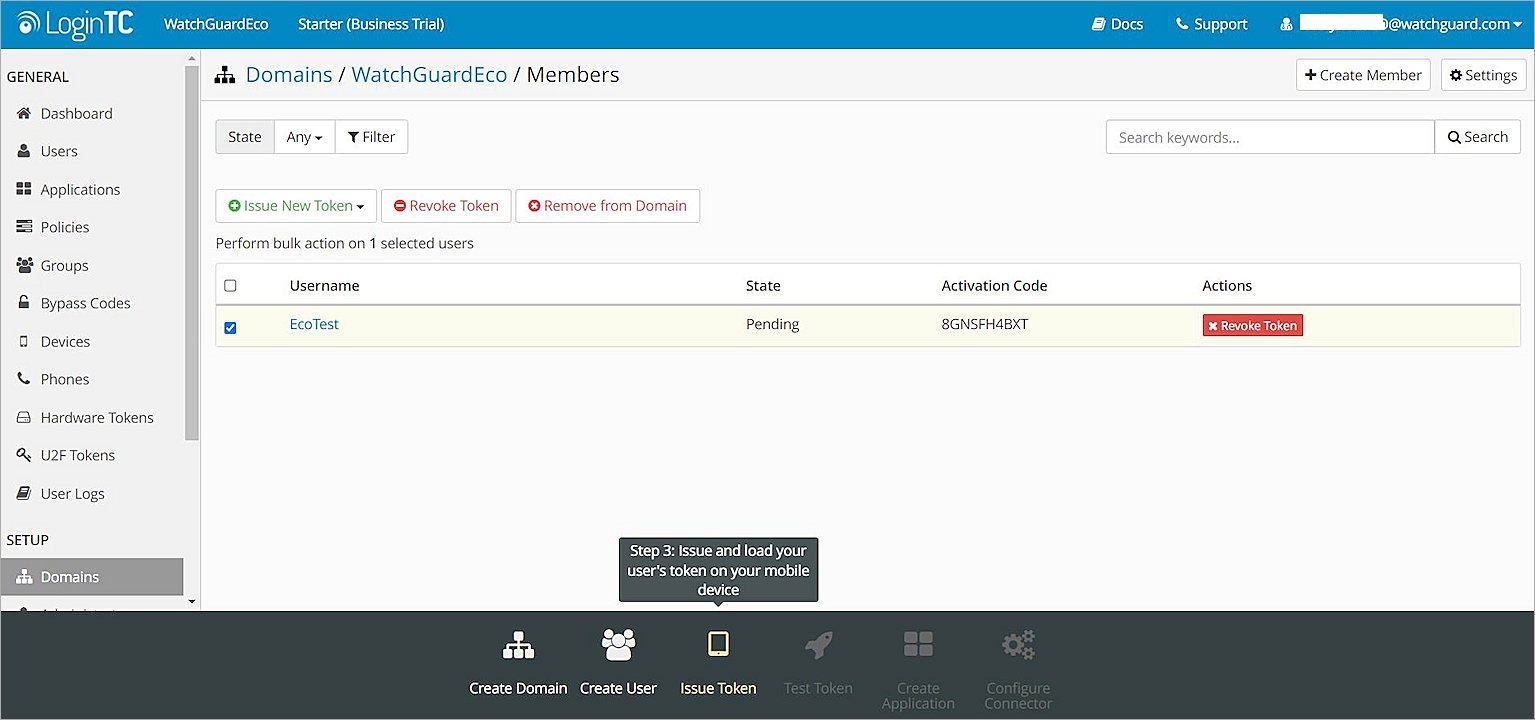
- Use the code in the Activation Code column to activate your token. For information on how to set up your token, see the Testing section in the LoginTC documentation.
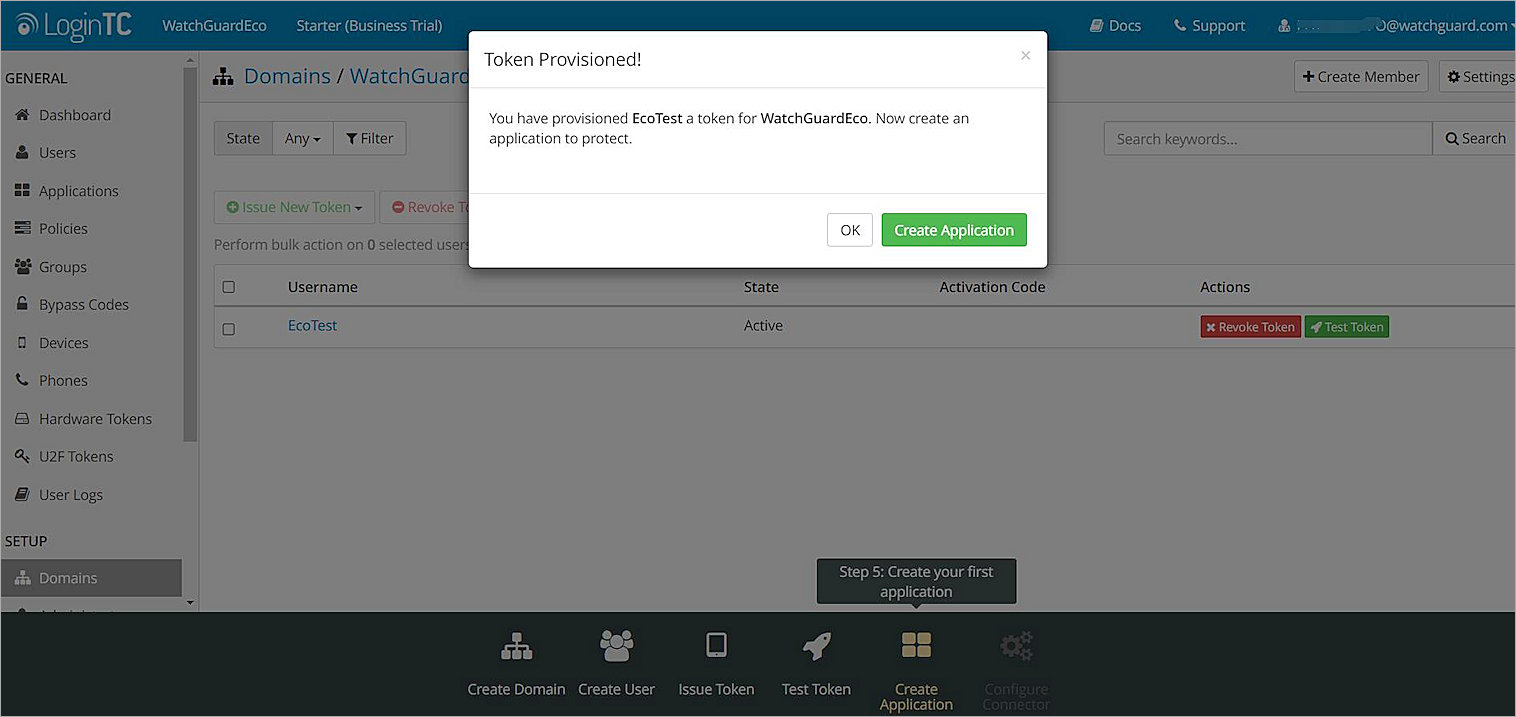
- Click Create Application.
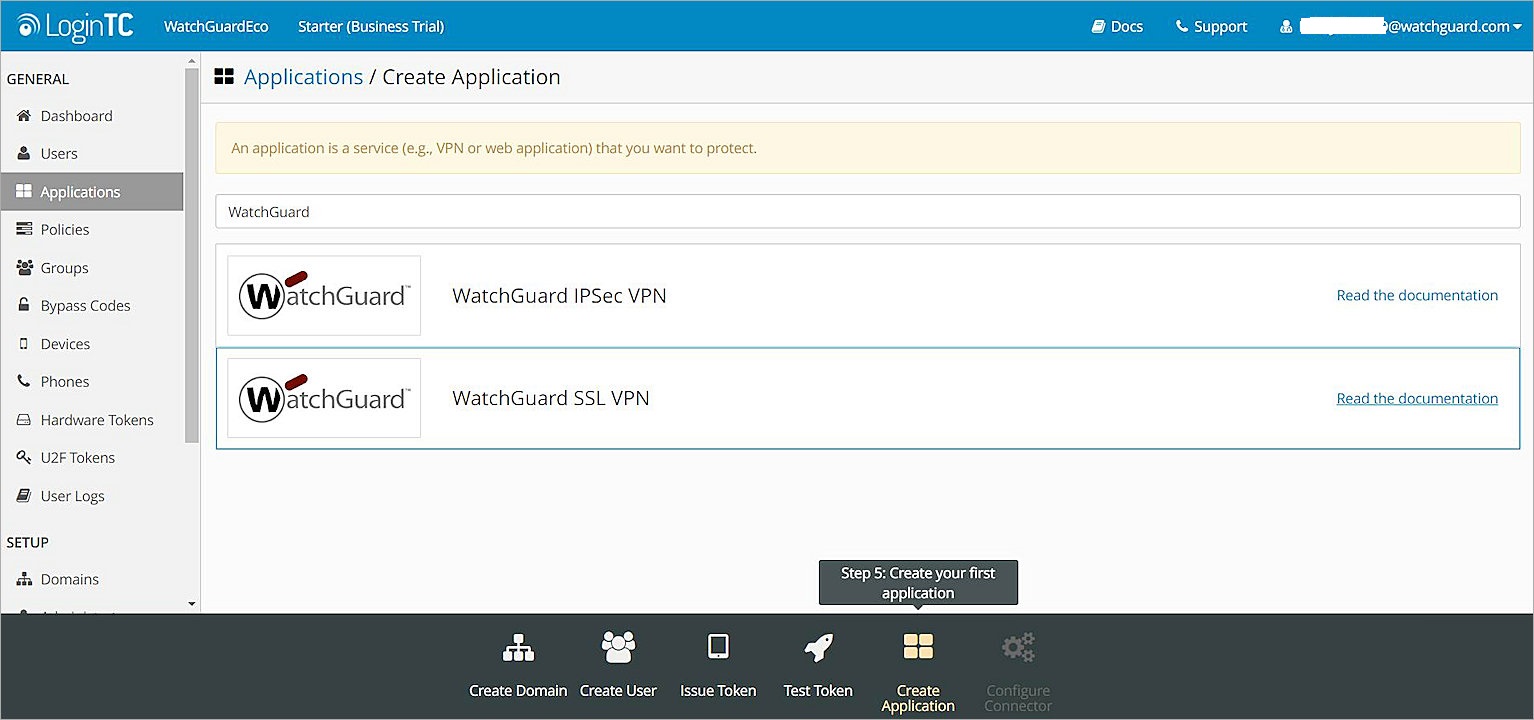
- Type WatchGuard in the filter.
- Select WatchGuard SSL VPN.
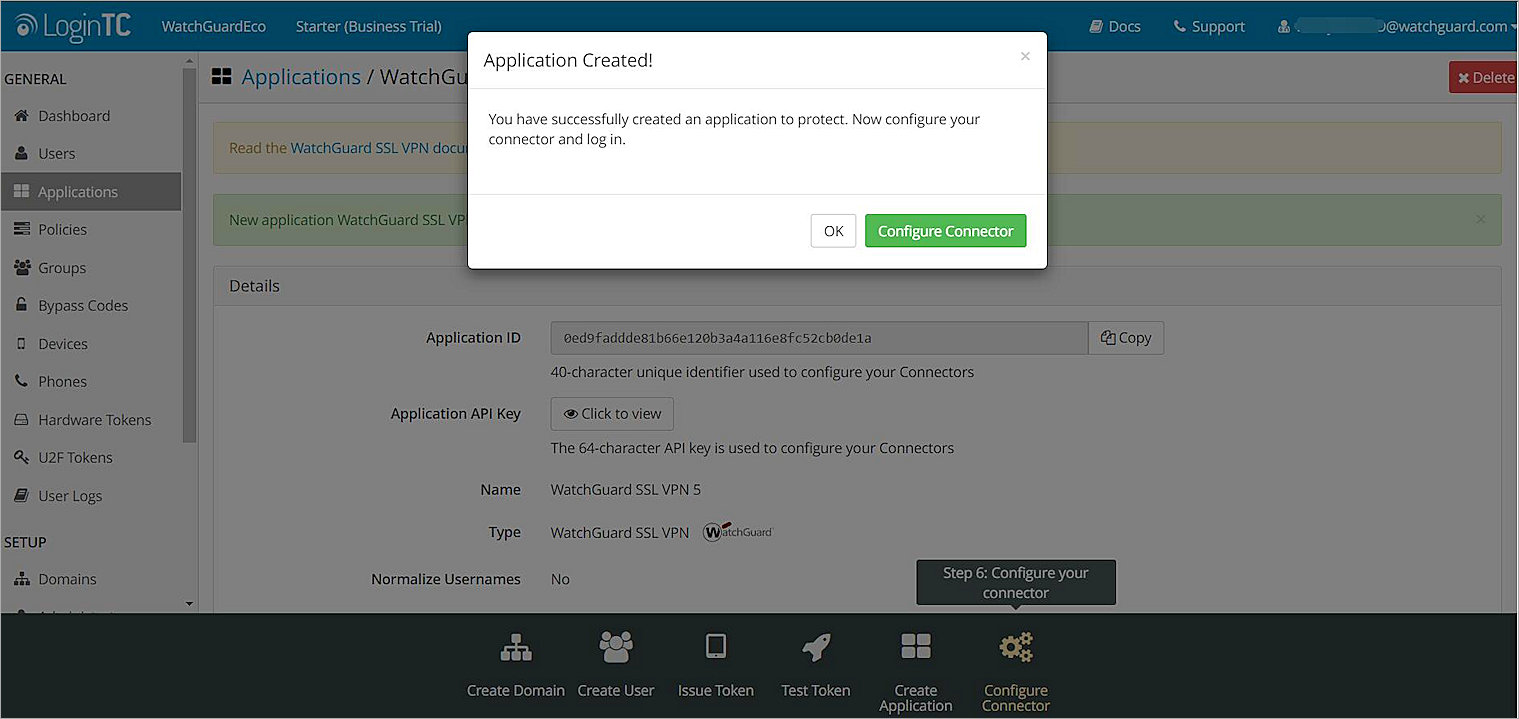
- Click Configure Connector.
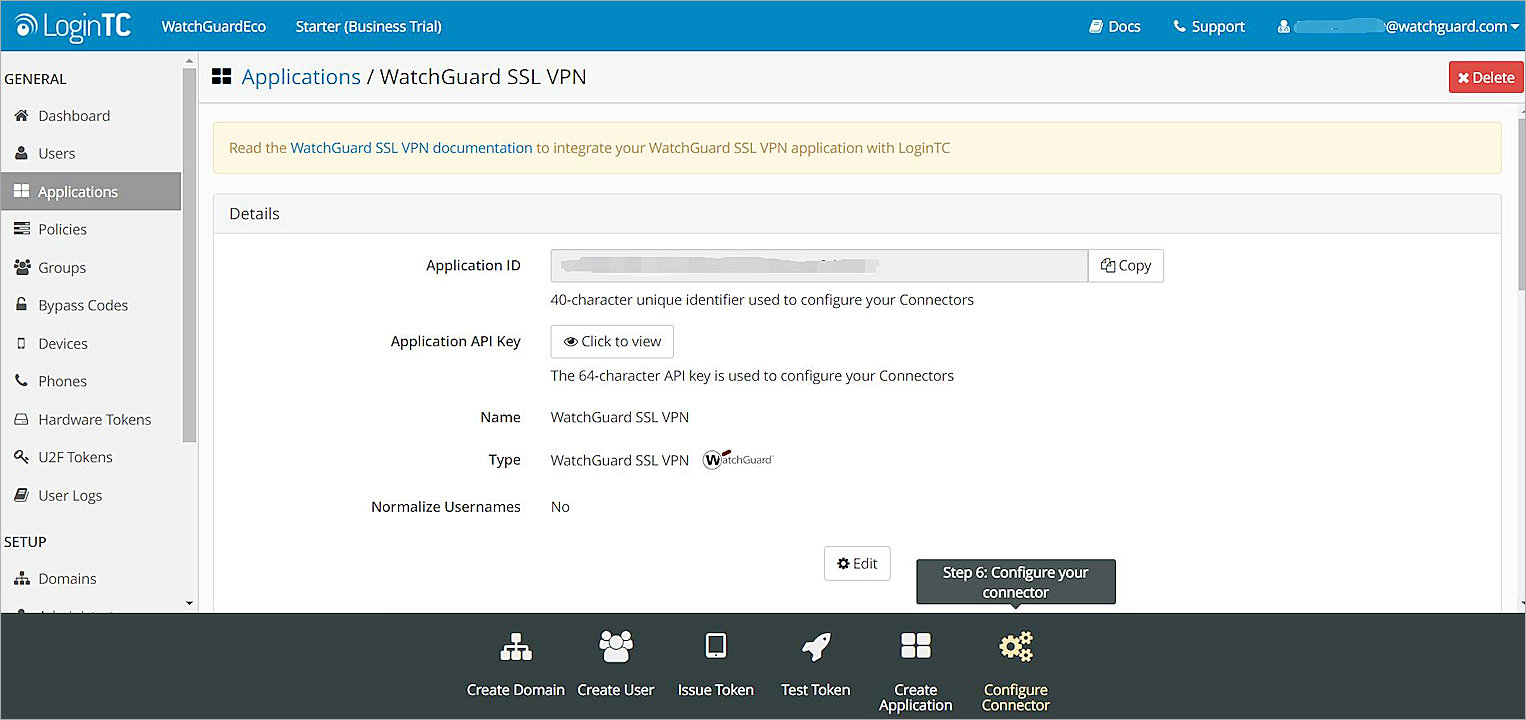
- Copy and save the Application ID and Application API Key to use when you configure the RADIUS connector.
Install LoginTC RADIUS Connector
For LoginTC RADIUS Connector installation instructions, see the Installation section in the LoginTC documentation.
After installation, you must:
-
Set the login Password.
-
Configure the IP Address.
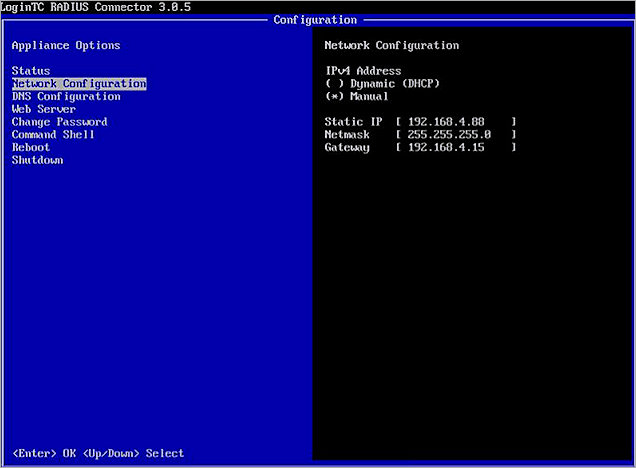
-
Configure the DNS.
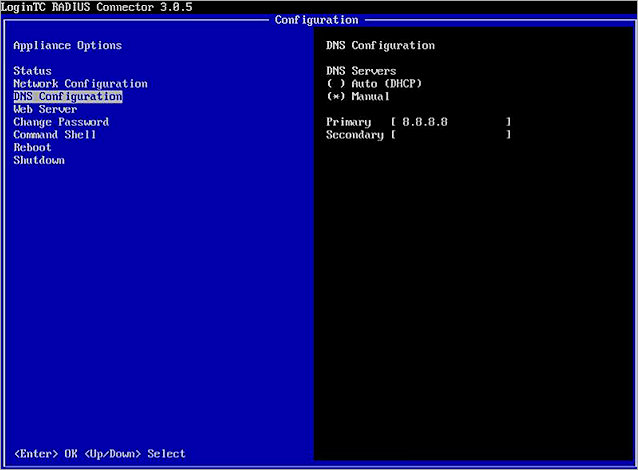
-
Check that the Web Server starts.
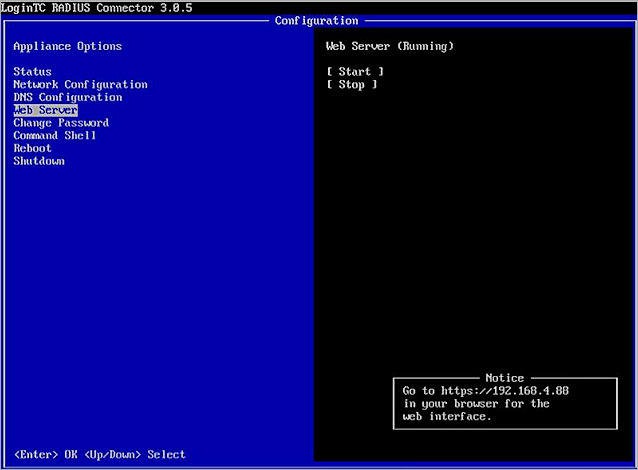
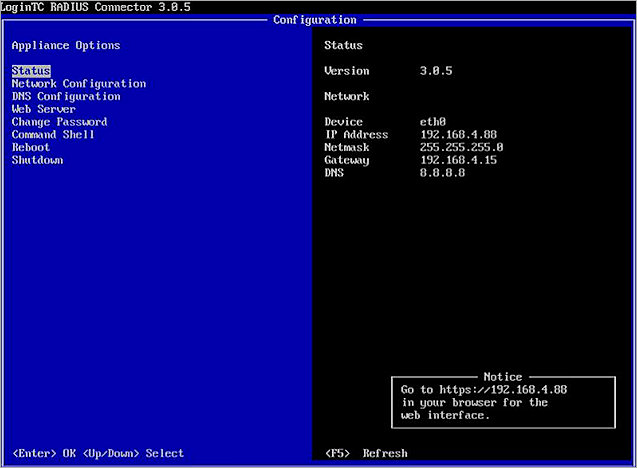
To view the status of the configuration, select Status.
Configure the RADIUS Connector
To configure the RADIUS Connector:
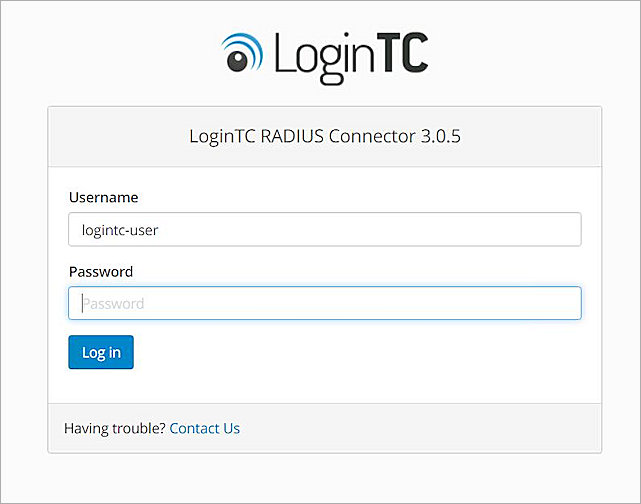
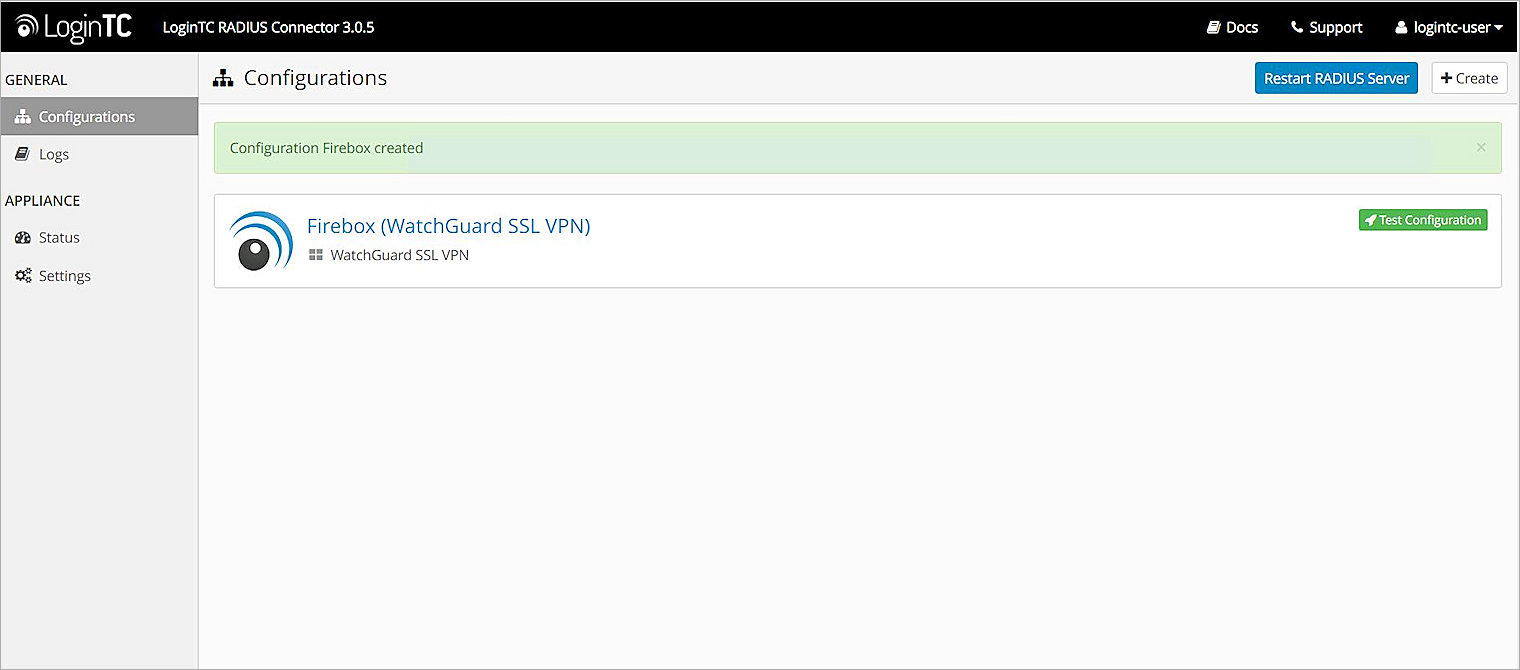
- Log in to LoginTC RADIUS Connector Web. The default user name is logintc-user.
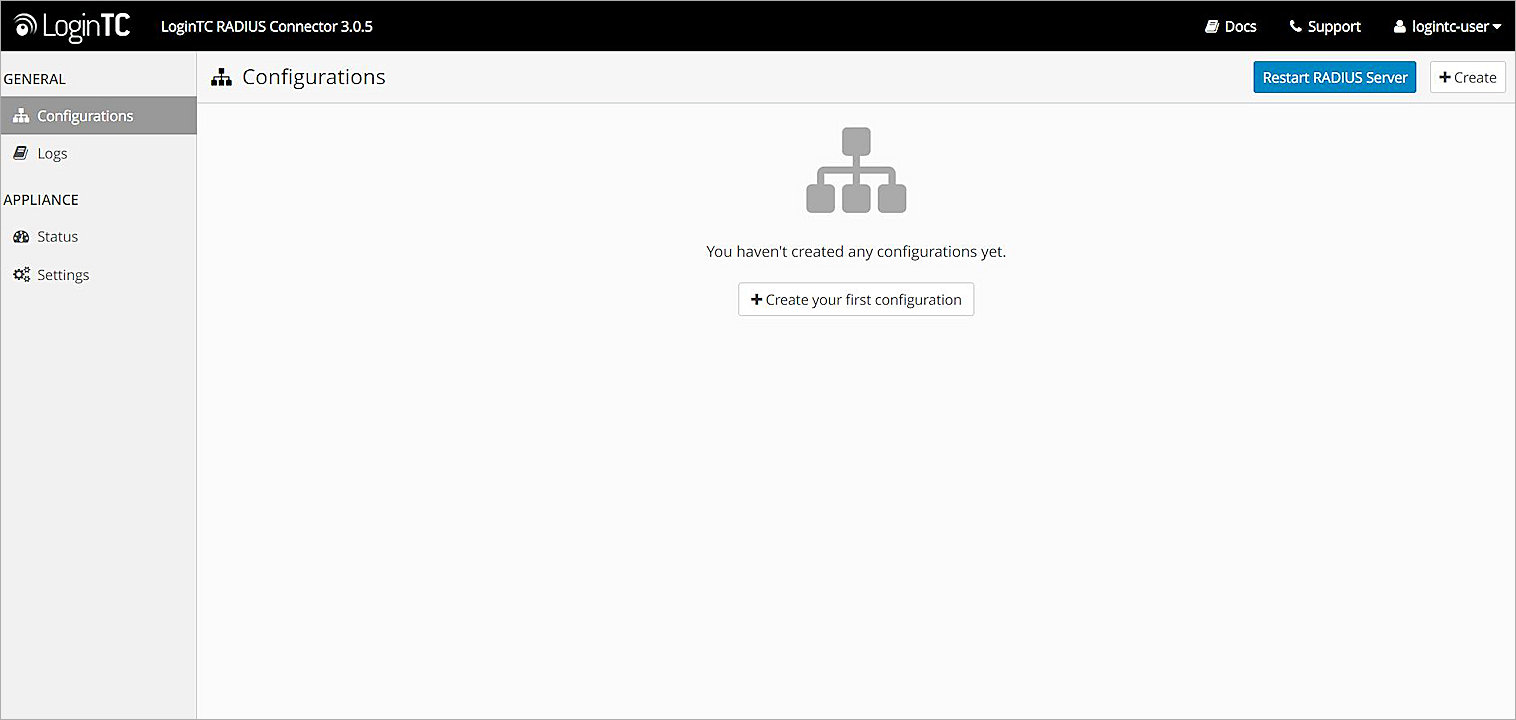
- Click Create Your First Configuration.
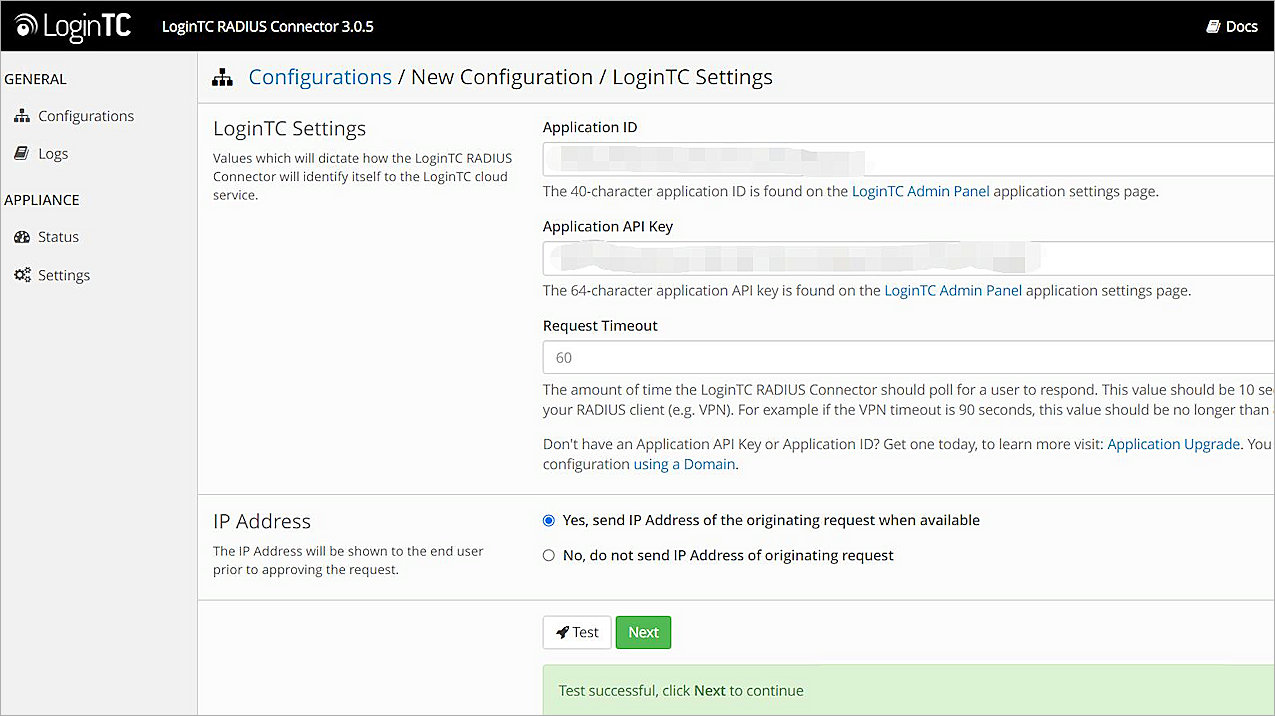
- In the Application ID text box, type the Application ID you copied previously in the Configure LoginTC Cloud steps.
- In the Application API Key text box, type the Application API Key you copied previously in the Configure LoginTC Cloud steps.
- Click Test.
If the test is successful, a success message appears. - Click Next.
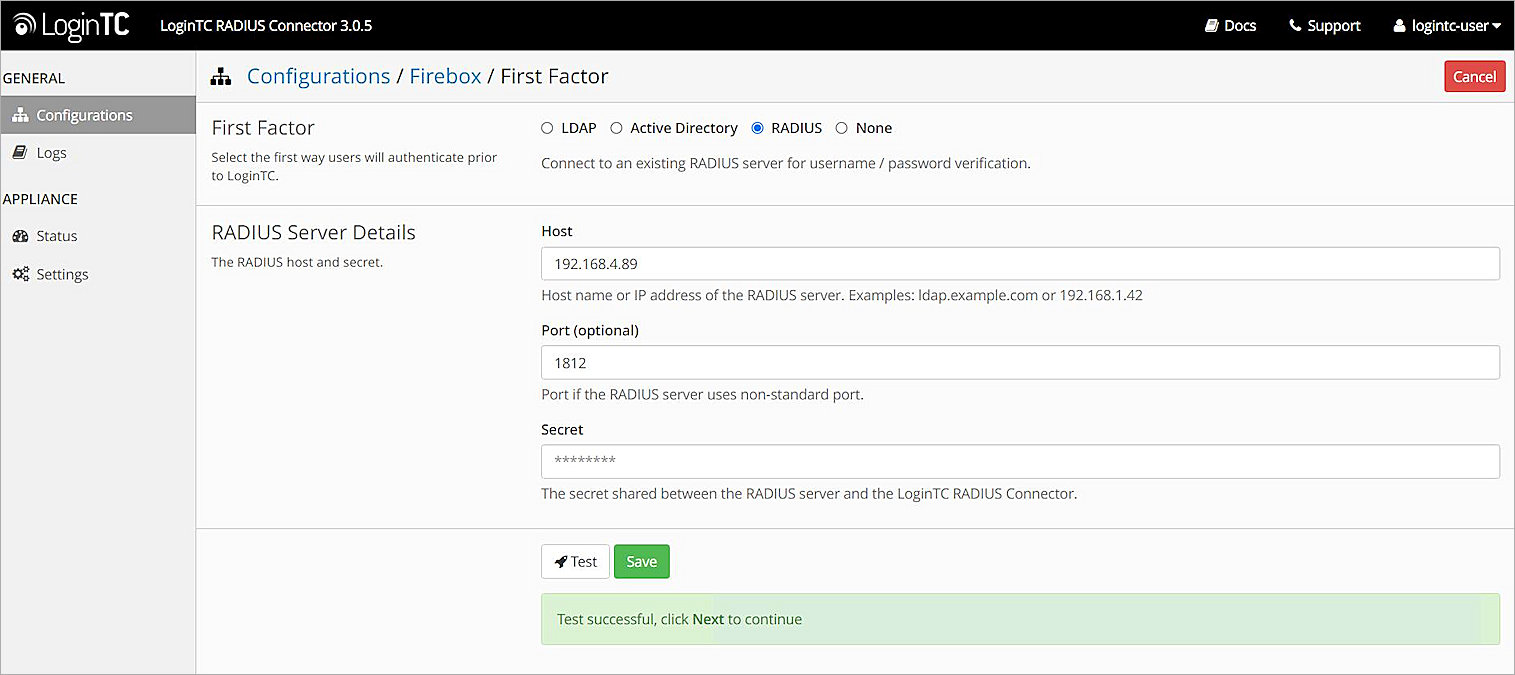
- In the First Factor section, select the first authentication factor to use with LoginTC. In our example, we select RADIUS.
- In the Host text box, type the IP address of the RADIUS server.
- In the Port text box, type the port number that your RADIUS server uses for communication. The default is 1812.
- In the Secret text box, type the shared secret used by the RADIUS server and the LoginTC RADIUS Connector.
- Click Test.
If the test is successful, a success message appears. - Click Save.
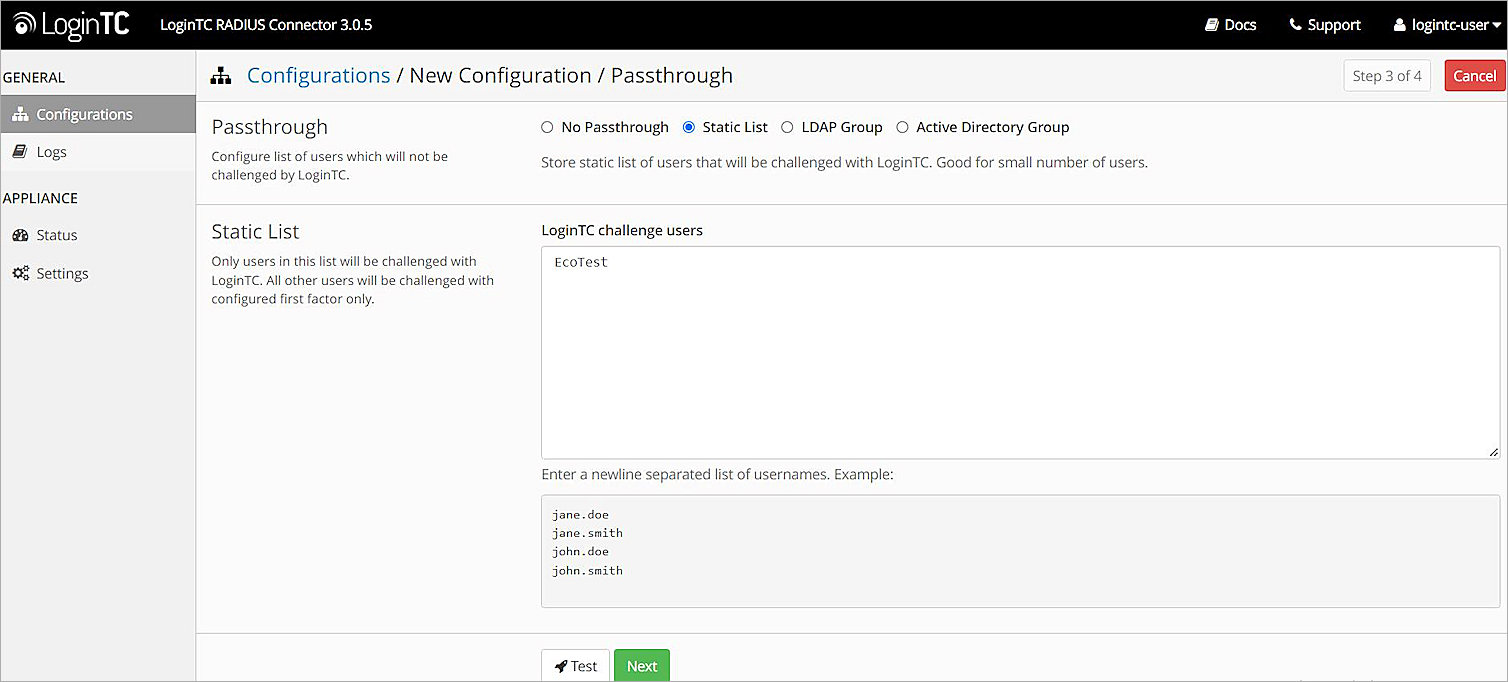
- To specify which users LoginTC challenges, select Static List.
- In the LoginTC Challenge Users text box, type one or more user names. In our example, we use EcoTest as our user.
- Click Next.
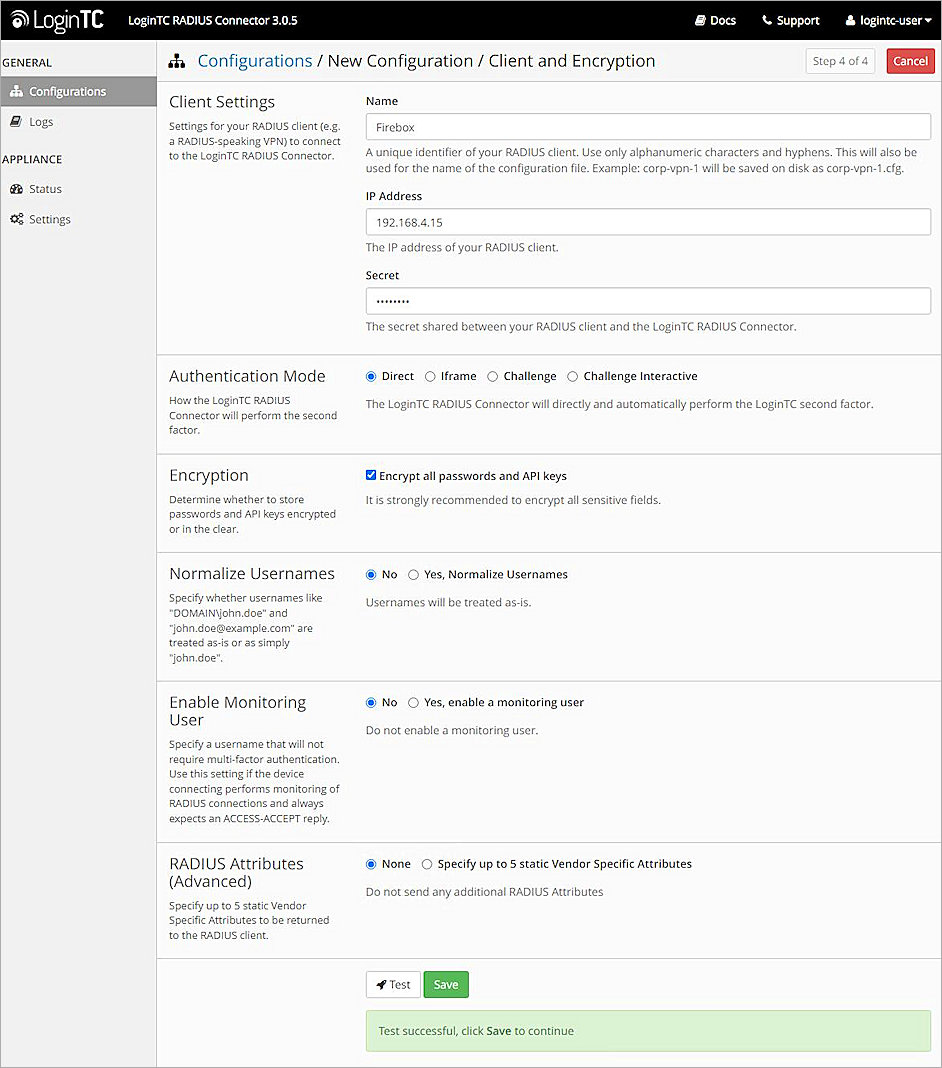
- In the Name text box, type the name of the client.
- In the IP Address text box, type the IP address of the client IP address of the Firebox Trusted or Optional interface.
- In the Secret text box, type the shared secret used by the RADIUS client and the LoginTC RADIUS Connector.
- For the other options, do not change the default settings.
- Click Test.
If the test is successful, a success message appears. - Click Save.
Configure the WatchGuard Firebox
To configure your Firebox for RADIUS authentication:
- Log in to Fireware Web UI.
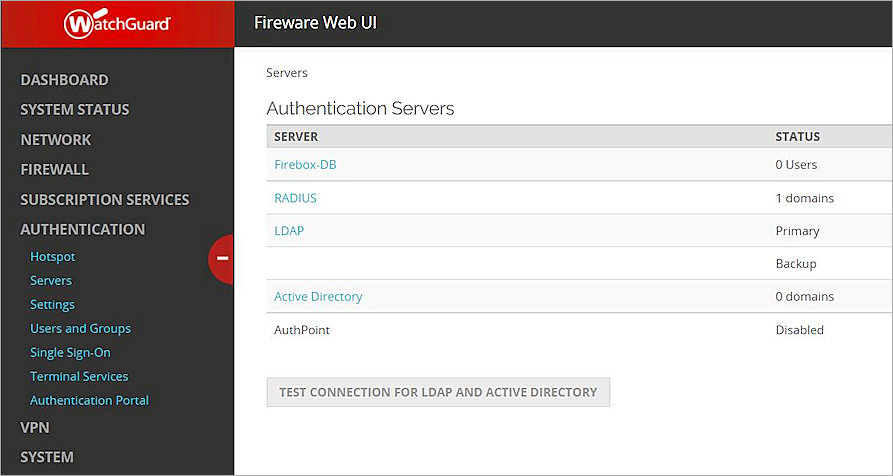
- Select Authentication > Servers > RADIUS.
- Click Add.
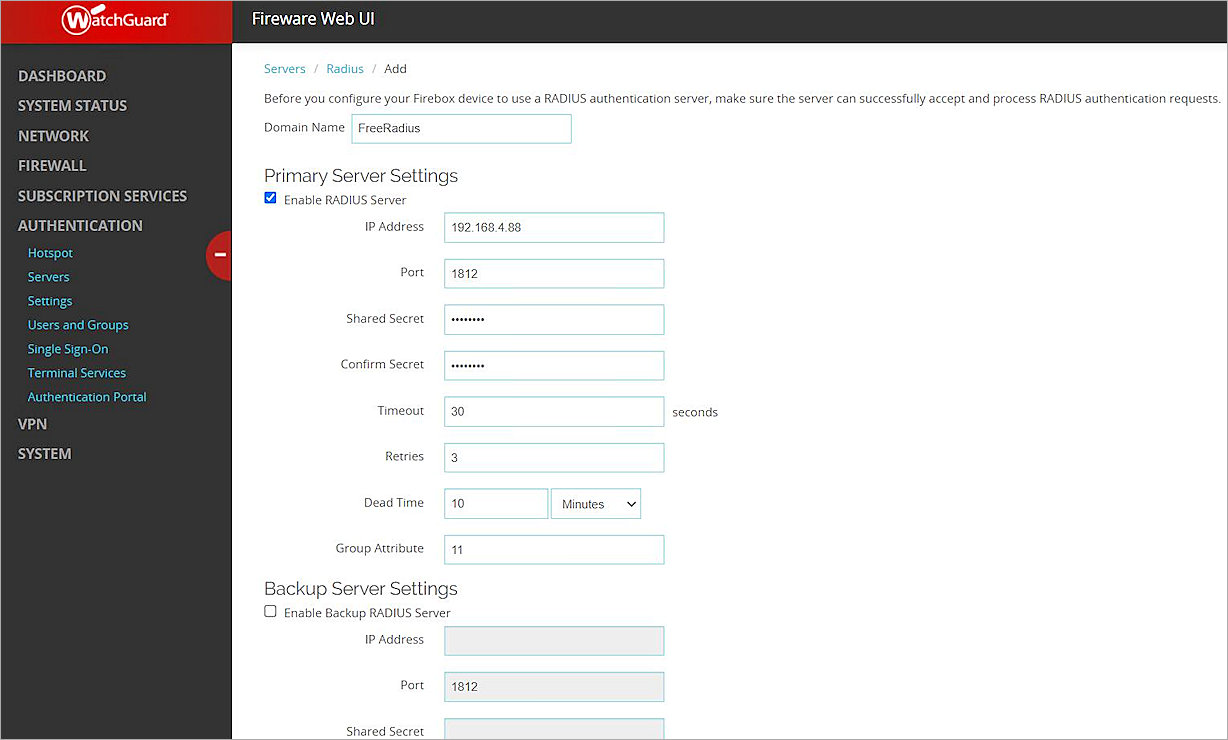
- In the Domain Name text box, type the domain name. In our example, we use FreeRadius.
- In the Primary Server Settings section, select Enable RADIUS Server.
- In the IP Address text box, type the IP address of the RADIUS server. In this guide, we use the IP address of the LoginTC Radius Connector.
- In the Shared Secret and Confirm Secret text boxes, type the shared secret used by the RADIUS client (Firebox) and the LoginTC RADIUS Connector.
- In the Timeout text box, type 30.
- For other options, do not change the default settings.
- Click Save.
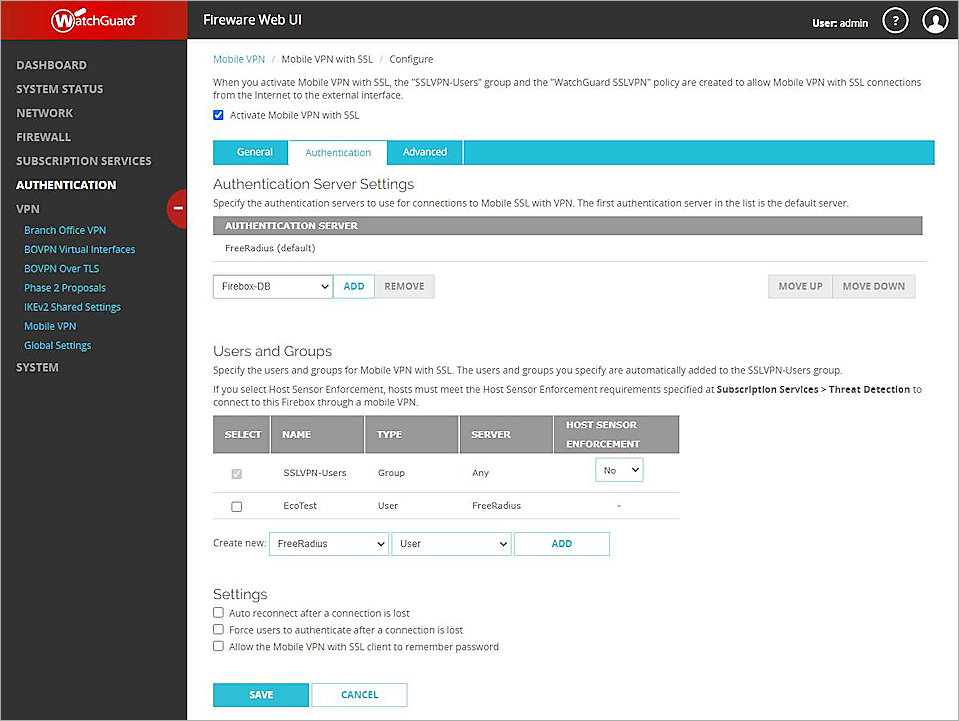
- Select VPN > Mobile VPN.
- In the SSL section, click Configure.
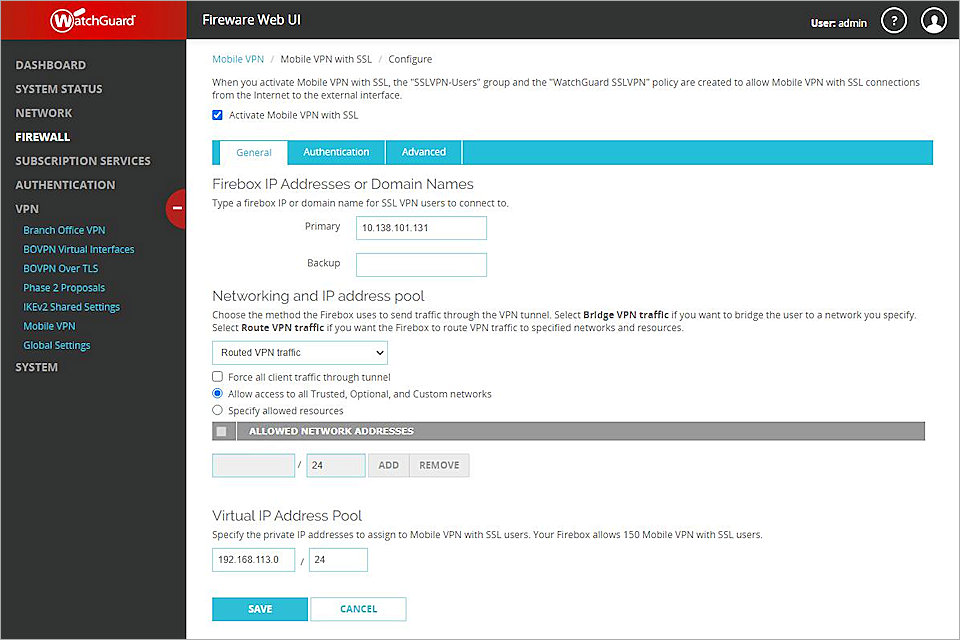
- Select the Activate Mobile VPN with SSL check box.
- In the Primary text box, type the IP address of your Firebox external interface.
- Select the Authentication tab.
- To make FreeRadius the default authentication server, select FreeRadius. Click Move Up.
- In the Users and Groups section, from the Create New drop-down list, select FreeRadius and User.
- Click Add.
The Add User or Group dialog box opens.
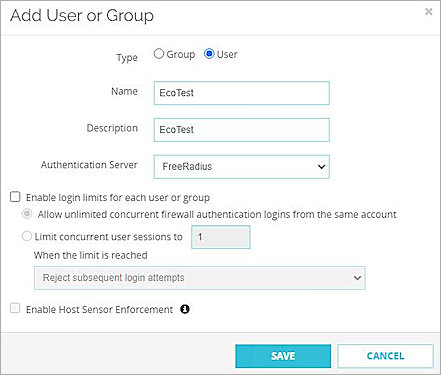
- In the Name text box, type the user name.
- In the Description text box, type the description.
- From the Authentication Server drop-down list, select FreeRadius.
- Click Save.
Your new user appears in the User and Groups list.
- Click Save.
- Select VPN > Mobile VPN.
The Mobile VPN page opens.
- To downland the Mobile VPN with SSL VPN client, in the SSL section, click Download Client.
Test the Integration
To test the integration:
- Install and open the Mobile VPN with SSL client.
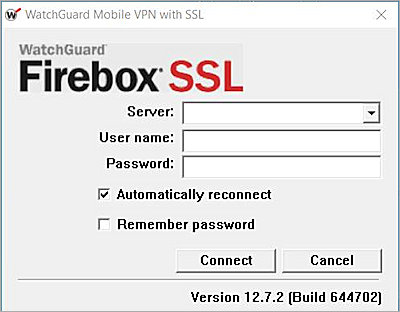
- In the Server text box, type the FQDN or IP address of the Firebox external interface.
- In the User name text box, type the user name.
- In the Password text box, type the password.
- Click Connect.
Your LoginTC token receives a push request.
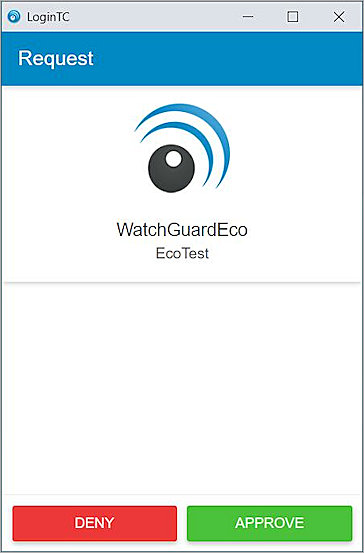
- Click Approve.
You are connected successfully.