Domotz offers powerful network management software for MSPs, integrators, security professionals, and business owners. It has integrated features such as remote device access, SNMP monitoring, network diagnostics, remote power management, device alerts, team collaboration, network mapping, and multiple VLANs.
Domotz can use SNMP to monitor a Firebox status, and can send alerts based on SNMP traps.
This document describes the steps to integrate your WatchGuard Firebox with Domotz.
Platform and Software
The hardware and software used to complete the steps outlined in this document include:
- Firebox device with an install of Fireware v12.8.1 or higher
- Domotz account
- Domotz Agent Manager

Set Up the Firebox
Before Domotz can discover your Firebox, you must configure SNMP settings on the Firebox and configure an SNMP policy.
Enable SNMP
Domotz only supports SNMPv2. To configure SNMP on the Firebox:
- Log in to Fireware Web UI at:
https://<your Firebox IP address>:8080 - Select System > SNMP.
- From the Version drop-down list, select v1/v2c.
- In the Community String text box, type the community string the SNMP server uses when it contacts the device. This example uses 11111111.
The Community String is used as a user ID or password that allows access to the statistics of a device. - From the SNMP Traps section, from the Version drop-down list, select v2Trap.
- From the SNMP Management Stations list, add the IP address of the Domotz Agent. After you install the Domotz Agent, the IP address shows in Domotz Pro.
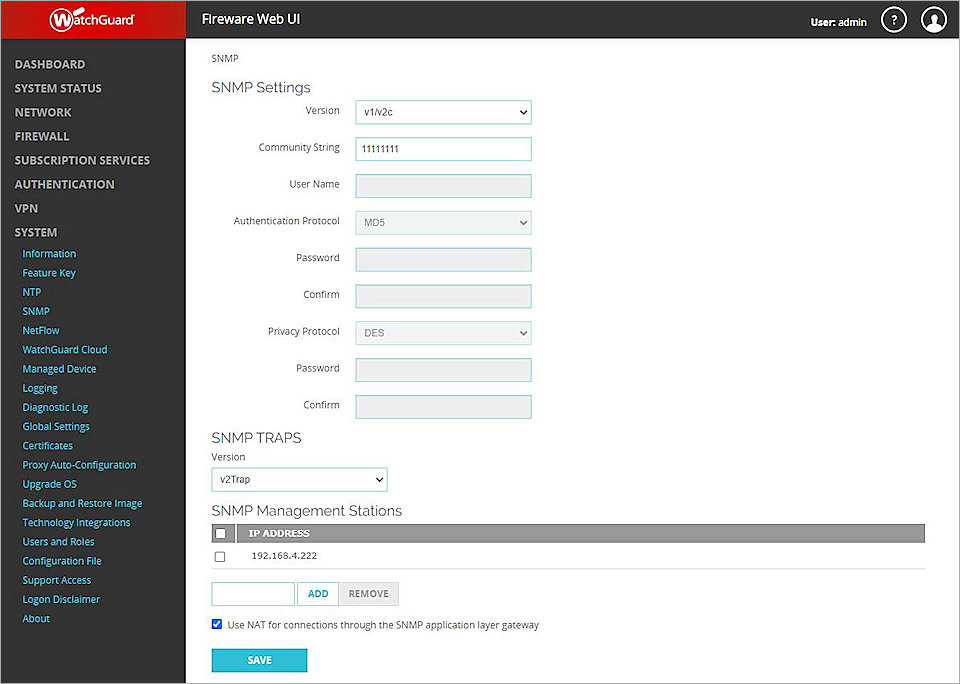
- Keep other settings at default values.
- Click Save.
Add an SNMP Policy
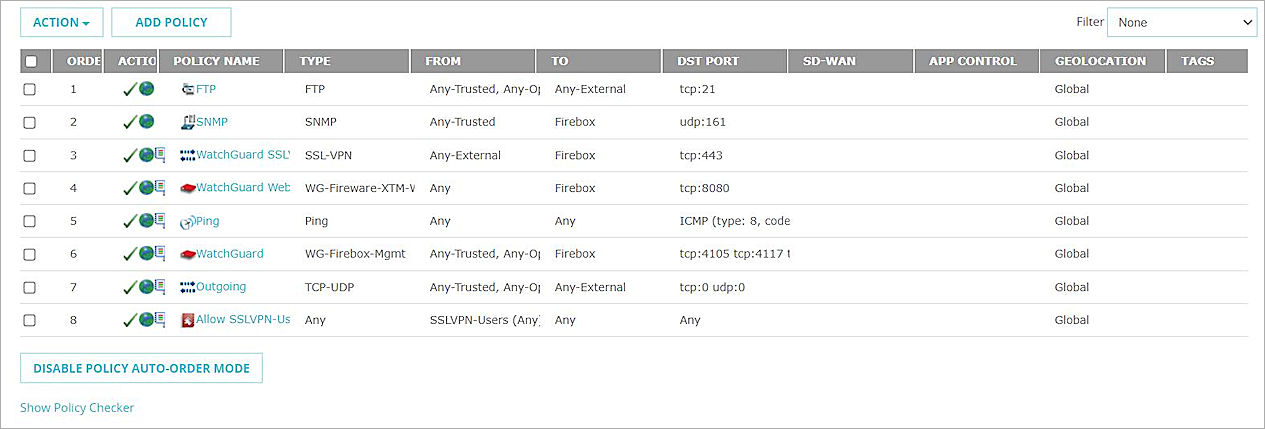
For the Firebox to receive SNMP polls, you must add an SNMP packet filter policy.
- Select Firewall > Firewall Policies.
- Add an SNMP packet filter policy that allows SNMP traffic from Any-Trusted to Firebox.
If you install the Domotz agent to an optional interface, specify Any-Optional instead of Any-Trusted.
Set Up Domotz
You install a Domotz agent on the Firebox trusted or optional network, then configure the community string to be the same as the configuration on the Firebox.
- Install Domotz Agent Manager.
- Log in to Domotz Pro.
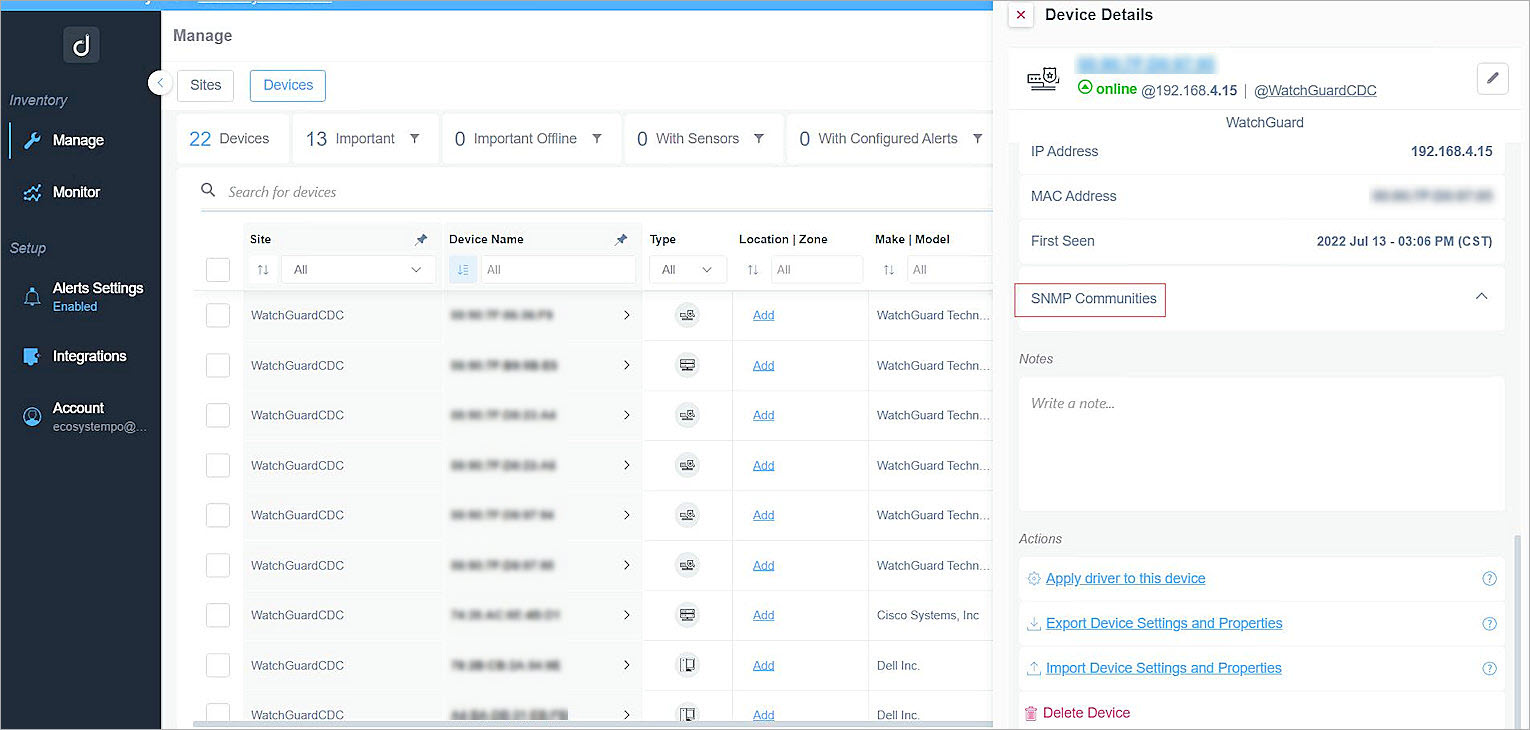
- Select Inventory > Manage > Devices.
- Click the Device Name. Note that you can use IP | Mac Address entries to help you find the target Firebox.

- From Devices Details, select Info > SNMP Communities.
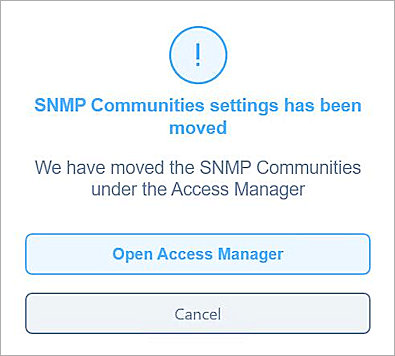
- From the SNMP Communities Settings Has Been Moved dialog box, click Open Access Manager.
- Click Edit the SNMP Authentication.
The Edit SNMP Configuration dialog box opens. - For Version, select v2.
- In the Community Read and Community Read/Write text boxes, type the value that you used for the SNMP Community String.
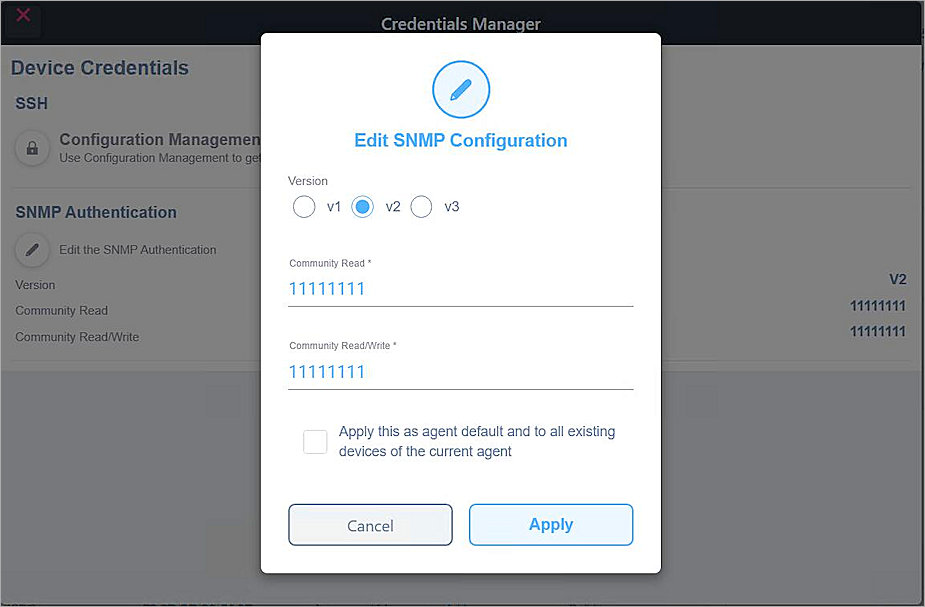
- Click Apply.
Test the Integration
To test the integration, you can add SMNP sensors for the Firebox and verify that the information that shows in Domotz. You can also add an alert and verify that you receive an email notification when a monitored event occurs on the Firebox.
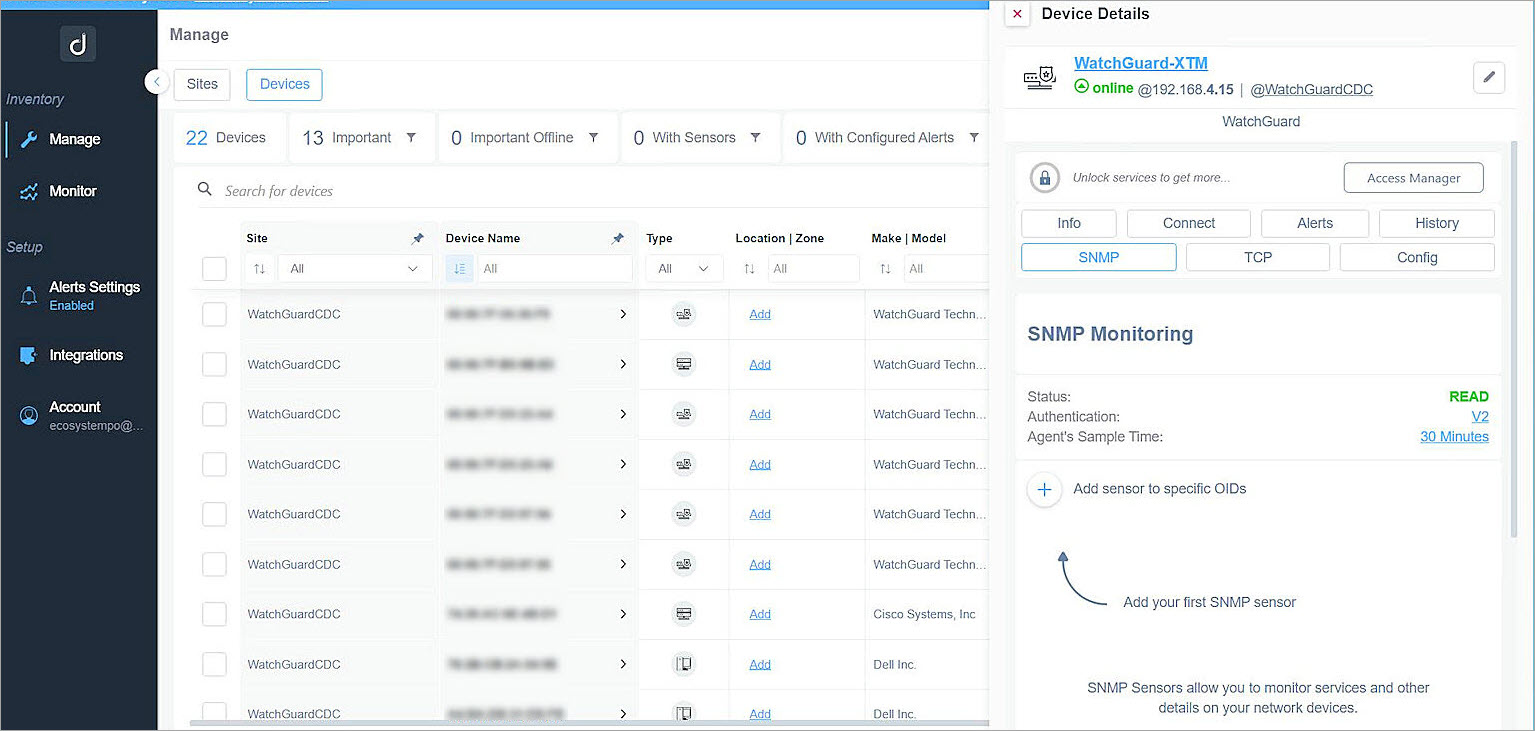
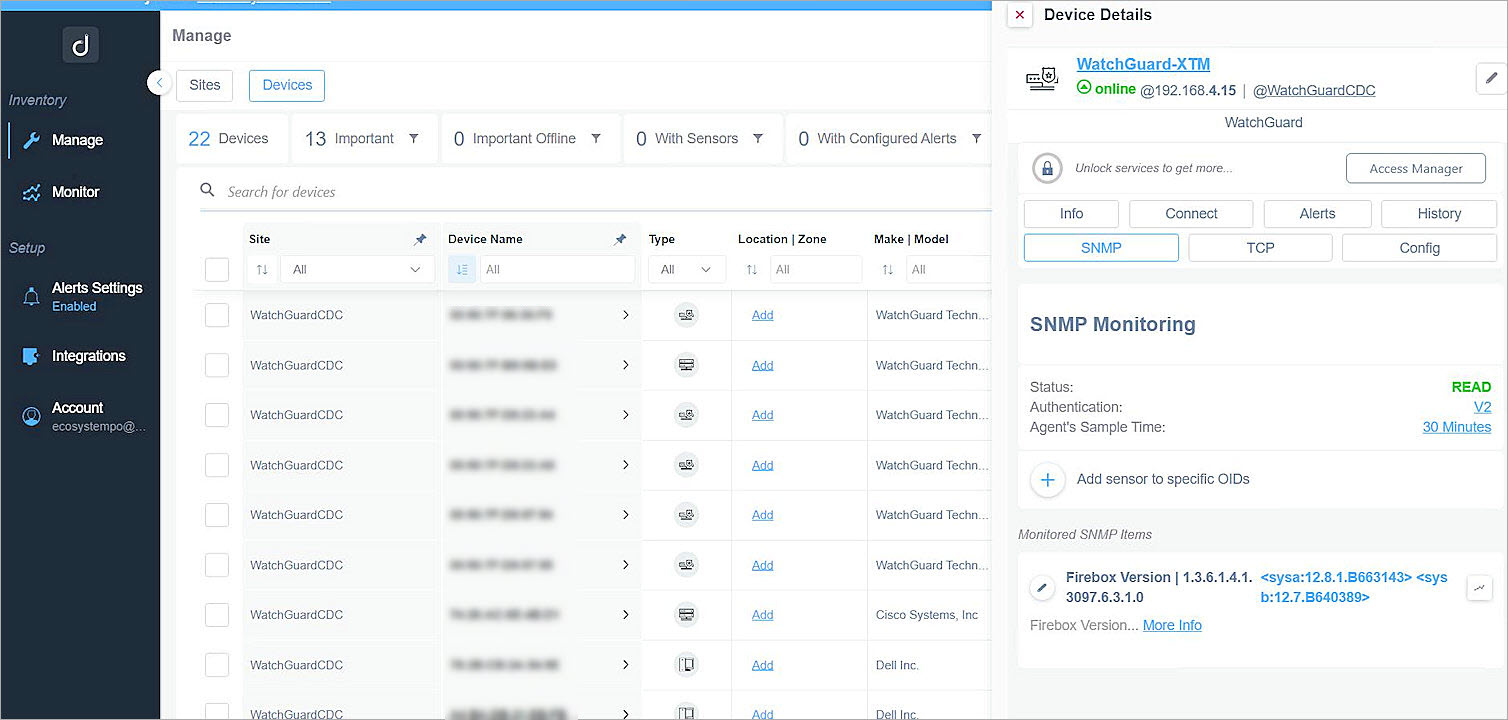
- From Domotz Pro, go to Device Details and click SNMP.
- From the SNMP Monitoring section, click Add Sensor to Specific OIDs.
- Click Manually Define an SNMP Sensor.
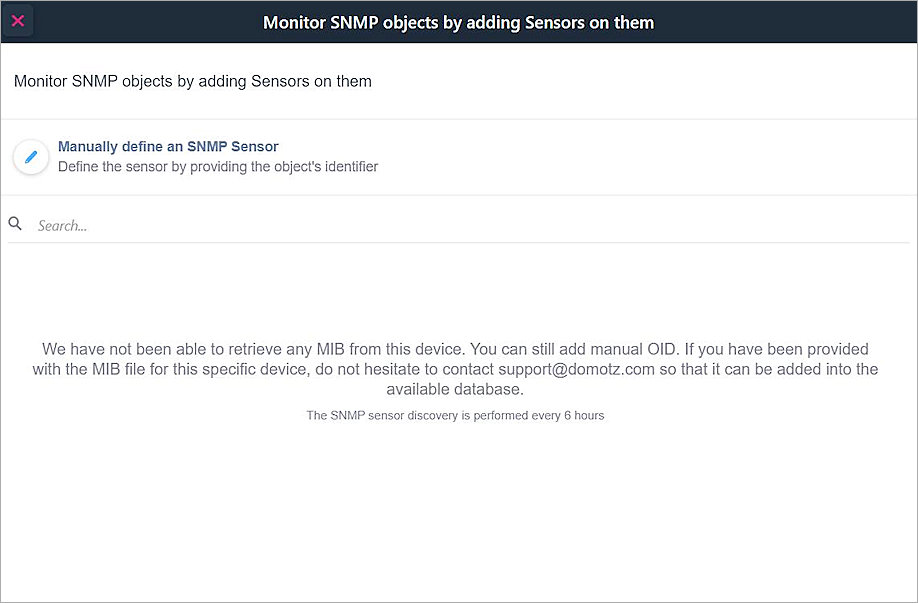
- In the Define the SNMP Sensor to Monitor dialog box, define the sensor configuration. This example uses an OID that returns the version of Fireware installed on the Firebox.
- In the Sensor Name text box, type a name for the sensor.
- In the Description text box, type a description for the sensor.
- In the OID text box, type 1.3.6.1.4.1.3097.6.3.1.0.
- For the Output Type, select String.

- Click Add.
- After a few minutes, check that the values for the Firebox Version OID shows in Device Details.
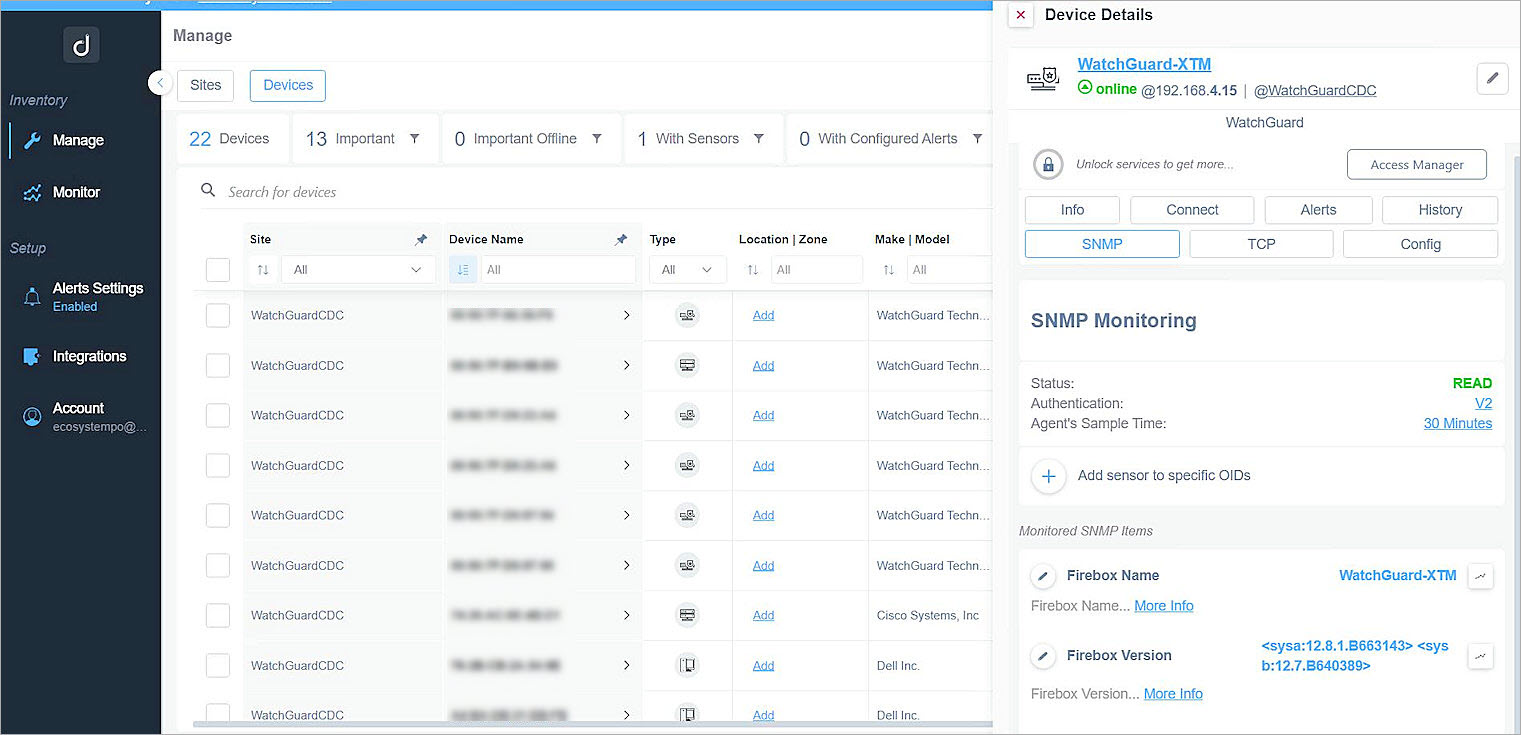
- Repeat Steps 2-5 to add an SNMP Sensor that you name Firebox Name, with OID 1.3.6.1.2.1.1.5.0.
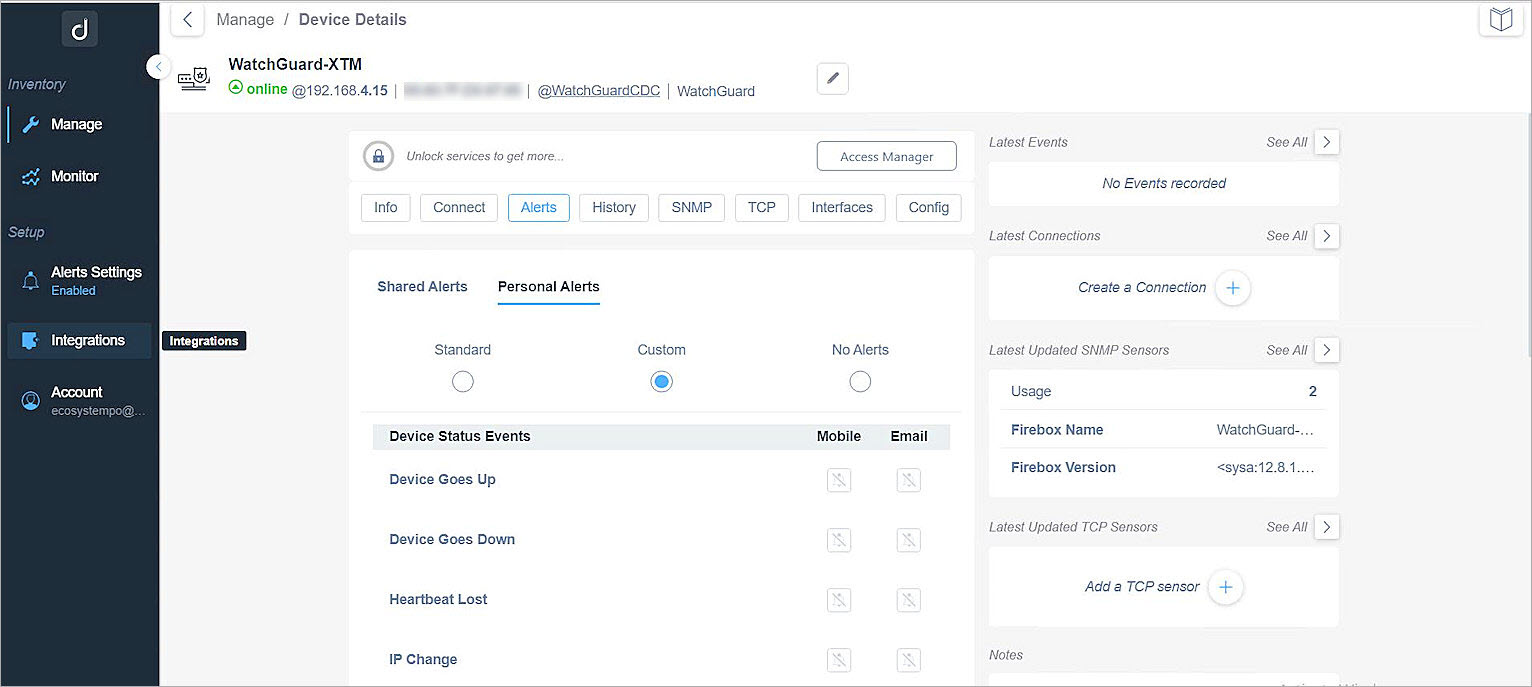
- From Device Details, click the device name.
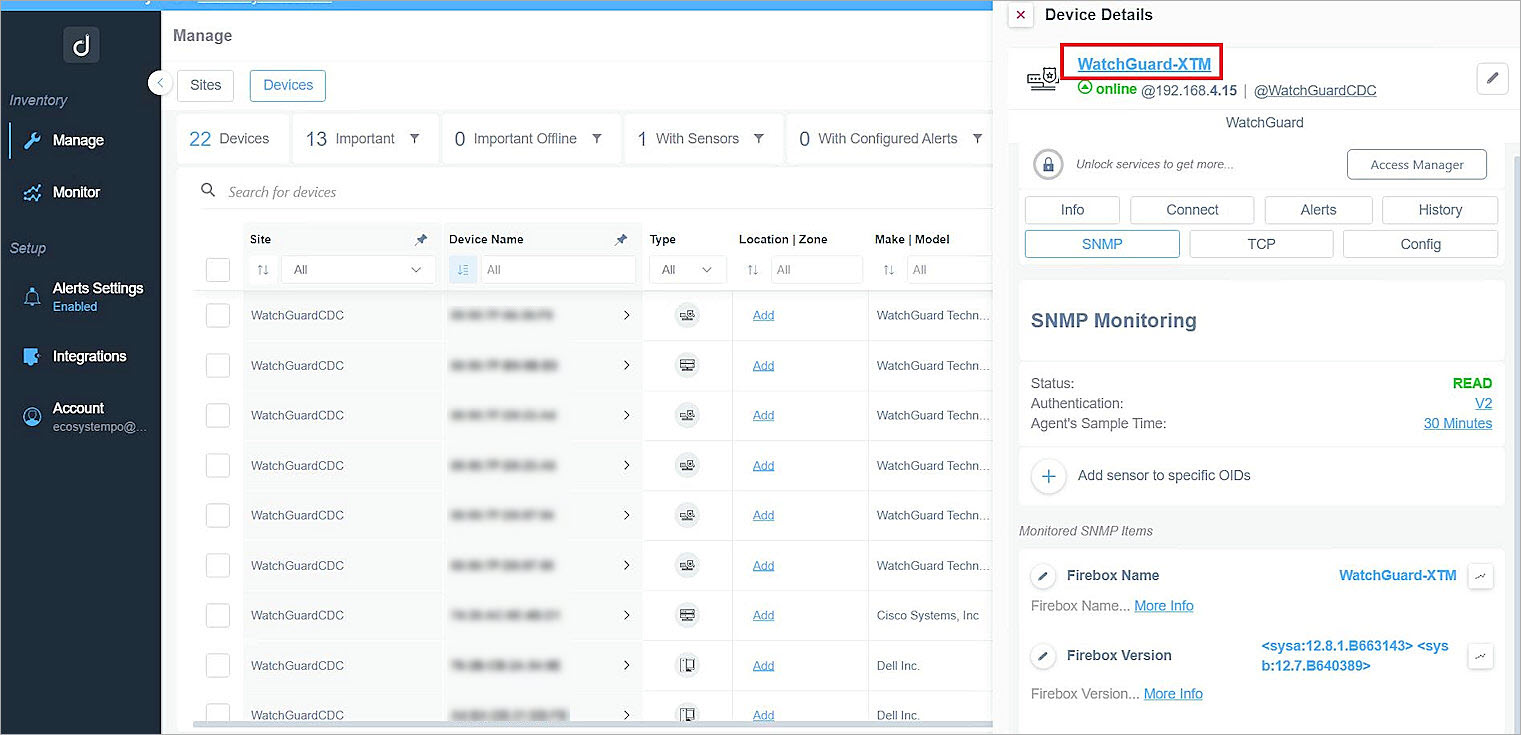
- Click Alerts, then select the Personal Alerts tab and select Custom.
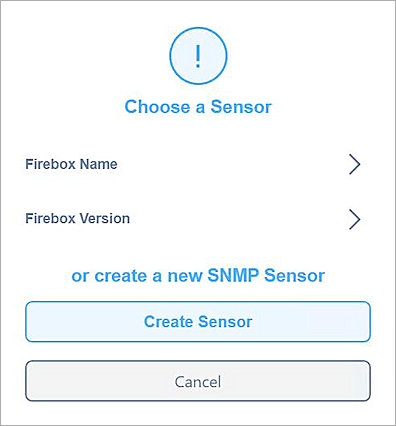
- From the SNMP Sensors section, click Configure an SNMP Alert.

- From Firebox Name, select your SNMP Sensor.
- In the Alert Configuration dialog box, configure the alert settings.
- In the Alert Name text box, type an alert name that describes the behavior that triggers the alert.
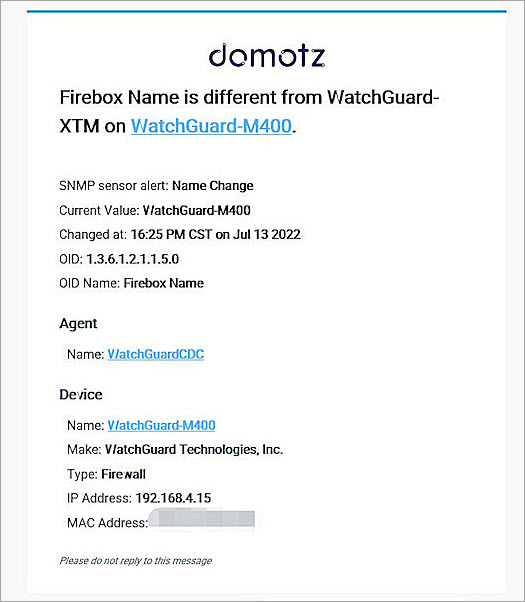
- From Alert Behaviour, select is different from and type the name of the current Firebox. For this example, the name is WatchGuard-XTM.
- From the Communication Channel section, select the Email check box.
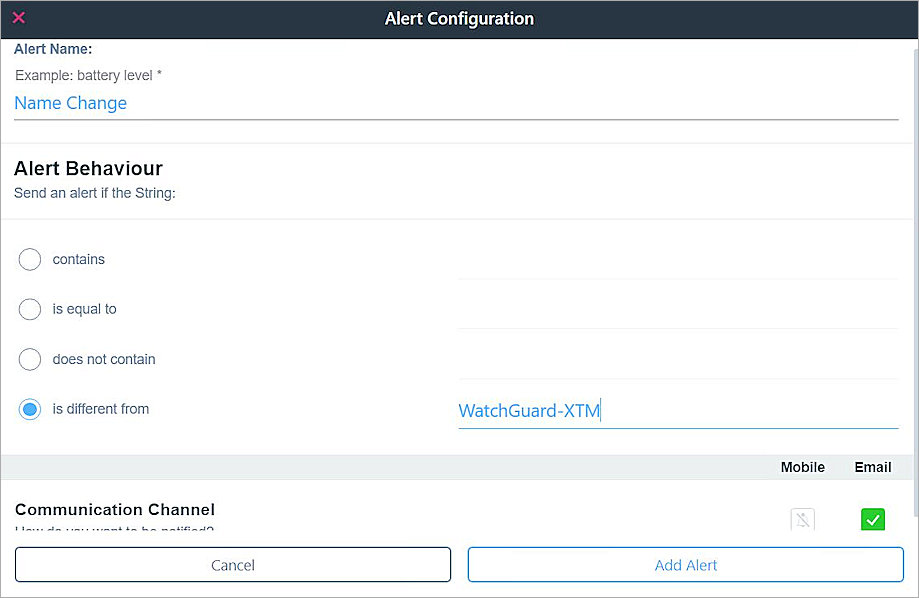
- Click Add Alert.
The alert configuration shows on the Device Details page.

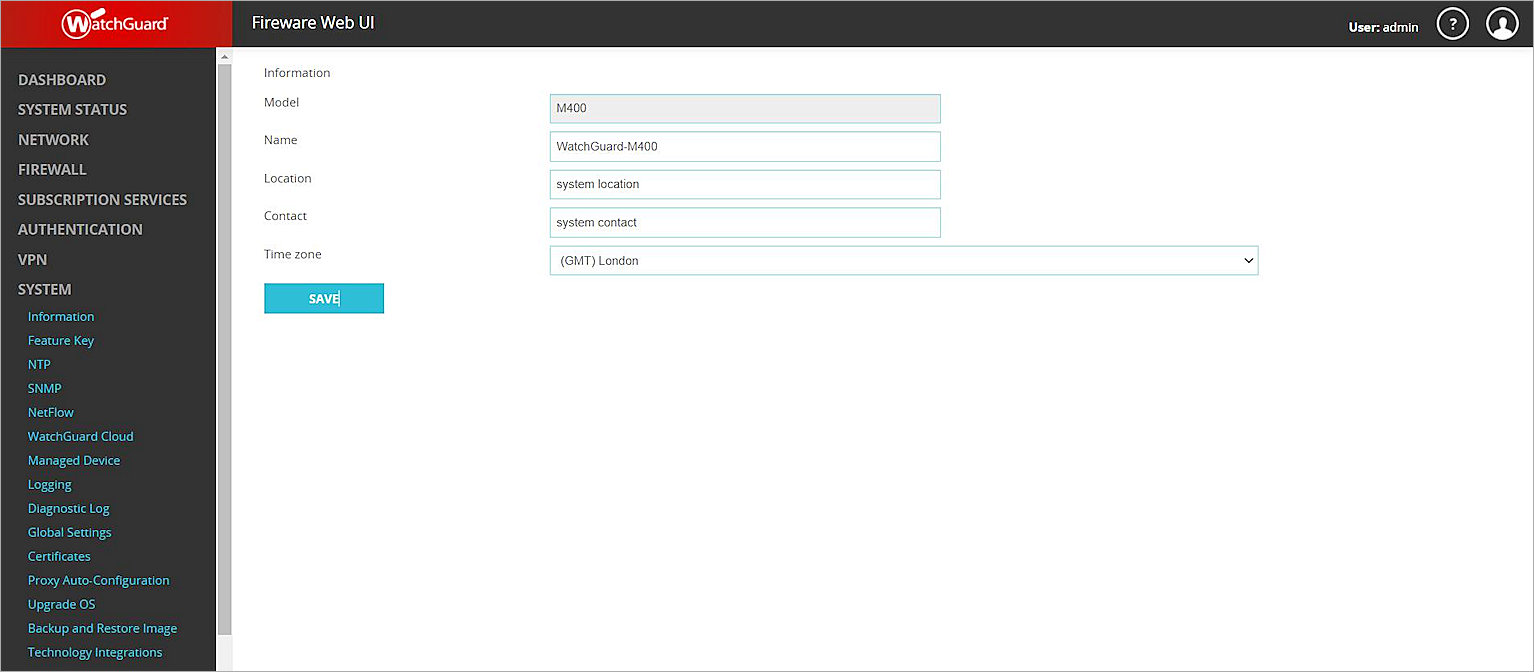
- Log in to Fireware Web UI at:
https://<your Firebox IP address>:8080 - Select System > Information.
- Change the Firebox Name.
- Click Save.
- You receive a notification email from Domotz about the name change.