Deployment Overview
This document describes how to enable two factor authentication for Autotask PSA and activate an Autotask PSA token in the AuthPoint mobile app to use for authentication.
Before You Begin
Before you begin these procedures, make sure that:
- End-users have an Autotask PSA account
- End-users have an AuthPoint user account and have downloaded the AuthPoint mobile app
Configure Autotask PSA
- Log in to Autotask PSA as a system administrator.
- Click
 .
.

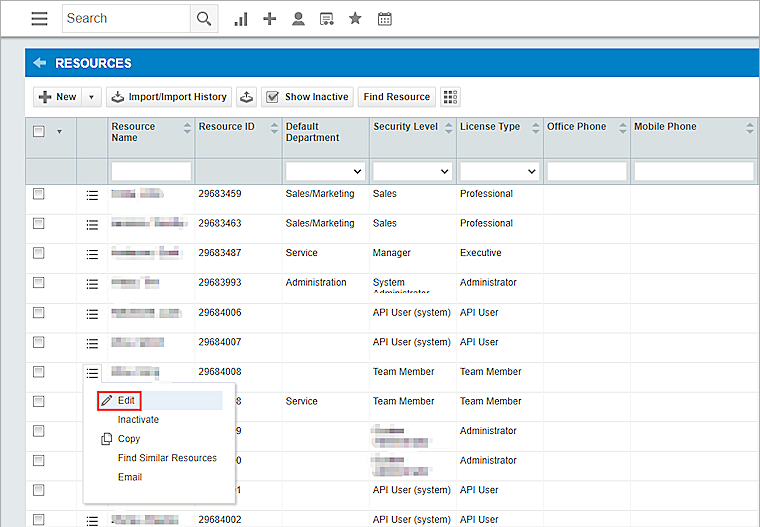
- Select Admin > Resources (Users).

- Select the user, then open the menu and select Edit.
- Select the Security tab.
- In the Two-Factor Authentication section, select the Require Two-Factor Authentication for this Resource check box.
- Select Not Required for next login.
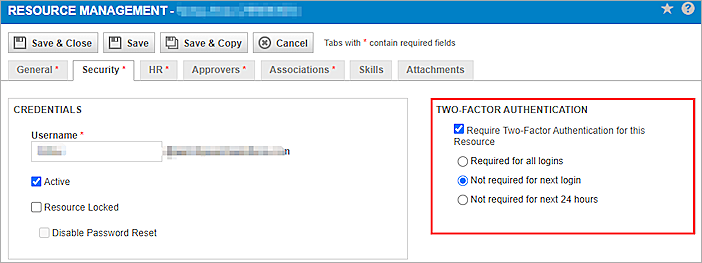
- Click Save & Close.
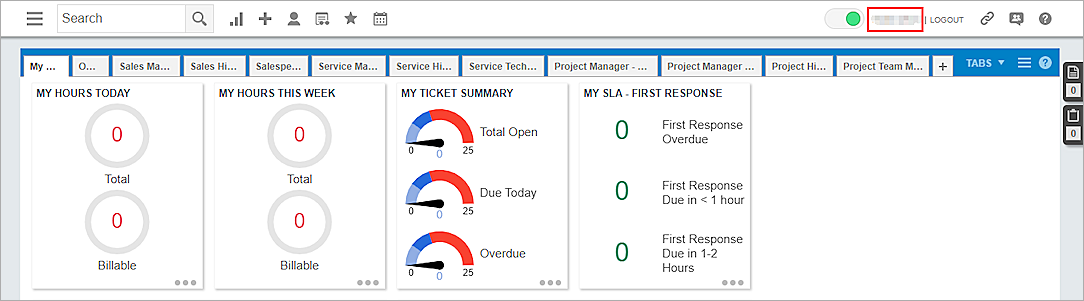
- Log in to Autotask PSA with the user you just edited.
- Click on the user's profile.
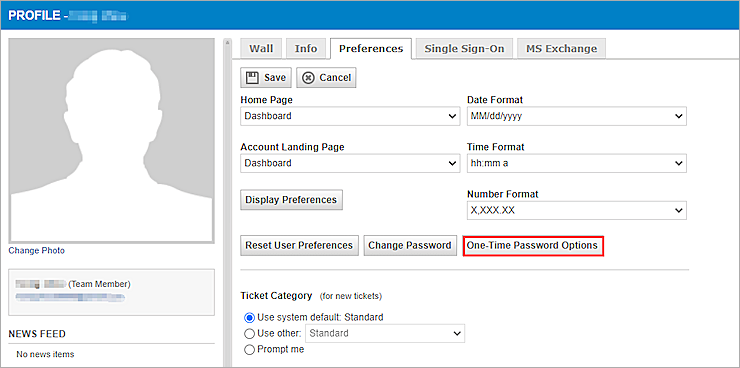
- Select the Preferences tab.
- Click One-Time Password Options.
- Click Request New QR Code.
- Open the AuthPoint app on your mobile device and tap
 to open the QR code reader. Scan the QR code on the screen to activate a third-party token for Autotask. If you have not yet activated a token in the AuthPoint mobile app, tap Activate when you open the app to open the QR code reader.
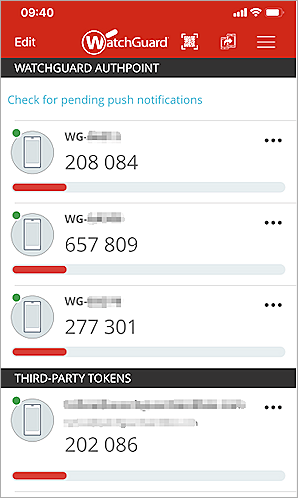
Your Autotask token is activated and listed in Third-Party Tokens on the Token Management screen in the AuthPoint app.
- In Autotask, in the Generated Code text box, type the code displayed in the AuthPoint mobile app.
- In the Autotask Password text box, type the Autotask PSA password.
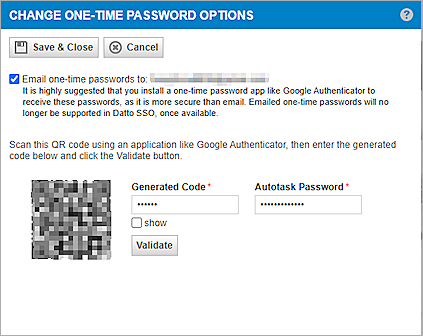
- Click Validate.
- Click Save & Close.
Test the Integration
- In a web browser, navigate to AutoTask PSA and log in.
- In the One-Time Password Token text box, type the OTP for your Autotask token. You can see the OTP for your token in the AuthPoint mobile app.
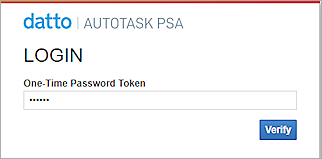
- Click Verify.
You are successfully logged in to your Autotask PSA account.