The WatchGuard Agent is responsible for the deployment of WatchGuard product software. To facilitate this in ConnectWise RMM, you can use automation tasks to create installation tasks for the WatchGuard Agent on your Windows devices. Complete one of these procedures:
- Create a Task to Install the WatchGuard Agent on Windows Devices
- Create a Task to Install the WatchGuard Agent on Windows Devices Manually Mapped in the Onboarding Application
After you create the task, you schedule it. For more information, go to Schedule the Installation Task.
Create a Task to Install the WatchGuard Agent on Windows Devices
Before you begin, make sure that you have configured the WatchGuard Agent plug-in to automatically map ConnectWise RMM companies with WatchGuard Cloud accounts.
You must also have the runner_shell.ps1 script, available from the downloaded ConnectWiseRMM.ZIP file. The provided script is used to automate agent installation when the account mapping is completed in the WatchGuard Agent onboarding application or you have manually mapped accounts to the specified custom fields.
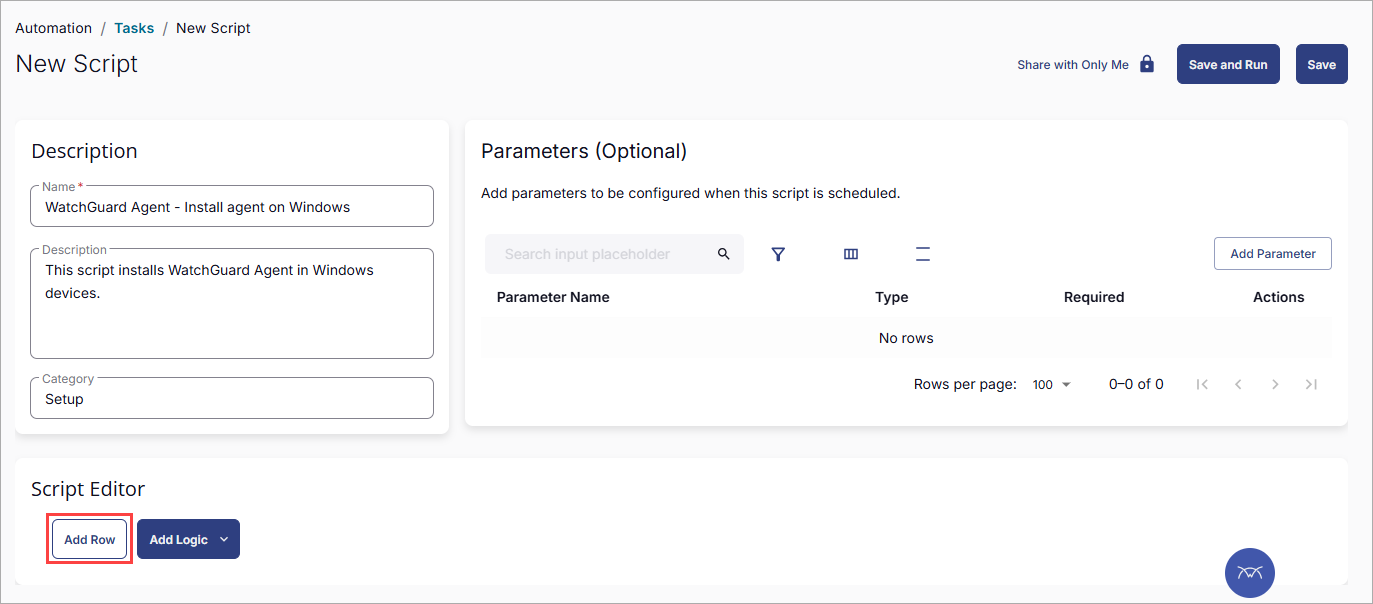
To create a task to install the WatchGuard Agent on Windows devices, from ConnectWise RMM:
- Go to Automation > Tasks.

- In the upper-right, click Add > Script Editor.
- In the Name box, type WatchGuard Agent - Install agent on Windows.
- In the Description box, type This script installs WatchGuard Agent on Windows devices.
- From the Category drop-down list, select Setup.
- In the Script Editor section, click Add Row.
- Add a pre-defined variable for the WatchGuard Account ID:
- From the drop-down list, select Function.
- Select Set Pre-defined Variable.
- In the dialog box that opens, in the Variable Name text box, type AccountID.
- Select Custom Field.
- Select WatchGuard Account ID.
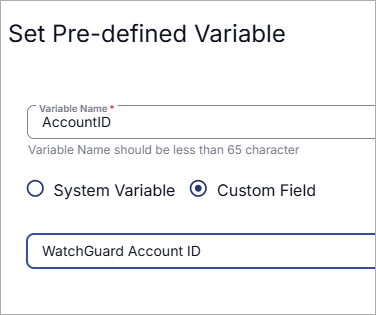
- Click Save.
- From the Operating System drop-down list, select Windows.
- Add a pre-defined variable for the WatchGuard Token:
- Click Add Row.
- From the drop-down list, select Function.
- Select Set Pre-defined Variable.
- In the dialog box that opens, in the Variable Name text box, type Token.
- Select Custom Field.
- Select WatchGuard Token.
- Click Save.
- From the Operating System drop-down list, select Windows.
- Add a user variable to run the PowerShell script runner_shell.ps1:
- Click Add Row.
- From the drop-down list, select Function.
- Select Set User Variable.
- In the dialog box that opens, in the Variable Name text box, type ScriptAction.
- In the Value text box, type installv2.
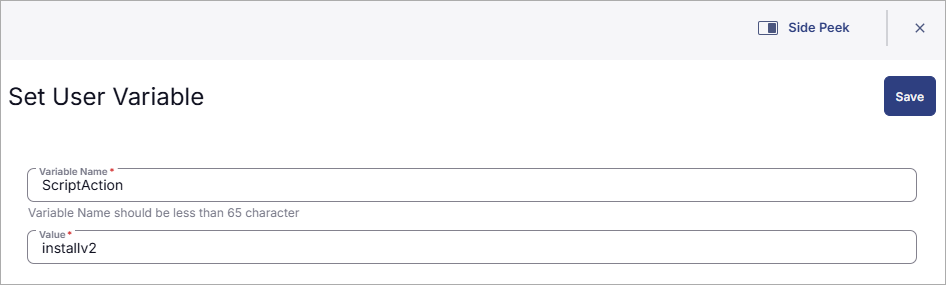
- Click Save.
- From the Operating System drop-down list, select Windows.
- Add the PowerShell Script:
- Click Add Row.
- From the drop-down list, select Function.
- Select PowerShell Script.
- Copy and paste the PowerShell script runner_shell.ps1 into Script.
- Click Save.
- From the Operating System drop-down list, select Windows.
- Define a script log message to include the script results:
- Click Add Row.
- From the drop-down list, select Function.
- Select Script Log.
- In the Script Log Message box, type %output%.
- Click Save.
- From the Operating System drop-down list, select Windows.
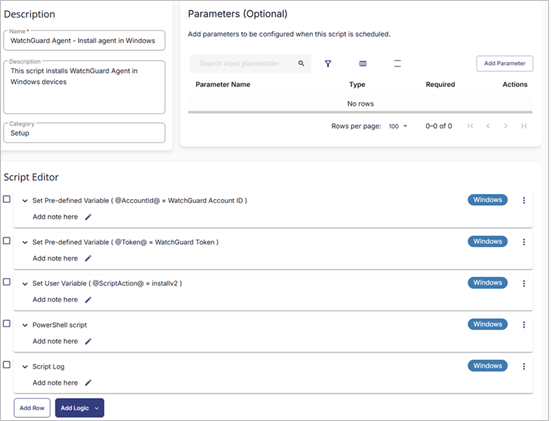
- In the upper-right corner, click Save.
You can now Schedule the Installation Task.
Create a Task to Install the WatchGuard Agent on Windows Devices Manually Mapped in the Onboarding Application
Before you begin, make sure that you have manually mapped the ConnectWise RMM and WatchGuard Cloud accounts. Complete the procedure in this section to create an installation task when you did not configure the API integration between ConnectWise RMM and WatchGuard Cloud. You must also have the runner_shell.ps1 script available from the downloaded ConnectWiseRMM.ZIP file. The provided script is used to automate agent installation when the account mapping is completed in the WatchGuard Agent onboarding application or you have manually mapped accounts to the specified custom fields.
For more information, go to Map ConnectWise RMM and WatchGuard Cloud Accounts.
To add a task to install the WatchGuard Agent on Windows devices when you did not configure a connection with ConnectWise RMM:
- Go to Automation > Tasks.
- In the upper-right corner, click Add > Script Editor.
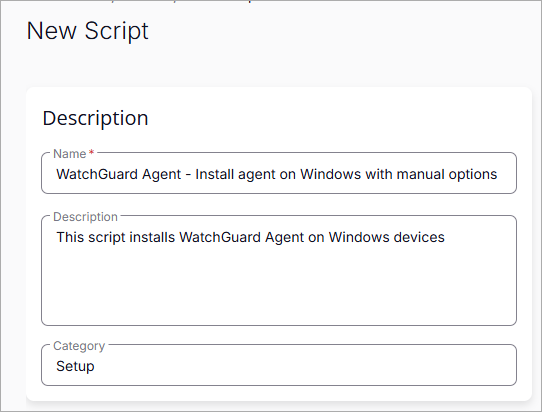
- In the Name box, type WatchGuard Agent - Install agent on Windows with manual options.
- In the Description box, type This script installs WatchGuard Agent on Windows devices.
- From the Category drop-down list, select Setup.
- In the Script Editor section, click Add Row.
- Add a pre-defined variable for the WatchGuard Account ID:
- From the drop-down list, select Function.
- Select Set Pre-defined Variable.
- In the dialog box that opens, in the Variable Name text box, type AccountID.
- Select Custom Field.
- Select WatchGuard Account ID.
- Click Save.
- From the Operating System drop-down list, select Windows.
- Add a pre-defined variable for the WatchGuard Token:
- Click Add Row.
- From the drop-down list, select Function.
- Select Set Pre-defined Variable.
- In the dialog box that opens, in the Variable Name text box, type Token.
- Select Custom Field.
- Select WatchGuard Token.
- Click Save.
- From the Operating System drop-down list, select Windows.
- Add a pre-defined variable for the WatchGuard Client Company ID:
- Click Add Row.
- From the drop-down list, select Function.
- Select Set Pre-defined Variable.
- In the dialog box that opens, in the Variable Name text box, type ClientId.
- Select Custom Field.
- Select WatchGuard Client Company ID.
- Click Save.
- From the Operating System drop-down list, select Windows.
- Add a pre-defined variable for the WatchGuard Deployment ID:
- Click Add Row.
- From the drop-down list, select Function.
- Select Set Pre-defined Variable.
- In the dialog box that opens, in the Variable Name text box, type DeploymentSetting.
- Select Custom Field.
- Select WatchGuard Deployment ID.
- Click Save.
- From the Operating System drop-down list, select Windows.
- Add a user variable to run the PowerShell script runner_shell.ps1:
- Click Add Row.
- From the drop-down list, select Function.
- Select Set User Variable.
- In the dialog box that opens, in the Variable Name text box, type ScriptAction.
- In the Value text box, type installv2.
- Click Save.
- From the Operating System drop-down list, select Windows.
- Add the PowerShell script:
- Click Add Row.
- From the drop-down list, select Function.
- Select PowerShell Script.
- Copy and paste the PowerShell script runner_shell.ps1 into Script.
- Click Save.
- From the Operating System drop-down list, select Windows.
- Create a script log message to include the script results:
- Click Add Row.
- From the drop-down list, select Function.
- Select Script Log.
- In the Script Log Message box, type %output%.
- Click Save.
- From the Operating System drop-down list, select Windows.

- In the upper-right corner, click Save.
You can now Schedule the Installation Task.
Schedule the Installation Task
After you create the task, you can schedule it to run now, when the RMM agent next connects with ConnectWise, or at a specific scheduled time.
To schedule the installation task in ConnectWise RMM:
- Go to Automation > Tasks
- Select the task you want to schedule.
- Click the
 in the row for the task.
 - Select a Schedule Mode.
- To select the target resources (companies and sites), click Select Targets.

- Click Run.
View the Task Results
After the task runs, you can view the history and execution results in the Scheduled Tasks section.
To view the history and execution results in ConnectWise RMM:
- Go to Automation > Scheduled Tasks.
- Select the scheduled task that you want to view the history for.
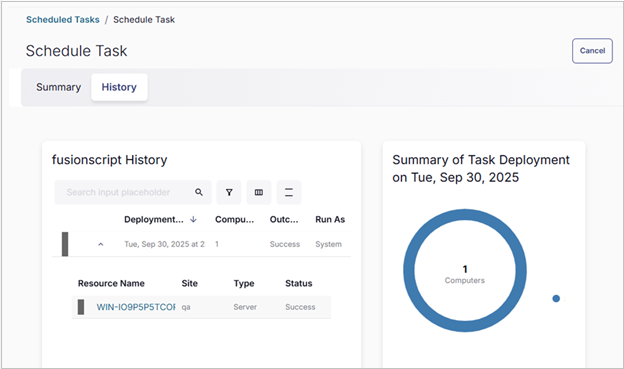
- To view the execution results, in the Resource Name column, select the endpoint of the executed task.
- Select the task name.
The Task Output dialog box opens.

Configure the WatchGuard Cloud and ConnectWise RMM Connection
Create Installation Tasks for Mac Devices from ConnectWise RMM