
Related Topics
Install and Configure AD Helper
Threat Detection and Response includes the AD Helper component. If your network has an Active Directory server, you can install AD Helper to manage automated installation and updates of Host Sensors on your network. After it is installed and configured, AD Helper sends the list of domains and hosts from your Active Directory server to your TDR account. In your TDR account, you specify on which hosts AD Helper installs Host Sensors.
Install AD Helper
You can install AD Helper on any Windows server or computer in your network domain.
For details about AD Helper OS compatibility, see the TDR Release notes available on the Fireware Release Notes page.
Prerequisites:
- Java 8 must be installed on the Windows computer where you install AD Helper
- You must run the AD Helper .MSI installer as a Windows administrator
To install AD Helper, on the computer where you want to install AD Helper:
- Log In to the TDR Web UI as a user with Operator credentials.
- Select Devices > AD Helper.
The AD Helper Configuration page appears.
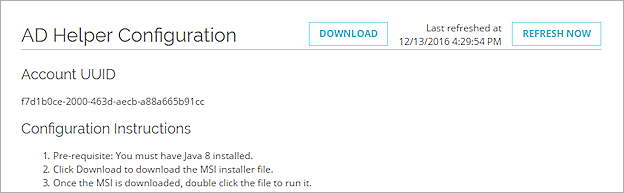
- From the AD Helper Configuration page, copy the Account UUID.
When you configure AD Helper in the next procedure, you add the Account UUID . - To download the .MSI installer file, click Download .
- To run the installer, double-click the .MSI installer file you downloaded.
- If required, type your Windows administrator credentials.
You can also run the .MSI installer from a Windows command prompt as an administrator:
- In the Windows Start menu, right-click Command Prompt and select Run as Administrator.
A Windows command prompt window appears. - Change directory to the location where you downloaded the .MSI file.
- Type this command: msiexec /package helper.msi
AD Helper runs as the local service helper.
If you install AD Helper behind a Firebox that has an HTTPS proxy policy with content inspection and certification validation enabled, it might be necessary to configure an HTTPS packet filter policy to allow connections from AD Helper to the TDR cloud. For more information, see Configure a Firewall Policy for TDR Traffic.
Configure AD Helper
After you install AD Helper, you must configure it to connect to your Active Directory domain controller and the Cloud URL of your TDR account.
Identify an Active Domain User Account for AD Helper
In the AD Helper settings, you must specify the credentials for a user account that is a member of either the Domain Admin or Domain Users security group. If you select a user account that is a member of only the Domain Users security group, make sure the security permissions for the user account are configured correctly to allow you to install software on the target endpoints.
The Domain User account installs the Host Sensors on hosts on your network. Make sure that the Domain User account you select has permission to complete these operations on all hosts on your network:
- Connect to the host
- Mount the share ADMIN$
- Create a file on the host
- Execute commands on the host
- Install software on the host
Configure AD Helper Settings
To configure AD Helper, you connect to a local web server on port 8080. If you prefer to use a different port, you can change the port AD Helper uses. For more information, see Change the AD Helper Port.
To connect to AD Helper:
- On the computer where you installed AD Helper, connect to the AD Helper web UI at http://localhost:8080. Tip!If you use Internet Explorer, you must type http://localhost:8080/app.
The Active Directory Helper web UI appears. - In the AD Helper web UI, select Configuration > Properties.
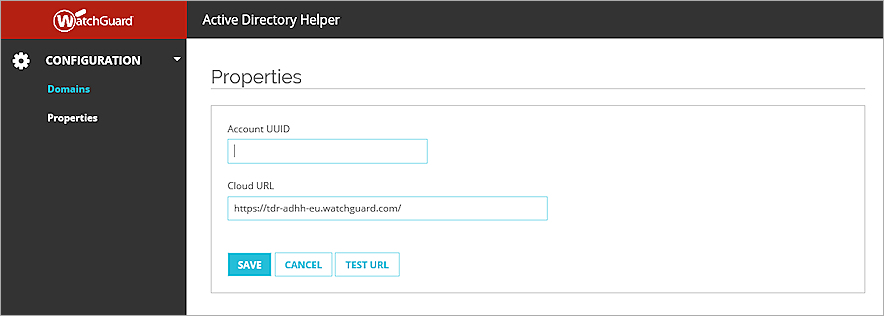
- In the Account UUID text box, paste your Account UUID.
You can copy the Account UUID from the page where you downloaded the .MSI installer. - The Cloud URL is automatically configured with the URL for your TDR account. If WatchGuard instructs you to change the URL, type or paste the Cloud URL provided by WatchGuard.
- Click Save.
The account properties are saved and the connection to your TDR account is tested automatically. - To test the connection to your TDR account again, click Test URL.
The test result appears in a banner at the top of the page. - Select Configuration > Domains.
The Domains page appears. - Click Add Domain.
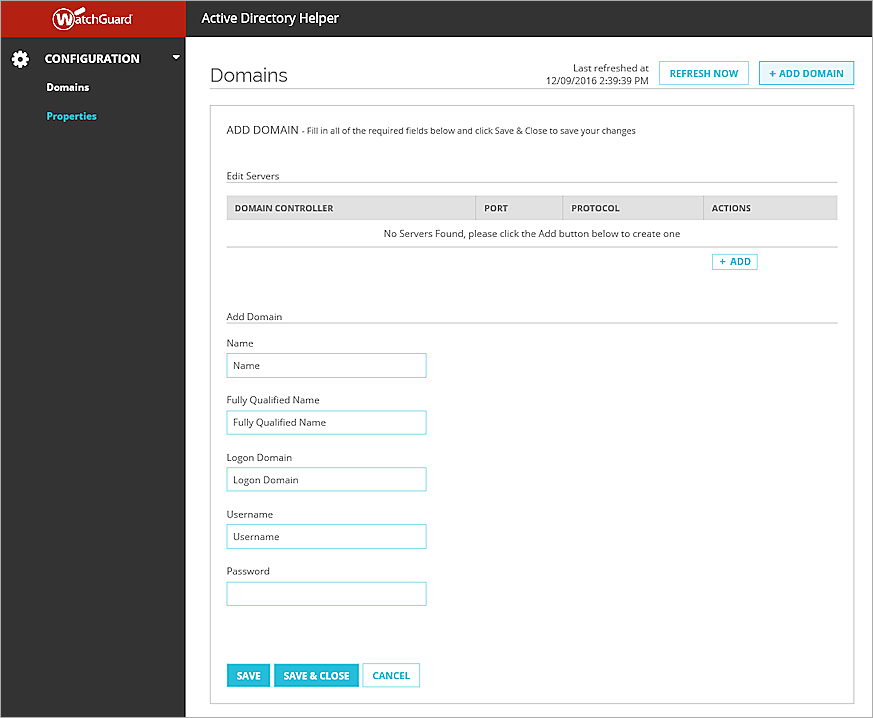
- To add the domain controller, click Add.
The Add Server dialog box appears.
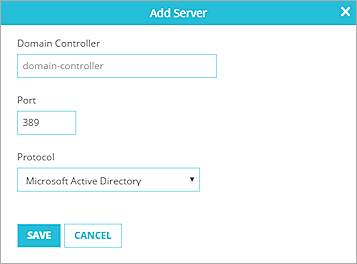
- In the Domain Controller text box, type the name of your Active Directory domain controller.
- In the Port text box, specify the port you use for connections to the domain controller.
The default setting is port 389. - From the Protocol drop-down list, select the protocol to use for the connection to the domain controller.
- Click Save.
The Domain Controller is added to the list. of servers - In the Name text box, type the name of your Active Directory domain.
- In the Fully Qualified Name text box, type the FQDN (fully qualified domain name) of your Active Directory domain.
- In the Logon Domain text box, type the domain name that you must specify to log in to the Active Directory domain controller.
- In the Username and Password text boxes, type the account credentials that AD Helper must use to log in to your Active Directory domain controller.
- Click Save.
AD Helper connects to your Active Directory domain controller and sends the list of hosts and domains to your TDR account.
Active Directory synchronization does not happen instantly. It can take up to two hours for AD Helper to fully synchronize all host, group, and domain information to your TDR account.
See Hosts, Domains, and AD Helper Status
After you configure AD Helper, AD Helper connects to your Active Directory domain controller and sends the list of hosts, groups, and domains to your TDR account. To see the hosts, groups, and domains from Active Directory, and check the status of AD Helper, you must log in to the TDR web UI.
- Log In to the TDR Web UI as a user with Operator credentials.
- To see information about your hosts, groups, domains, and AD Helper:
- To see the list of hosts, select Devices > Hosts.
- To see the list of domains, select Configuration > Domains.
- To see the list of Active Directory groups, select Configuration > Groups. In the Type column, select Active Directory and click Apply.
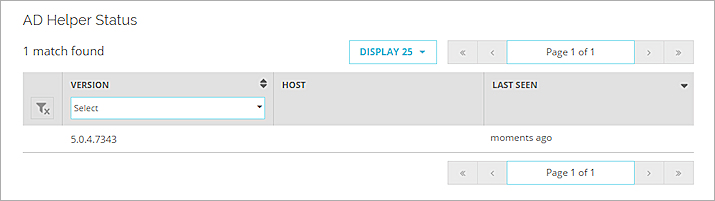
- To see the status of AD Helper, select Devices > AD Helper.
The AD Helper Status section shows the installed version of AD Helper, the name of the host on which it is installed, and how long ago the last heartbeat was received from AD Helper.
- To see information about any problems with AD Helper, click
 . Tip!The option to expand AD helper status appears only if AD Helper reports a problem.
After you set up AD Helper, from your TDR account, you can install Host Sensors on the hosts in your Active Directory domain. For more information, see TDR Host Sensor Automated Installation.
Change the AD Helper Port
The AD Helper user interface uses port 8080 by default. If you want to change the port you use to connect to AD Helper, you can edit the AD Helper configuration file.
To change the AD Helper port:
- On the computer where you installed AD Helper, edit the file C:\Program Files (x86)\WatchGuard\Active Directory Helper\helper.xml.
- On line 42, find --httpPort=8080. Replace 8080 with the port number you want to use.
- Save the file.
For AD Helper to use the port you specified, you must restart it:
- Open a Windows command prompt as an administrator.
- In the Command Prompt window, paste or type this command:
"C:\Program Files (x86)\WatchGuard\Active Directory Helper\helper.exe" restart