
Related Topics
Add VPN Resources
A VPN resource is a network that is allowed to connect through a VPN tunnel you specify. If a VPN endpoint device has a static IP address, all trusted networks behind the device are automatically allowed to connect. The Management Server creates a default VPN resource for the device that includes all trusted networks.
However, if the trusted network behind a device has many routed or secondary networks that you want to allow through the tunnel, you must add them manually as VPN resources for the device. If an endpoint device has a dynamic IP address, you must either get its current resources, as described below, or add any networks behind that device as VPN resources. The Management Server does not automatically create VPN resources for those networks.
Get the Current Resources from a Device
If an endpoint device has a dynamic IP address, you can use WatchGuard System Manager to get the policies that already apply to the networks behind the device. Or, you can skip this procedure and add the networks as VPN resources instead.
If you modify a predefined resource, such as the Trusted Network resource, if you select the Download Trusted and Optional Network policies option when you get the current resources from your device, the changes you made to the resource are replaced by the default settings for the predefined resource.
To get the current resources from your Firebox:
- On the Device Management tab, select a managed device and select Edit > Update Device.
The Update Device dialog box appears.
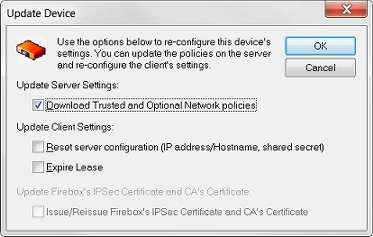
- Select the Download Trusted and Optional Network policies check box.
- Click OK.
Create a New VPN Resource
To add a VPN resource, on the Device Management tab:
- Select a device and click
 .
.
Or, right-click the device and select Insert VPN Resource.
The VPN Resource dialog box for that device appears.
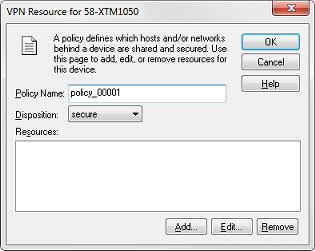
- In the Policy Name text box, type a name for the policy.
This name later appears in the Device Management window and in the Add VPN Wizard. - From the Disposition drop-down list, select one of these options:
secure
Encrypt traffic to and from this resource. This is the most commonly used option.
bypass
Send the traffic in clear text. You might use this option if one Firebox is in drop-in mode and the tunnel routes traffic to the drop-in network. In this case, the drop-in IP address must be bypassed but not blocked or the tunnel cannot negotiate.
block
Do not allow the traffic through the VPN. You might use this option to specify that one or more IP addresses cannot use a VPN that allows a full subnet, but only when given a higher precedence than the full subnet.
The Disposition drop-down list does not appear when you create a VPN resource for a Firebox X Edge that does not use Fireware v11.0 or higher, because only the secure option is supported.
- Add, edit, or delete resources.
- Click Add to add an IP address or a network address.
- Click Edit to edit a resource that you have selected in the list.
- To delete a resource, select the resource in the Resources list and click Remove.
- Click OK.
Add a Host or Network
- From the VPN Resource dialog box, click Add.
The Resource dialog box appears.
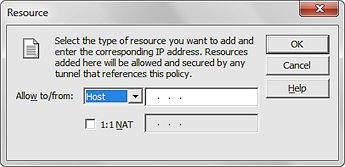
- From the Allow to/from drop-down list, select the resource type, and type the IP address or network address in the adjacent address text box.
- To use 1-to-1 NAT for the resource, select the 1:1 NAT check box and type the IP address for NAT in the adjacent text box.
- Click OK.