Applies To: AuthPoint Multi-Factor Authentication, AuthPoint Total Identity Security
This quick start topic reviews the general steps to configure and test multi-factor authentication (MFA) with AuthPoint. This guide introduces AuthPoint, reviews the basic components of AuthPoint, and helps you get started so you can test MFA before you fully deploy AuthPoint.
If you already understand the basic setup of AuthPoint and are ready to deploy it in your network, you can start with the AuthPoint Deployment Guide.
If you have not already purchased an AuthPoint license, you can start a free AuthPoint trial in WatchGuard Cloud. To start a trial, go to the Trials page. You can also contact your preferred WatchGuard Partner and have them set you up with an AuthPoint trial. For more information, see Manage Trials – Service Providers and Manage Trials – Subscribers.
Before you begin, we recommend that you familiarize yourself with the components of AuthPoint and some of the key terms related to AuthPoint:
AuthPoint has several components:
- AuthPoint Management UI — The AuthPoint management UI in WatchGuard Cloud is where you set up and manage your users, groups, resources, authentication policies, external identities, and the AuthPoint Gateway.
- AuthPoint Mobile App — The AuthPoint mobile app is required for authentication. You can view and manage tokens, approve push notifications, get OTPs, and scan QR codes.
- AuthPoint Gateway — The AuthPoint Gateway is a lightweight software application that you install on your network so that AuthPoint can communicate with your RADIUS clients and LDAP databases. The Gateway operates as a RADIUS server and is required for RADIUS authentication and for LDAP users to authenticate with SAML resources.
- Logon App — The Logon app is used to require authentication when users log on to a computer or server. There are two parts to the Logon app — the application you install on a computer or server and the resource you configure in AuthPoint.
- ADFS Agent — With the AuthPoint ADFS agent, you can add multi-factor authentication (MFA) to Active Directory Federation Services (ADFS) for additional security.
- RD Web Agent — With the AuthPoint RD Web agent, you can add MFA to Remote Desktop Web Access.
- WatchGuard Cloud Directory — The WatchGuard Cloud Directory is an authentication domain where you can add users and groups that are hosted in WatchGuard Cloud. Users and groups that you add to the WatchGuard Cloud Directory are automatically added to AuthPoint. To learn more, go to About the WatchGuard Cloud Directory.
- Zero Trust — Zero Trust is a WatchGuard Cloud feature where you create and manage policies and policy conditions for products such as AuthPoint.
- Zero Trust Policies — Zero Trust policies specify which resources users can authenticate to and which authentication methods they can use (Push, QR code, and OTP).
- Zero Trust Conditions — Zero Trust conditions enable you to set parameters that must be met for a policy to apply to a user authentication. This enables you to create policies that are more specific and granular. You configure conditions and then add them to policies.
- Resources — Resources are the applications and services that your users connect to. In AuthPoint there are seven types of resources:
- Firebox — The Firebox resource is used to enable AuthPoint as an authentication server on a Firebox that has been added to WatchGuard Cloud.
- RADIUS client — An application or service that uses RADIUS authentication (primarily firewalls and VPNs).
- OIDC — An application or service that uses OpenID Connect (OIDC) authentication, such as Microsoft 365, Salesforce, or the Firebox Access Portal.
- SAML — An application or service that uses Security Assertion Markup Language (SAML) authentication, such as Microsoft 365, Salesforce, or the Firebox Access Portal.
- IdP portal — A portal page that shows users the SAML resources available to them.
- Logon app — The Logon app resource is used to configure and define authentication policies for the Logon app.
- ADFS — The ADFS resource is used to add MFA to ADFS authentication.
- RD Web — The RD Web resource is used to add MFA to Remote Desktop Web Access.
- RESTful API Client — The RESTful API Client resource is used to configure and define authentication policies for a RESTful API client.
- Authentication Methods
- Push Notification — A push notification is a notification sent to your mobile device when you try to log in to a resource. You must approve the push notification to log in or deny it to prevent an access attempt that was not made by you.
- QR Code — When you authenticate with a QR code, you scan the QR code on the screen with the AuthPoint mobile app and use the verification code you receive to authenticate and log in.
- One-Time Password (OTP) — An OTP is a unique, temporary password available in the AuthPoint mobile app. To log in to a resource with OTP, you must type the OTP shown in your AuthPoint mobile app when you authenticate.
- Passkey — Passkey authentication is a passwordless authentication method that enables you to sign in with just biometrics, and makes the login process easier because there is no password to remember. It is a digital credential that is stored on a device, such as a phone or laptop.
- External Identities — The information required to connect to your Active Directory or LDAP databases to get user account information and validate passwords.
Connect to AuthPoint Management UI
The AuthPoint management UI is where you set up and manage your AuthPoint users, groups, and resources. You get access to the AuthPoint management UI in WatchGuard Cloud.
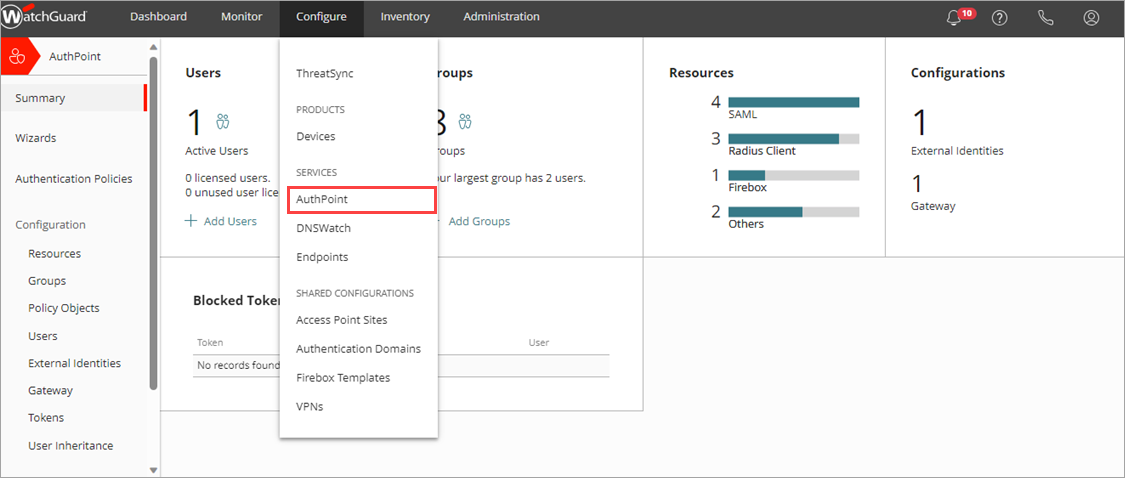
To connect to WatchGuard Cloud, go to cloud.watchguard.com. After you log in, select Configure > AuthPoint.
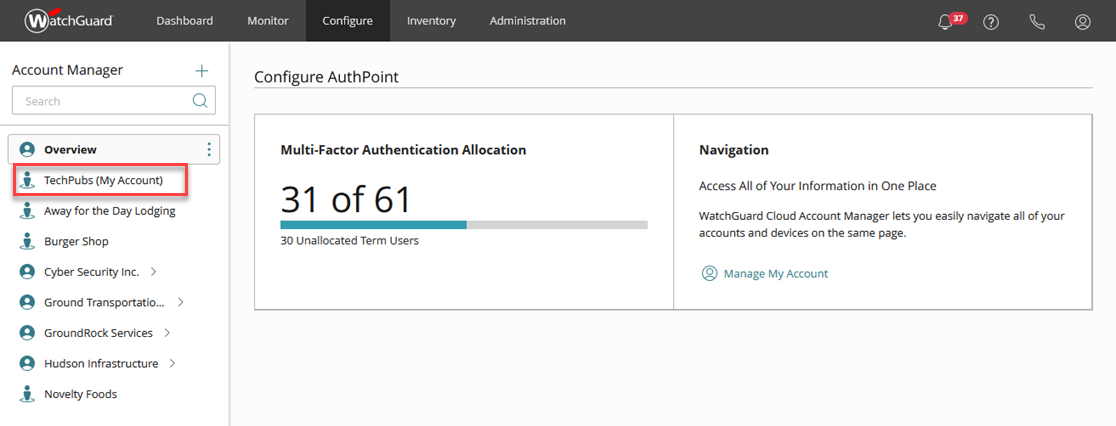
Service Providers have a different view of WatchGuard Cloud. If you have a Service Provider account, you must select an account from Account Manager to configure AuthPoint for that account.
Add a Resource to Protect with MFA
To configure MFA for an application, you must add a resource for the client in AuthPoint and configure the necessary settings for MFA in your third-party application.
In our example, we add an Identity Provider (IdP) portal resource. The IdP portal is a portal page that shows users a list of the SAML resources available to their AuthPoint group. Because the IdP portal is an AuthPoint resource, you can use it to test MFA with no third-party configuration required.
If you want to test MFA with a specific application, see the AuthPoint Integration Guides. If you do not see an integration guide for the application you want to try with AuthPoint, see Configure MFA for an Application or Service with SAML or OIDC or Configure MFA for a RADIUS Client.
To add an IdP portal resource:
- From the navigation menu, select Resources.
The Resources page appears.
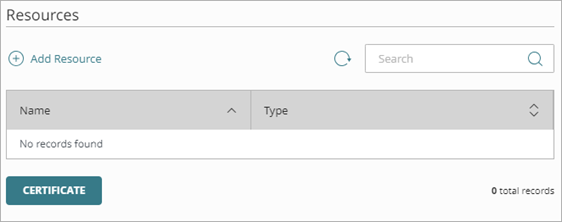
- Click Add Resource.
- From the Type drop-down list, select IDP Portal.
Additional fields appear. - In the Name text box, type a descriptive name for the resource. In our example, we name this resource Self Service Portal.
- In the Account Alias text box, type a unique value to append to the URL for your IdP portal. In our example, we use Washington. This means that the URL for our IdP portal is https://authpoint.watchguard.com/washington.
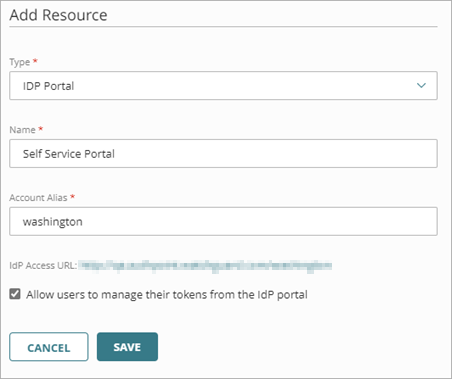
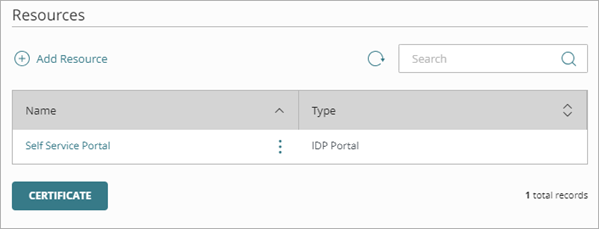
- Click Save.
The IdP portal resource is listed on the Resources page.
Set Up the WatchGuard Cloud Directory
Before we get started with users and groups, we need to set up the WatchGuard Cloud Directory. The WatchGuard Cloud Directory is an authentication domain where you can add users and groups that are hosted in WatchGuard Cloud. Services in WatchGuard Cloud, such as AuthPoint, can use the WatchGuard Cloud-hosted users and groups that you add to the WatchGuard Cloud Directory.
Users and groups that you add to the WatchGuard Cloud Directory are automatically added to AuthPoint.
To add the WatchGuard Cloud Directory, from WatchGuard Cloud:
- Select Configure > Directories and Domain Services.
The Directories and Domain Services page opens.
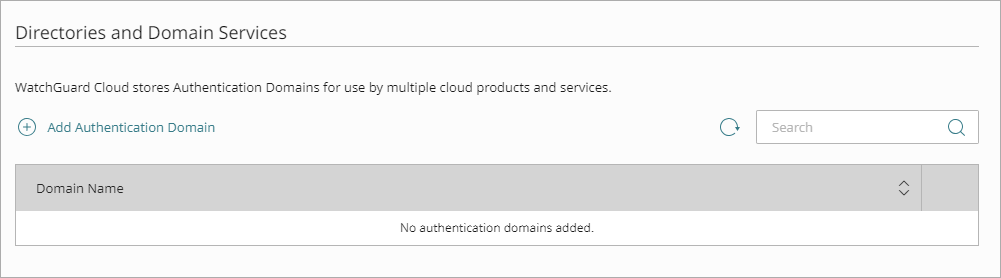
- Click Add Authentication Domain.
The Add Authentication Domain page opens.

- Select whether the WatchGuard Cloud Directory.
- Click Next.
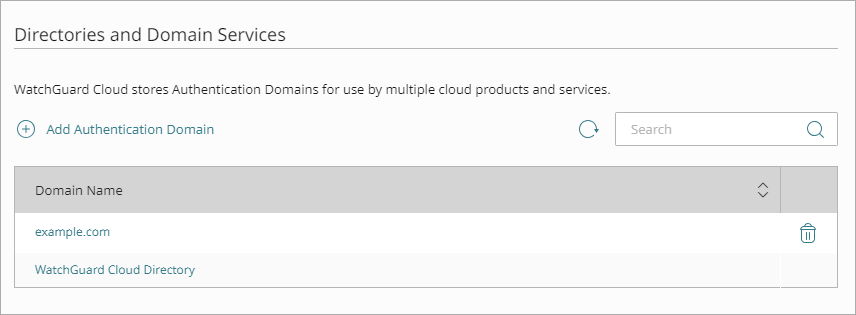
- Confirm that you want to create the WatchGuard Cloud Directory.
The Directories and Domain Services page opens and the WatchGuard Cloud Directory is added to your WatchGuard Cloud account.
Add a Group
In AuthPoint, groups are how you define which resources your users have access to. You add users to groups, then you add the groups to the authentication policies that specify which resources users can authenticate to.
You must add at least one group before you can add or sync users or add authentication policies.
To add a new group:
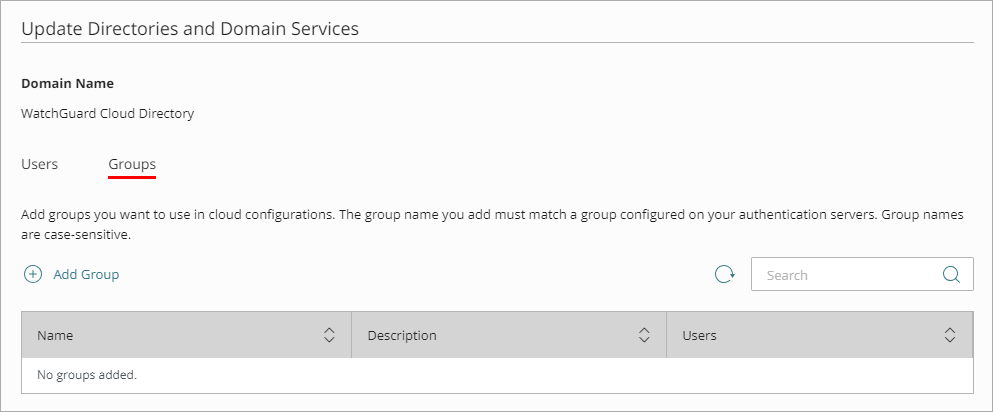
- On the Directories and Domain page, click the WatchGuard Cloud Directory domain name.
- Select the Groups tab.
- Click Add Group.
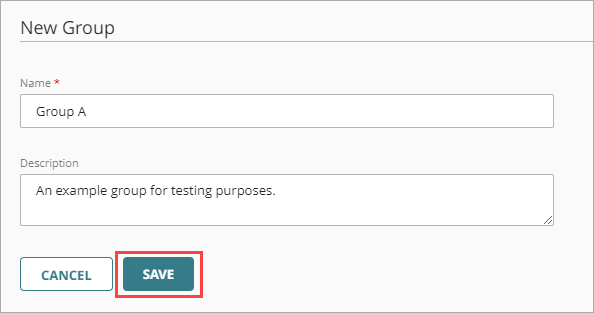
- On the New Group page, type a Name and Description for your group. The description is optional, but we recommend that you specify the purpose of the group. In our example, the name of this group is Group A.
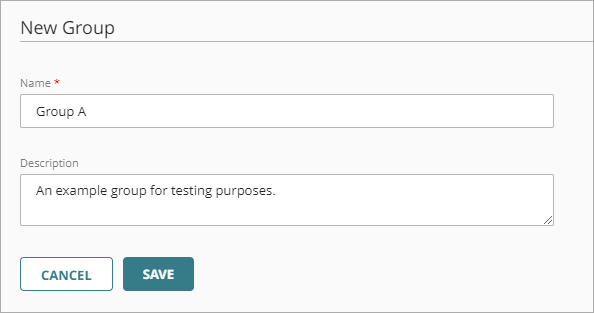
- Click Save.
Your group is listed in the Groups list for the WatchGuard Cloud Directory. The group is also added to the Groups page in AuthPoint.
Add a Zero Trust Policy
Zero Trust in WatchGuard Cloud is where you create and manage policies and policy conditions for products such as AuthPoint.
Zero Trust authentication policies specify which resources users can authenticate to and which authentication methods they can use (Push, QR code, OTP, and Passkey). When you configure a Zero Trust policy, you specify these settings:
- Which user groups the policy applies to
- Which resources the policy applies to
- Which conditions apply to the authentications
- Whether the policy allows or denies authentications
- Which authentication methods are required
To add a new authentication policy:
- Go to Configure > Zero Trust.
- Click Add Policy.
- Enter a name to identify your policy.
- In the Target section, from the Content drop-down list select the group that you created. This specifies which groups this policy applies to. In our example, we select Group A.
- In the Resources section, select the IdP portal resource that you created. This determines which resources users can authenticate to. In our example, we select the Self Sevice Portal resource that we created previously.
- Skip the Conditions section.
- In the Action section, select an option to specify whether to require MFA or to deny authentications for the resources in this policy. In our example, we select Allow.
- Select the Password, Push, QR Code, One-Time Password, and Passkey check boxes. These are the authentication methods that users can choose from when they log in to this resource. The Password check box requires that users type their password before they authenticate for this resource. For more information about authentication methods, see About Authentication.
- Click Save.
Your policy is created and added to the end of the policy list.
Add a User
There are two ways to add users in AuthPoint: you can sync users from Azure Active Directory, Active Directory, or a Lightweight Directory Access Protocol (LDAP) database, or you can add WatchGuard Cloud-hosted AuthPoint users.
In this quick start topic, we provide the steps to add a WatchGuard Cloud-hosted user to the WatchGuard Cloud Directory. We recommend that you start with a test user before you add or sync all of your end users.
To learn how to sync a user from an external user database, see Sync Users from Active Directory or LDAP andSync Entra ID Users to AuthPoint.
To add a user account:
- Select Configure > Directories and Domain Services.
The Authentication Domains page opens.
- On the Directories and Domain page, click the WatchGuard Cloud Directory domain name.
The Update Directories and Domain Services page opens.

- In the Users tab, click Add User.
The Add User page appears.

- Select MFA user. MFA users are user accounts that will use AuthPoint to authenticate. Non-MFA users are users that will only ever authenticate with a password, such as a service account user. Non-MFA users do not consume an AuthPoint user license and cannot authenticate to resources that require MFA.
- Leave the two check boxes selected. These options are necessary to create a token for your user account and to send you an email to activate your token. We cover this in the next section.
- In the First Name and Last Name text boxes, type the name of a test user. In our example, we use Sun Li.
- In the User Name text box, type a unique user name for your user.
- In the Email text box, type an email address for the test user. To test AuthPoint, you can use your own email address, but, if you later sync to an authentication database that you are a part of, you must remember to first delete this test user.
You must specify a valid email address that you have access to. This email address receives the email message to set your password and activate your token.
- From the Groups list, select the WatchGuard Cloud Directory group(s) to add your user to. If you do not have groups, or you want to add more groups, you can click Add Group. The group determines which authentication policies apply to this user. In our example, we add Sun Li to Group A, which we created previously.

- Click Save.
The user receives two email messages. One is used to set their AuthPoint password and the other to activate a token in the AuthPoint mobile app. To resend the Set Password or Activation email messages, see Resend Activation Email and Resend the Set Password Email to a User.
Set Password and Activate Token
When you add a user, AuthPoint sends two email messages to the user that they use to set their AuthPoint password and activate a token in the AuthPoint mobile app.
Users synced from Active Directory or an LDAP database do not receive the Set Password email. They use the password defined for their user account in Active Directory as their AuthPoint password.
Open the Set Password email sent to the test email account. Click the link in the email to set your password. When prompted, type your password, then click Save.

Now your AuthPoint password is set. You use this password when you authenticate to log in to protected services and applications.
Next you must activate your token.
Open the Activation email and click the link in the email. This takes you to the Welcome to AuthPoint web page. If you have not done so, download and install the AuthPoint mobile app on your phone.
- If you opened the web page on your phone, tap the Activate button. This opens the AuthPoint app and activates your token.
- If you opened the web page on your computer, open the AuthPoint app on your phone and tap Activate in the app, then point the camera on your phone at the QR code on your computer screen.

You can also activate tokens in the IdP portal. You might do this if you want to activate a new token on another mobile device.
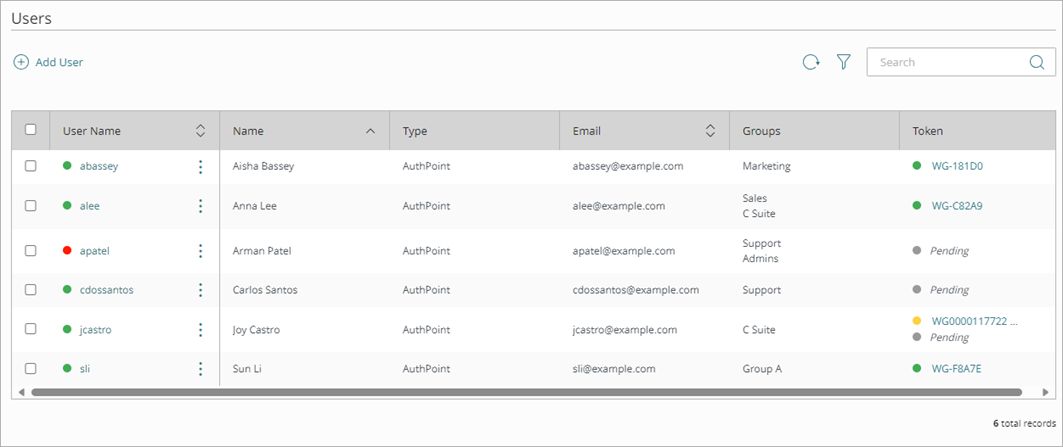
After a user successfully activates a token, AuthPoint sends you an email message to let you know that a token was activated for your user account. You can see the token on the Users page.
Try MFA
At this point, you have configured MFA for one or more of your resources. Now you can test that MFA works.
To test MFA:
-
In a web browser, navigate to the login URL for your IdP portal. This URL should be https://authpoint.watchguard.com/<your account alias>. In our example, we navigate to https://authpoint.watchguard.com/washington.
The AuthPoint single sign-on page appears.If you don't know the URL of your IdP portal, on the Resources page, select your IdP portal resource to find the URL for that resource.
- Type your email address or AuthPoint user name. Click Next.
- In the Password text box, type your AuthPoint password. You must do this before you can select an authentication method. This is because we selected the Password check box when we configured the authentication policy for this resource.
- Click Send Push to test Push authentication.
- Approve the authentication request that you receive on your mobile device.
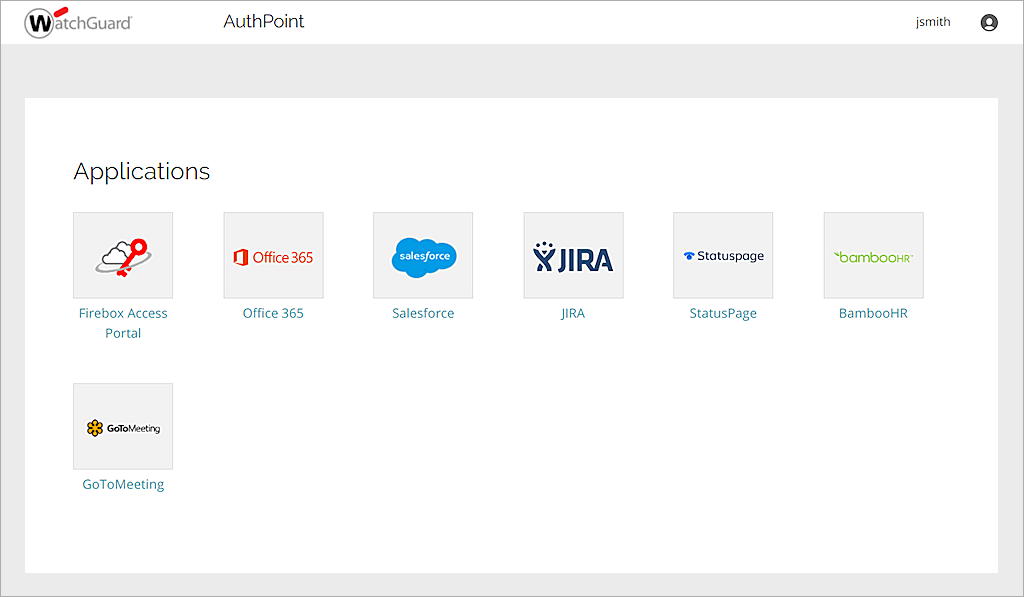
You are logged in to the IdP portal.
After you log in to the IdP portal, you see a blank page with no applications listed. This is because you have not configured any SAML resources. After you add SAML resources, the IdP portal shows a list of all the SAML resources available to your AuthPoint group.