Applies To: Cloud-managed Fireboxes
Overview
Firewall policies control when a cloud-managed Firebox allows or denies connections. The Firebox matches each connection to a policy based on the traffic source, destination, and traffic type.
On the Firewall Policies page, you can:
- View Firewall Policies
- Add a Firewall Policy
- Copy a Firewall Policy
- Change the Firewall Policy Type
- Enable or Disable a Firewall Policy
- Edit a Firewall Policy
- Delete a Firewall Policy
You can configure policies for individual Fireboxes and for Firebox templates. If a Firebox subscribes to a template with a policy configured, a lock icon shows next to the policy in the Firebox configuration, and you cannot configure the policy in the Firebox configuration for that device. To view the name of the template where the policy is configured, hover over the lock icon. For more information about Firebox templates, go to About Firebox Templates.

Your operator role determines what you can see and do in WatchGuard Cloud. Your role must have the Devices permission to view or configure this feature. For more information, go to Manage WatchGuard Cloud Operators and Roles.
View Firewall Policies
To view configured firewall policies, open the Firewall Policies page in the Device Configuration.
To view firewall policies, from WatchGuard Cloud:
- Select Configure > Devices.
- Select the cloud-managed Firebox.
- Click Device Configuration.
- Click the Firewall Policies widget.
The Firewall Policies page opens.
By default, the Firebox automatically determines the order of firewall policies by priority (Automatic Policy Order mode). If necessary, you can switch to Manual Policy Order mode and set the policy order manually. For more information about policy order, go to Firewall Policy Priority on Cloud-Managed Fireboxes.
Add a Firewall Policy
To create new rules for specific types of traffic through the Firebox, you can add firewall policies to the Firebox configuration.
For information about best practices for firewall policy configuration, go to Firewall Policies Best Practices.
To add a firewall policy, from WatchGuard Cloud:
- On the Firewall Policies page, click Add Firewall Policy.
The Add Firewall Policy page opens.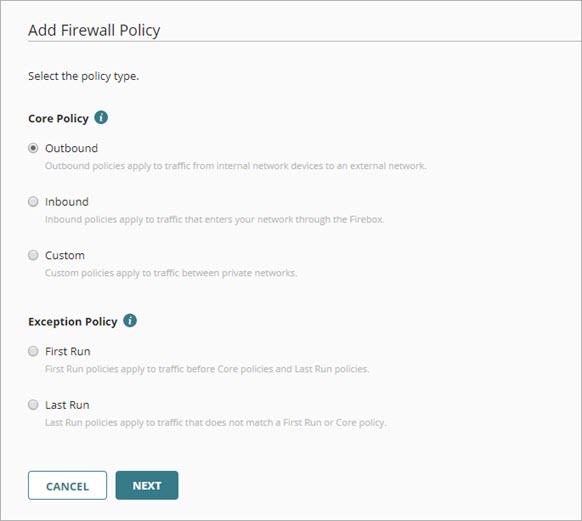
- Select the policy type. For information about policy types, go to Firewall Policy Types on Cloud-Managed Fireboxes.
- Click Next.
Settings for the selected policy type open.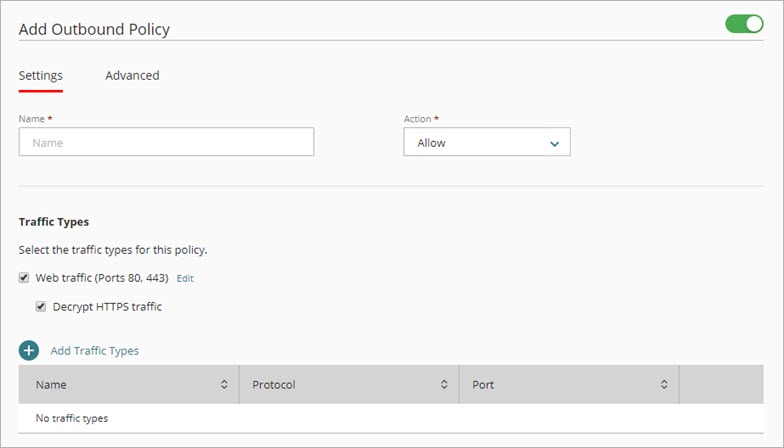
- In the Name text box, type a name for this policy.
- From the Action drop-down list, select the policy action:
- Allow — Allows traffic that matches the policy settings.
- Deny — Denies traffic that matches the policy settings.
- Configure other policy settings described in these topics:
- To save configuration changes to the cloud, click Save.
For configuration changes to take effect on a cloud-managed Firebox, you must deploy the configuration update to the Firebox. For more information, go to Manage Device Configuration Deployment for Fireboxes.
Copy a Firewall Policy
You can copy existing policies, including System policies, to add firewall policies to the Firebox configuration.
You can copy a System policy, but you cannot create a new System policy from a copy. For more information, go to System Firewall Policies on Cloud-Managed Fireboxes.
To copy a firewall policy, from WatchGuard Cloud:
- On the Firewall Policies page, in the row for the policy you want to copy, click the
 icon.
icon. - From the drop-down list, select Copy.
The Copy Firewall Policy page opens.
- Select the policy type for the new policy. For information about policy types, go to Firewall Policy Types on Cloud-Managed Fireboxes.
Custom policies can be bidirectional. If you copy a custom bidirectional policy as a type other than Custom, you must review the traffic direction for the new policy and update as necessary. For more information, go to Step 7.
- Click Next.
The policy type settings open.
- In the Name text box, enter a name for this policy.
- From the Action drop-down list, select the policy action:
- Allow — Allows traffic that matches the policy settings.
- Deny — Denies traffic that matches the policy settings.
- In the Source and Destination section, select the source and destination for this policy. For more information, go to Source and Destination.
If you copy a bidirectional custom policy, you must select the traffic direction for the new policy. If you want to reverse the traffic for the policy, click Swap Source and Destination.
- Configure other policy settings described in these topics:
- To save configuration changes to the cloud, click Save.
For configuration changes to take effect on a cloud-managed Firebox, you must deploy the configuration update to the Firebox. For more information, go to Manage Device Configuration Deployment for Fireboxes.
Change the Firewall Policy Type
You can change a firewall policy from one policy type to another policy type in the Firebox configuration. For example, you can change an outbound policy to custom policy.
Custom policies can be bidirectional. If you change a custom bidirectional policy to another policy type, you must review the traffic direction for the policy and update as necessary. For more information, go to Change the Firewall Policy Type of a Bidirectional Policy.
In Automatic Policy Order mode, traffic shaping rules can apply only to firewall policies of the same type. If a traffic shaping rule applies to only one policy, you can change the firewall policy type and the policy type in the traffic shaping rule updates automatically. If a traffic shaping rule applies to more than one policy, before you can change the firewall policy type, you must remove the policy from the Policies list in the traffic shaping rule. For more information about traffic shaping rules, go to Configure Traffic Shaping Rules for Policies.
To change the firewall policy type, from WatchGuard Cloud:
- On the Firewall Policies page, in the row for the policy you want to change, click the icon.
- From the drop-down list, select Change Type.
The Change Policy Type page opens. - Select the policy type you want to change to.
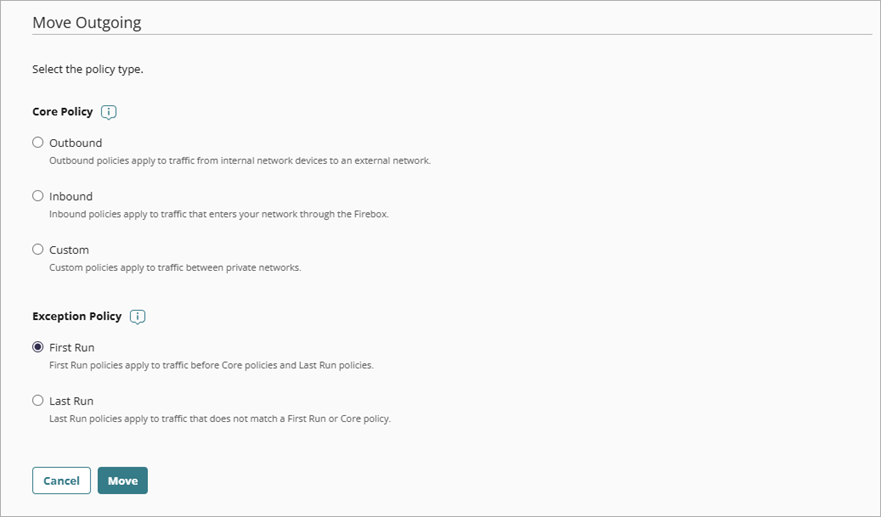
- Click Change Type.
The change is saved to the Firebox configuration in the cloud.
For configuration changes to take effect on a cloud-managed Firebox, you must deploy the configuration update to the Firebox. For more information, go to Manage Device Configuration Deployment for Fireboxes.
Change the Firewall Policy Type of a Bidirectional Policy
When you change the policy type of a bidirectional custom policy, the policy is no longer bidirectional. You must review and select the traffic direction for the policy.
To change the policy type of a bidirectional custom policy, from WatchGuard Cloud:
- On the Firewall Policies page, in the row for the bidirectional policy you want to change, click the icon.
- From the drop-down list, select Change Type.
The Change Policy Type page opens. - Select the policy type you want to change to.

- Click Next.
The Change Policy Type page opens. - In the Source and Destination section, select the source and destination for the policy. If you want to reverse the traffic direction for the policy, click Swap Source and Destination.

- Click Save.
The change is saved to the Firebox configuration in the cloud.
For configuration changes to take effect on a cloud-managed Firebox, you must deploy the configuration update to the Firebox. For more information, go to Manage Device Configuration Deployment for Fireboxes.
Enable or Disable a Firewall Policy
You can enable or disable a policy from the Firewall Policies page or when you edit a policy.
You cannot remove or change the order of System policies, and you can only disable or edit specific System policies. For more information about which System policies you can disable or edit, go to System Firewall Policies on Cloud-Managed Fireboxes.
To enable or disable a policy from the Firewall Policies page:
- On the Firebox Device Configuration page, click the Firewall Policies widget.
The Firewall Policies page opens. - To disable or enable the policy in the list, click the toggle next to the policy name.
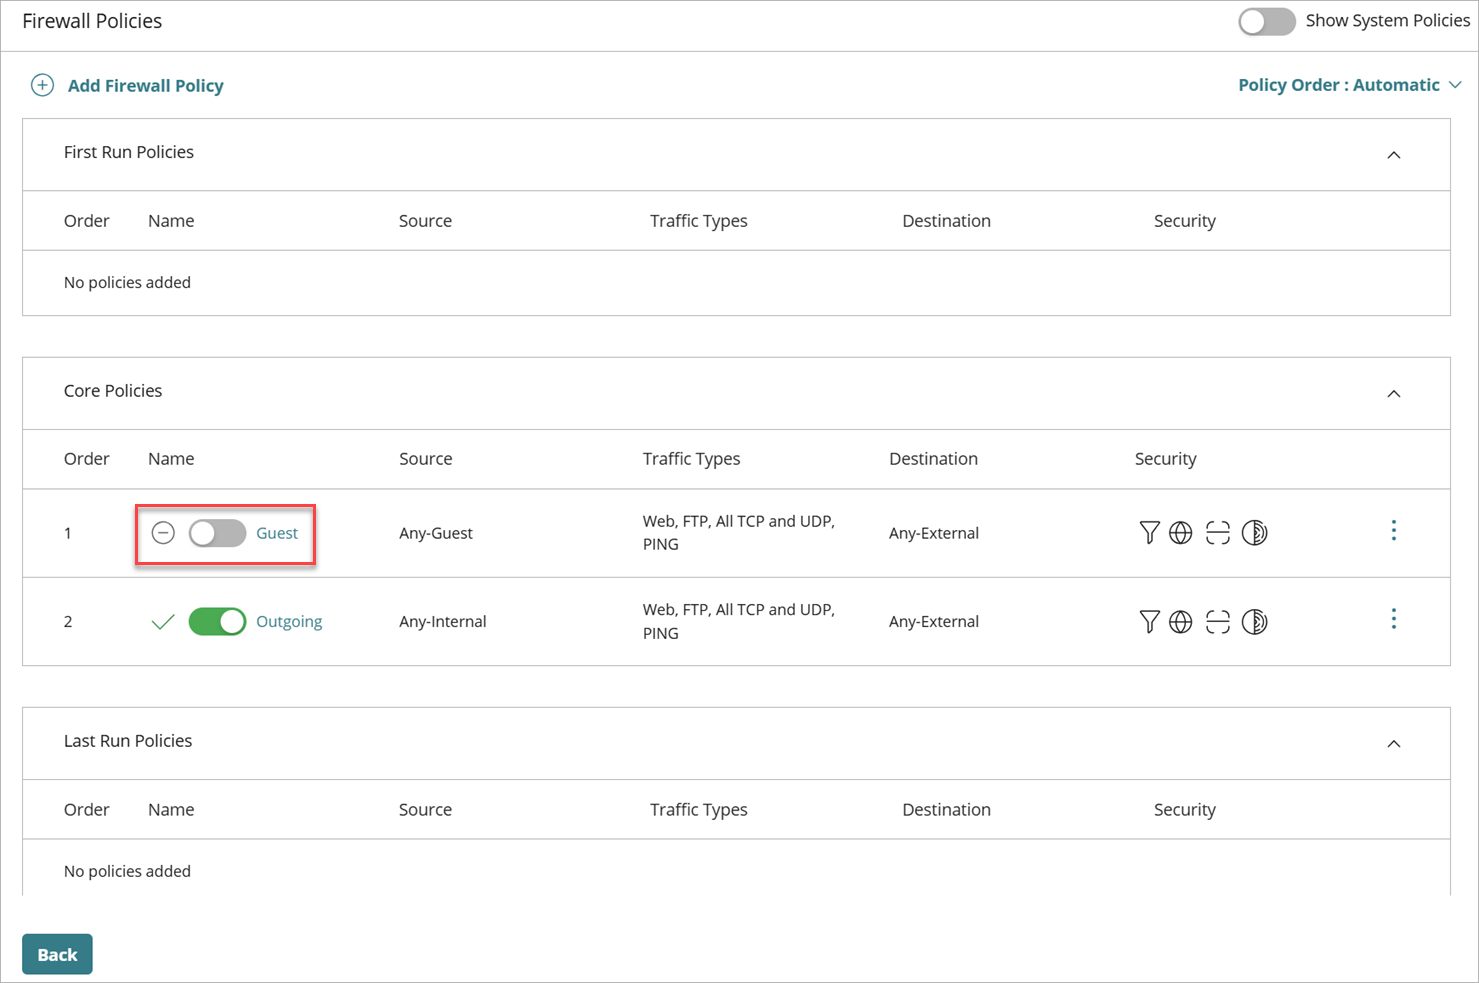
- If Manual Policy Order mode is enabled, click Save. If Automatic Policy Order mode is enabled, the change is saved automatically.
For configuration changes to take effect on a cloud-managed Firebox, you must deploy the configuration update to the Firebox. For more information, go to Manage Device Configuration Deployment for Fireboxes.
To enable or disable a policy when you edit the policy:
- On the Firebox Device Configuration page, click the Firewall Policies widget.
The Firewall Policies page opens. - Click a policy name to open the policy settings.
- To disable or enable the policy, click the toggle next to the policy name.

- Click Save.
The change is saved to the Firebox configuration in the cloud.
For configuration changes to take effect on a cloud-managed Firebox, you must deploy the configuration update to the Firebox. For more information, go to Manage Device Configuration Deployment for Fireboxes.
Edit a Firewall Policy
You can update any policy that you added for a cloud-managed Firebox.
To edit a policy, from WatchGuard Cloud:
- On the Firebox Device Configuration page, click the Firewall Policies widget.
The Firewall Policies page opens. - Click the policy name.
- Edit the policy settings.
- Click Save.
The change is saved to the Firebox configuration in the cloud.
For configuration changes to take effect on a cloud-managed Firebox, you must deploy the configuration update to the Firebox. For more information, go to Manage Device Configuration Deployment for Fireboxes.
Delete a Firewall Policy
To remove a policy from the configuration for a cloud-managed Firebox, you can delete it.
You cannot delete a policy that has a traffic shaping rule applied. Before you can delete the policy, you must edit the traffic shaping rule. For more information, go to Configure Traffic Shaping Rules for Policies.
To delete a policy, from WatchGuard Cloud:
- On the Firebox Device Configuration page, click the Firewall Policies widget.
The Firewall Policies page opens. - In the row for the policy you want to delete, click the icon.
- From the drop-down list, select Delete.
- To confirm the deletion, click Delete.
The policy is deleted from the Firebox configuration in the cloud.
For configuration changes to take effect on a cloud-managed Firebox, you must deploy the configuration update to the Firebox. For more information, go to Manage Device Configuration Deployment for Fireboxes.