Define Advanced WebBlocker Options
Applies To: Locally-managed Fireboxes
On the Advanced tab in a WebBlocker action, you can configure advanced WebBlocker options.
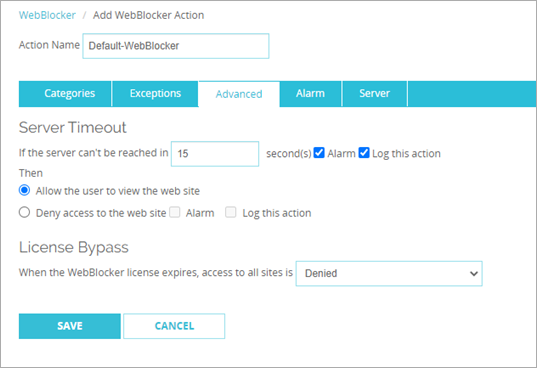
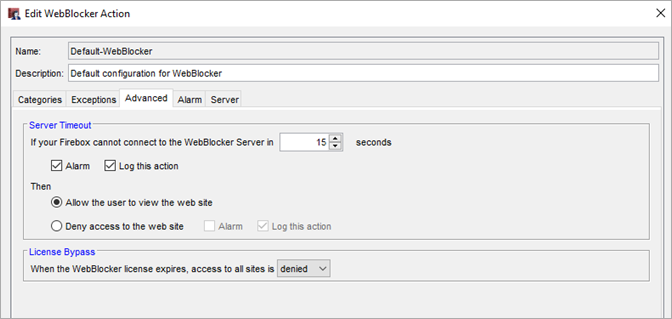
WebBlocker Advanced tab in Policy Manager
Server Timeout
The server timeout setting allows you to set the number of seconds to try to connect to the WebBlocker Server before the Firebox times out.
In Fireware v12.5.4 and higher, the default and lowest value for the WebBlocker server timeout is 15 seconds. For Fireware v12.5.3 and lower, the default and lowest WebBlocker server timeout is 5 seconds.
Alarm
Select this option to send an alarm when the Firebox cannot connect to the WebBlocker Server and times out. To set parameters for the alarms, click the Alarm tab. For information about the settings on the Alarm tab, go to Set Logging and Notification Preferences.
Log this action
Select this option to send a message to the log file if the Firebox times out.
Allow the user to view the website
Select this option to allow the user to see the website if the Firebox times out and does not connect to the WebBlocker Server. This option is selected by default.
Deny access to the website
Select this option to deny access if the Firebox times out.
If you allow web traffic when the WebBlocker server is unavailable, each user who sends a web request must wait for the number of seconds in the Server Timeout settings before the Firebox allows the user to get access to the website. When the Firebox can connect to the WebBlocker Server again, it starts to apply WebBlocker rules again.
In the Default-WebBlocker action created by the Web Setup Wizard or Quick Setup Wizard, the server timeout setting is configured to deny access if the Firebox cannot connect to the WebBlocker Server. To restore this default setting, click Restore Defaults. For more information, go to Setup Wizard Default Policies and Settings.
License Bypass
The license bypass setting controls whether users on your network can get access to websites if WebBlocker is enabled and the WebBlocker security subscription expires.
From the When the WebBlocker license expires, access to all sites is drop-down list, select one of these options:
Denied
Select to deny access to all websites when the WebBlocker license expires.
Allowed
Select to allow access to all websites when the WebBlocker license expires.
By default, license bypass is configured to deny access to all websites if the WebBlocker security subscription expires. This is the most secure option if you must deny your users access to specific types of content. In Fireware 12.3 or higher, you can change the license bypass setting after your WebBlocker license expires.
In the Default-WebBlocker action created by the Web Setup Wizard or Quick Setup Wizard, the license bypass setting is configured to deny access when the WebBlocker license expires. To restore this default setting, click Restore Defaults. For more information, go to Setup Wizard Default Policies and Settings.
For information about how to renew your security subscription, go to Renew Subscription Services.
Local Override (Fireware v12.4 and lower)
In Fireware v12.4.x and lower, you can enable WebBlocker Override on the WebBlocker Action dialog box Advanced tab. In Fireware v12.5, these settings moved to the Categories tab. For more information, go to WebBlocker Override.
To enable WebBlocker override (Fireware v12.4.x and lower):
- Edit the WebBlocker action.
- On the Advanced tab, select the Enable WebBlocker Local Override check box.
- In the Passphrase and Confirm text boxes, specify and confirm the local override passphrase that users can type to get access to denied content.
- In the Inactivity Timeout text box, type or select a number of minutes. When users are inactive for the specified amount of time, they can no longer get access to the denied content.
- To send an alarm when someone types the override password, select the Alarm check box.
- To send a message to the log file when someone types the override password, select the Log This Action check box.
- Click OK or Save.