Applies To: Endpoint Security Elite, Endpoint Security 360, Endpoint Security Prime, WatchGuard EDR, Endpoint Security Basic
To open the multi-tenant management UI for endpoint security, your Service Provider account must have an active Endpoint Security product license in its inventory.
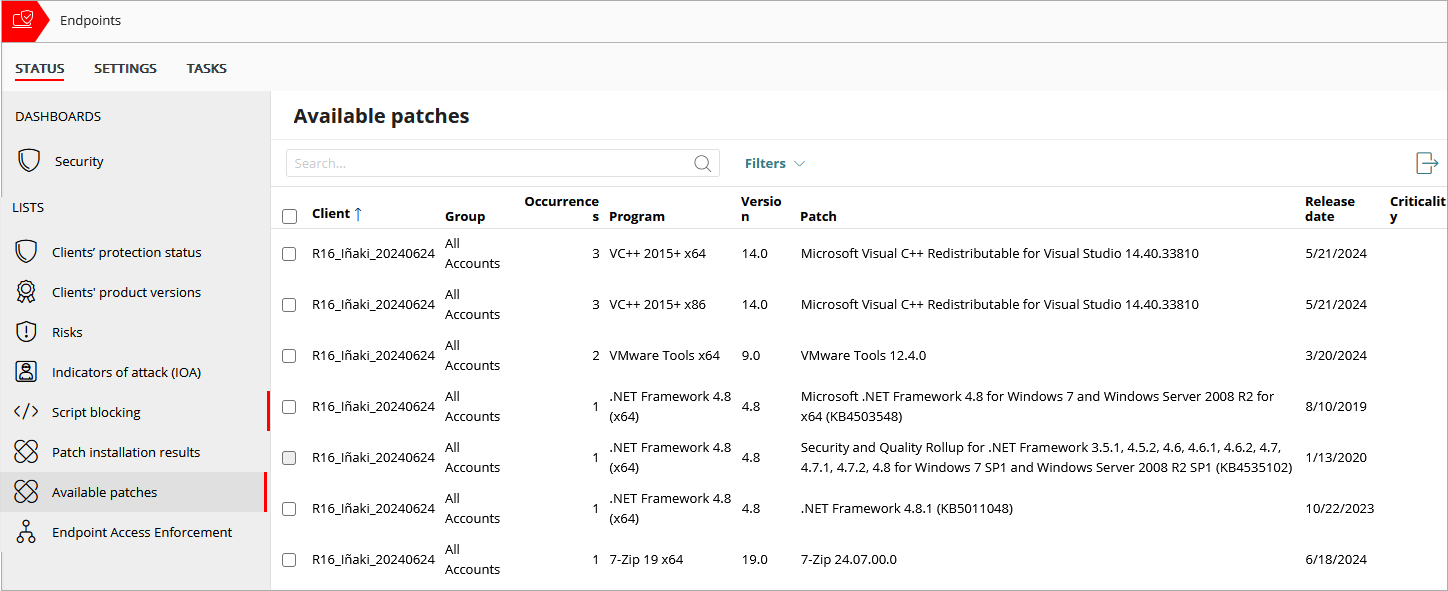
The Status > Available Patches list provides quick access to a list of accounts and the patches available. As a Service Provider, you can see the client account, the patches available, when the patch was released, the criticality of the patch, and the number of devices that require the patch.
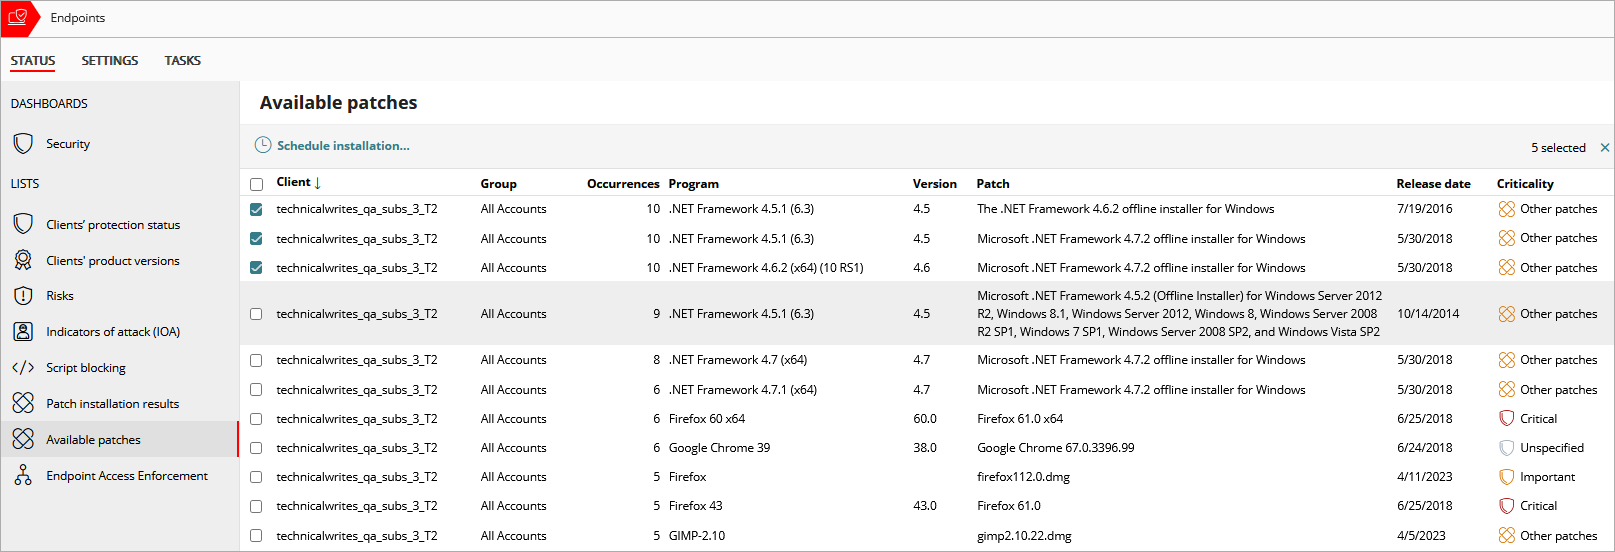
You can also create a quick patch installation task for the client accounts and patches you select in the list. For example, if you select two different patches and each patch is associated with a different account, then Endpoint Security creates a single task that installs the two patches on the two accounts. To make sure that a patch installs only on devices in the accounts where you want it installed, you can create individual tasks for a single patch.
To export the list, in the upper-right corner of the table, click ![]() .
.
To filter the list of accounts with available patches, from WatchGuard Cloud:
- From Account Manager, select a Service Provider account.
To select your own Service Provider account, select Overview. Or, select a tier-n Service Provider account.
 - Select Monitor > Endpoint Security.
- On the Status page, select Available Patches.
The Available Patches page opens. - Click Filters.

- To refine search results, you can specify these filters:
- Platform — Select the operating system you want to filter the list for (All, Windows, Linux, macOS).
- Patch Release — Select when the patch was released.
- Computer Type — Select the device type (Workstation, Laptop, or Server).
- Program — Enter the name of the program.
- Patch — Enter the name of the patch.
- CVE — Enter the CVE ID for the vulnerability the patch resolves (for example, CVE-2018-2790).
- Patch Type — Select application patches or operating system patches.
- Patch Installation — Select whether Patch Management installs patches for computers with this profile assigned. Options include: Install patches, Test computer for patch installation, or Patch installation disabled.
- Criticality — Select the patch severity from the list.
- Installation — Select the installation status (Available, Requires manual download, Pending (manually downloaded), or Pending restart).
- Show non-downloadable patches — Select this option to show patches that are not readily available from the software vendor. Some software vendors allow you to purchase extended support to download patches as they become available. If a patch is non-downloadable, you must contact the software vendor to obtain the patch.
- Click Filter.
Exclude Patches in Accounts
You can exclude patches from installation tasks.
To exclude patches from the list:
- In the Available Patches list, select the managed client accounts that you want to exclude patches for.
- Click Exclude.
- Select an option to exclude the patches for all computers where they are now available and when they are available in the future.
- Exclude patch for computers in this account only.
- Exclude patch for computers in all accounts.
This action can be changed later if required.
- Click Exclude.
The exclusion process can take a few minutes to complete. - To review a list of excluded patches, open the Excluded Patches list.
For more information, go to Multi-Tenant Management — Excluded Patches.
Schedule a Patch Installation Task
When you select one or more client accounts in the list, you can schedule a patch installation task for available patches.
To schedule a patch installation task:
- In the Available Patches list, select one or more accounts that have an available patch.
- Click Schedule Installation.
The task page opens. The accounts you selected automatically show as Recipients and the Patches to Install show by program and patch.
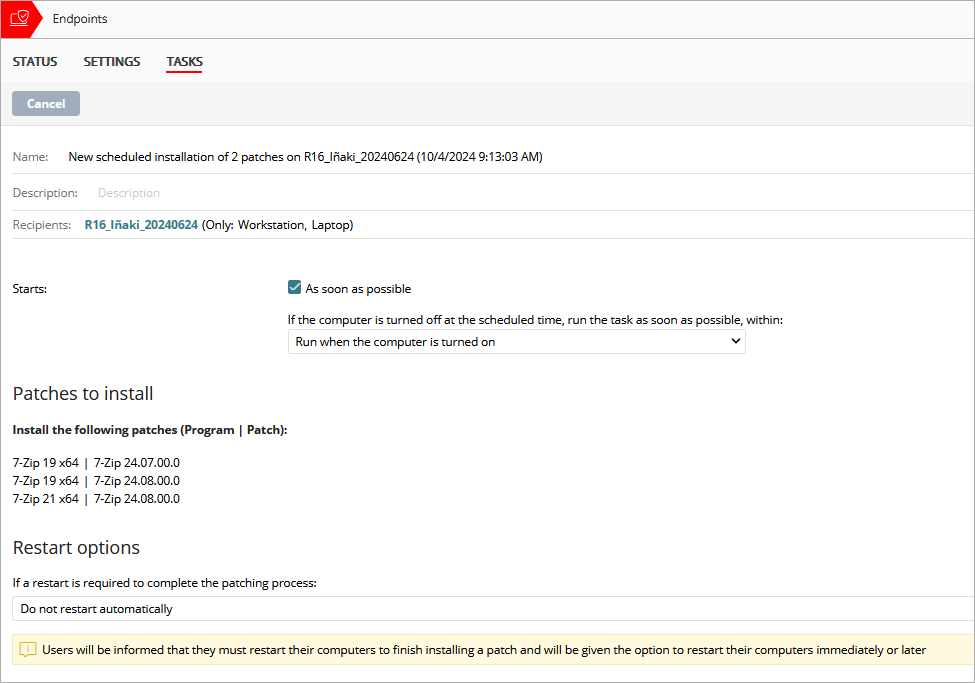
- Follow the steps to Configure a Scheduled Patch Installation Task.
- Click Save.
Endpoint Security automatically sends the task to the Endpoint Security management UI of managed accounts with computers that have the selected patch available for installation. If no computers in an account have the selected patch, Endpoint Security does not create a task to install that patch in the management UI. - Publish a Task.
The task runs based on its settings.
About the Available Patches List
The list displays available patch information for each account. You can sort the list by the Client and Group columns.
The list includes these columns:
Client
The name of the WatchGuard Cloud account with at least one available patch. The account must have the Patch Management module allocated to appear in this list.
Group
The name of the WatchGuard Cloud account group that the account belongs to.
Occurrences
The number of computers without the available patch.
Program
The name of the program with the available patch.
Version
The version of the program with an available patch.
Patch
The name of the patch.
Release Date
The date when the patch became available.
Criticality
Patch severity, as determined by the vendor (for example, Critical, Important, Moderate, Low).
About Detected Patch Details
When you select a patch from the Available Patches list, the Detected Patch page opens. In the upper section of the page, a pink notification box provides key information about the patch, including:
- Patch
- Program
- Program version
- Family
- Vendor
- Criticality
- Client
- Occurrences
- Installation Status
In the lower section of the Detected Patch page, there is more information on the patch and installation status of the patch.
Patch Details
In the Patch Details section, you can review detailed information about the patch, including:
- Release date
- Download size
- KB ID
- Download URL
- File name
- Description
The description provides a detailed summary of the update or patch, as well as any requirements and known issues.
Patch Installation Status
In the Patch Installation Status section, you can review the installation status of the selected patch for:
- Computers in this account
- Computers in all accounts
- Computers in the WatchGuard community (%)
About Multi-Tenant Management in Endpoint Security