This document describes how to set up multi-factor authentication (MFA) for FireCloud with Microsoft Entra ID as an identity provider.
Contents
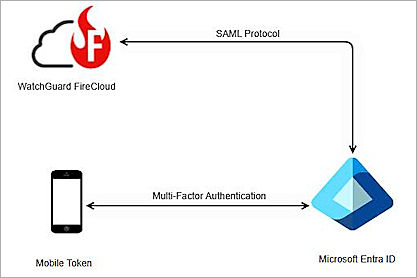
WatchGuard FireCloud Authentication Data Flow with Microsoft Entra ID
Microsoft Entra ID communicates with various cloud-based services and service providers with the SAML protocol. This diagram shows the data flow of an MFA transaction for WatchGuard FireCloud.
Before You Begin
Before you begin these procedures, make sure that:
- You have a Microsoft global administrator account within the Microsoft Entra ID tenant
- You have created a user in Microsoft Entra ID or synchronized an on-premises Active Directory user to Microsoft Entra ID
- A token is assigned to a user in Microsoft Entra ID
- You have a WatchGuard Cloud account
Additional charges might apply to use Microsoft Entra ID.
Configure Microsoft Entra ID
To configure Microsoft Entra ID:
- Log in to the Microsoft Azure portal with your Microsoft global administrator account credentials.
- Search for and select Microsoft Entra ID.
- To add a Microsoft Entra ID user, select Manage > Users > All users > + New user.
- Select Create new user.
The Create new user page opens and populates your user information.
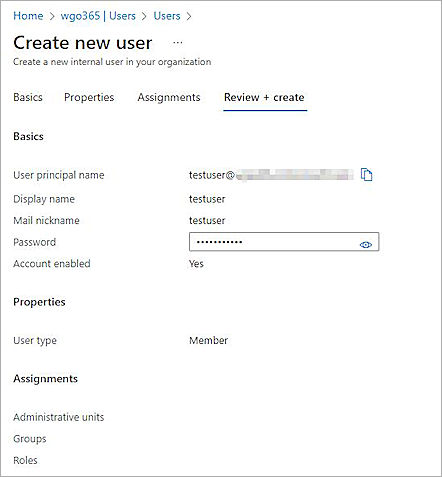
- Click Create.
- On the Microsoft Entra ID page, select Manage > Enterprise applications.
- Select Manage > All applications > + New application.
- Click Create your own application.
The Create Your Own Application page opens. - In the What's the name of your app? text box, type a name. In our example, we name the application WatchGuard-FireCloud.
- Select Integrate any other application you don't find in the gallery (Non-gallery).
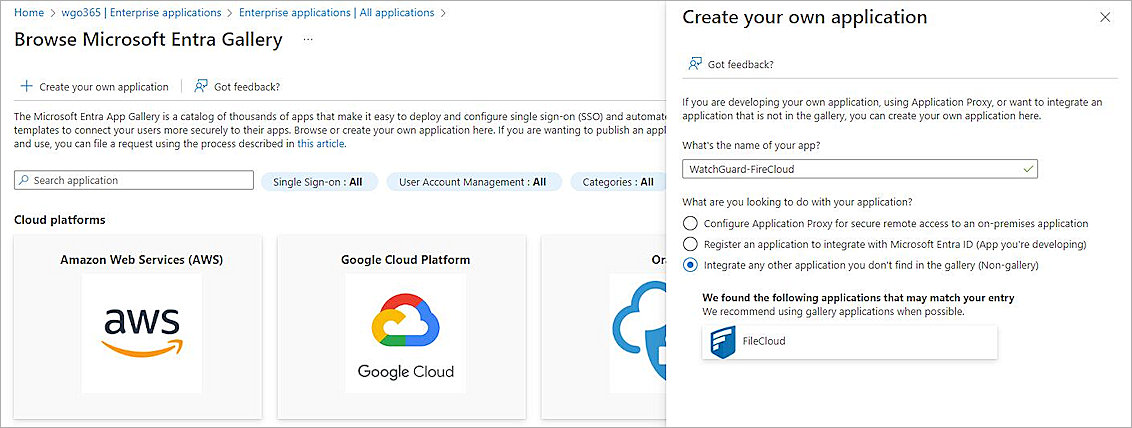
- Click Create.
- Select Manage > Single sign-on.
The Single sign-on page opens.
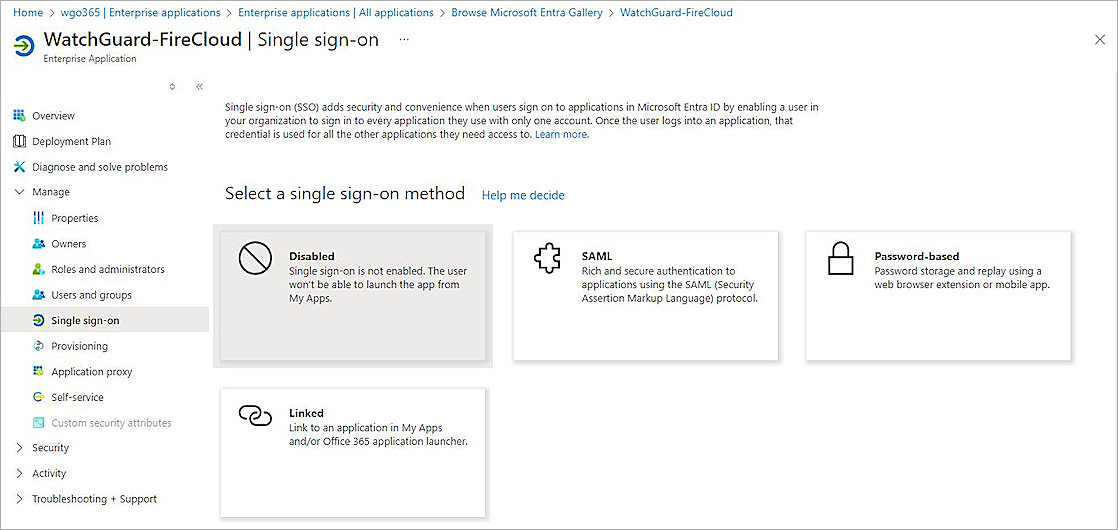
- From the Select a single sign-on method section, select SAML.
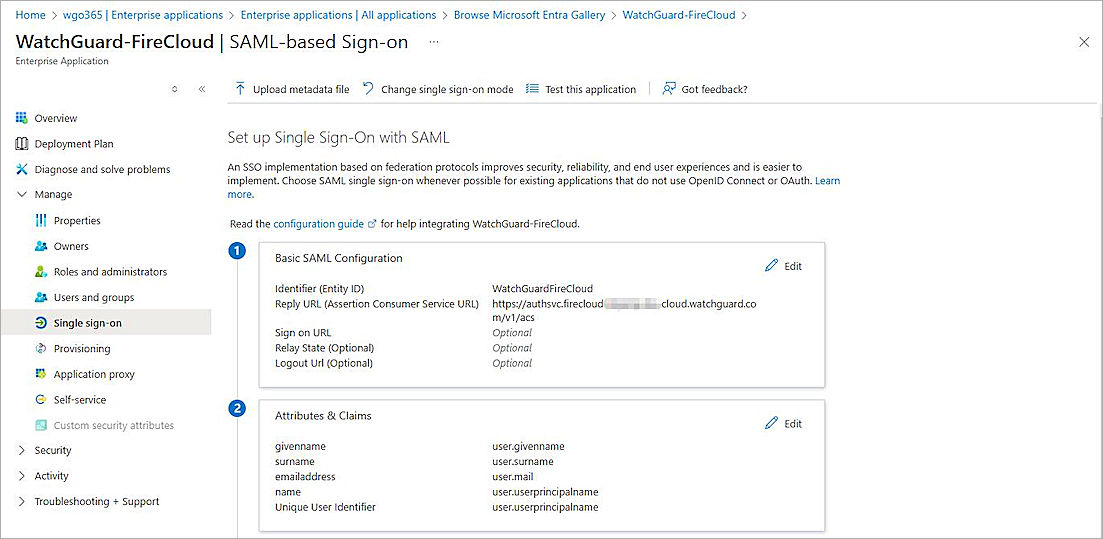
The SAML-based Sign-on page opens. - In the Basic SAML Configuration section, click Edit.
- For Identifier (Entity ID), click Add identifier.
- In the Enter an identifier text box, type any value. In our example, we type WatchGuardFireCloud. Note this value. This value must match the SAML Service Provider Entity ID you specify when you configure FireCloud.
- For Reply URL (Assertion Consumer Service URL), click Add reply URL.
- In the Enter a reply URL text box, type https://authsvc.firecloud.your WatchGuard Cloud region.cloud.watchguard.com/v1/acs/.
To find your account region, log in to WatchGuard Cloud and go to Administration > My Account. Your region is listed under the Data Zone heading. To get the region code, refer to WatchGuard Cloud URLs and Network Access Requirements.
- Click Save.
- To close the Basic SAML Configuration page, click
 .
.
The Test single sign-on dialog box opens. - Click No, I'll test later.
The Set up Single Sign-on with SAML page opens.
- In the Attributes & Claims section, click Edit.
- Click + Add a group claim.
- For Which groups associated with the user should be returned in the claim?, select Groups assigned to the application.
- From the Source attribute drop-down list, select one of these options:
- If only Entra ID cloud security groups are assigned to the SAML application, select Cloud-Only Group Display Names.
- If only on-premises AD security groups are assigned to the SAML application, select sAMAccountName and leave Emit Group Name for Cloud-Only Groups blank.
- If both on-premises Active Directory security groups and the Entra ID cloud security group are assigned to the SAML application, select sAMAccountName and leave Emit Group Name for Cloud-Only Groups blank. Select this option if you use AD connect or your on-premises AD is connected to your Microsoft Entra ID account.
- Expand the Advanced Options section, then select Customize the Name of the Group Claim.
-
In the Name (required) text box, type groups.
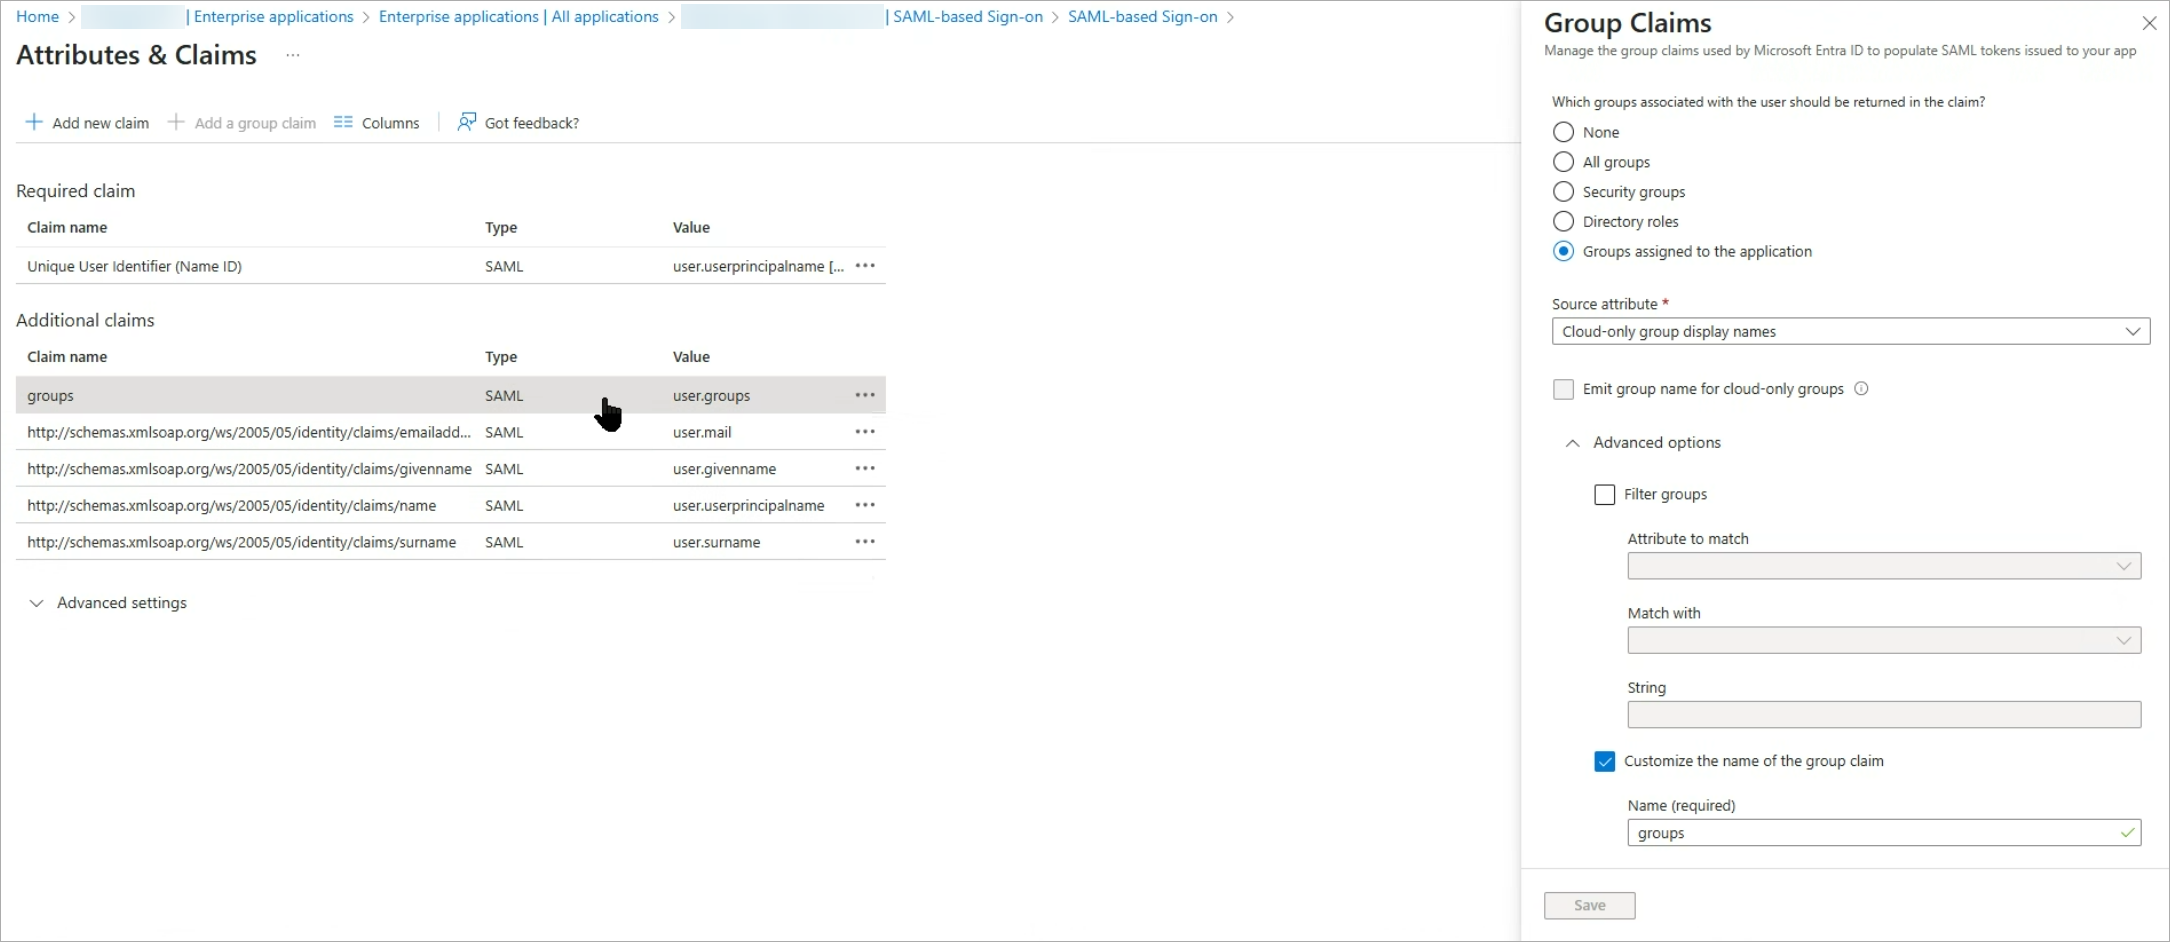
- Click Save.
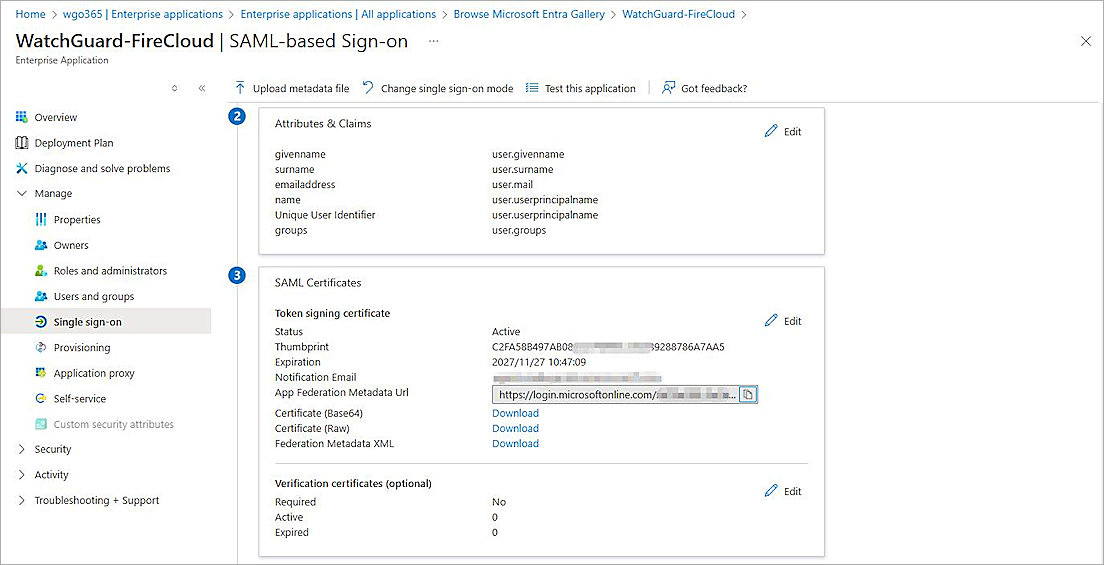
- Go back to the SAML-based Sign-on page, and in the SAML Certificates section, next to Certificate (Base64), click Download to get your IDP certificate. You need this file when you configure FireCloud.
- Next to Federation Metadata XML, click Download.
- Open the downloaded Microsoft Entra ID metadata file, and copy the entityID and SingleSignOnService Location values. You need this information when you configure FireCloud.
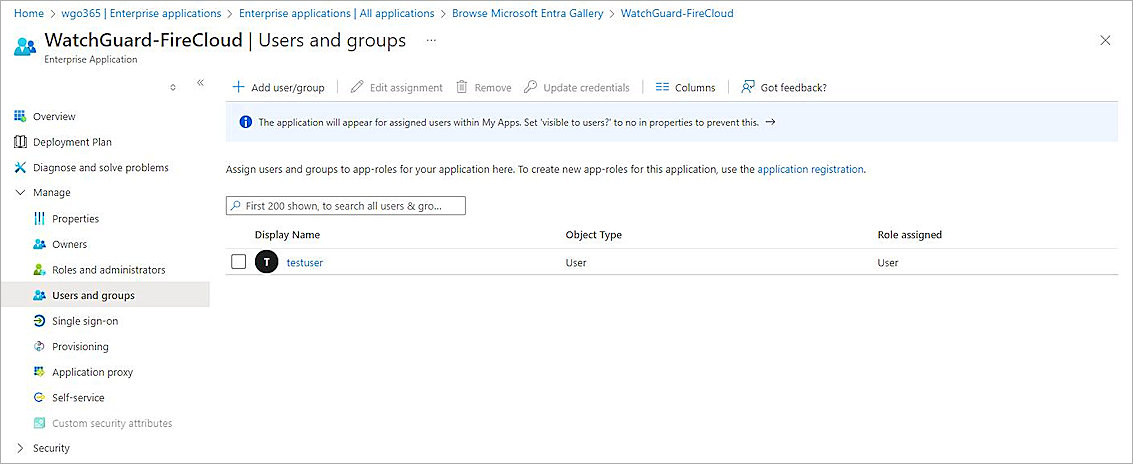
- From the navigation menu, select Manage > Users and groups.
The Users and groups page opens. - Click + Add user/group.
- Click None Selected, then select the user you created.
- Click Select.
- Click Assign.
- To enable the Microsoft Entra ID multi-factor authentication, from the navigation menu, select Security > Conditional Access.
- Select + New policy.
The New Conditional Access policy page opens. - In the Name text box, type a policy name.
- In the Assignments section, for Users, click 0 users and groups selected.
- Select the Include tab, and select Select users and groups.
- Select the Users and groups check box.
- Search for and select the users or groups, then click Select.
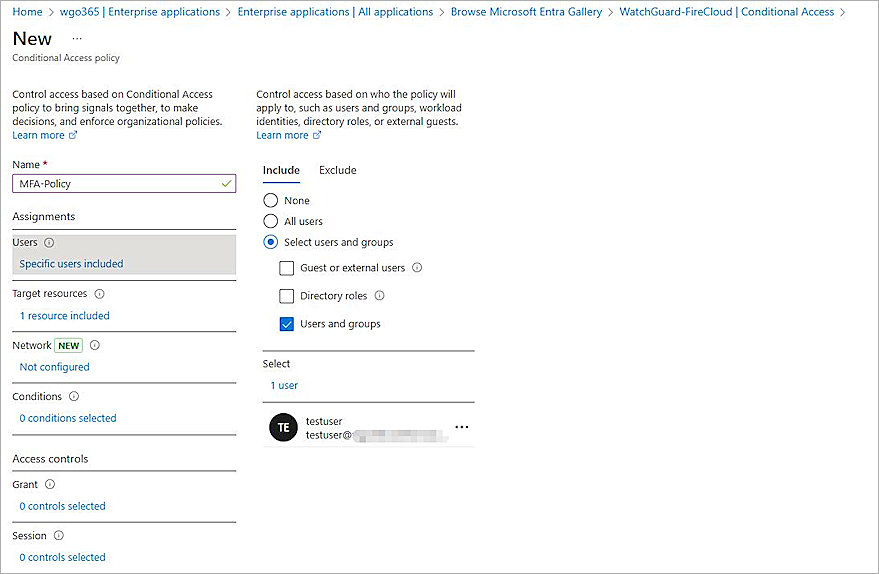
- Under the Access controls section, for Grant, click 0 controls selected.
The options panel to block or grant access opens. - Select Grant access.
- Select the Require multifactor authentication check box.
- In the For multiple controls section, select Require all the selected controls.
- Click Select.
- For Enable Policy, select On.
- Keep the default values for other settings.
- Click Create.
Configure FireCloud
To set up FireCloud with Entra ID as your identity provider:
- Log in to WatchGuard Cloud with your WatchGuard operator account credentials.
- From the navigation menu, select Configure > FireCloud. If you have a Service Provider account, you must select an account from the Account Manager.
- Click Set Up FireCloud.
- Select Connect to Your Identity Provider.
- Click Next.
- Select SAML Identity Provider.
- In the SAML Service Provider Entity ID text box, type the identifier that you configured in Entra ID. This must be the same value that you configured in the previous section. In our example, we type WatchGuardFireCloud.
- In the Identity Provider ID text box, type or paste the entityID value you copied from the Microsoft Entra ID metadata file in the previous section.
- In the Single Sign-On URL text box, type or paste the SingleSignOnService Location value you copied from the Microsoft Entra ID metadata file in the previous section.
- In the IDP Certificate text box, click
 and upload the downloaded Microsoft Entra ID certificate in the previous section.
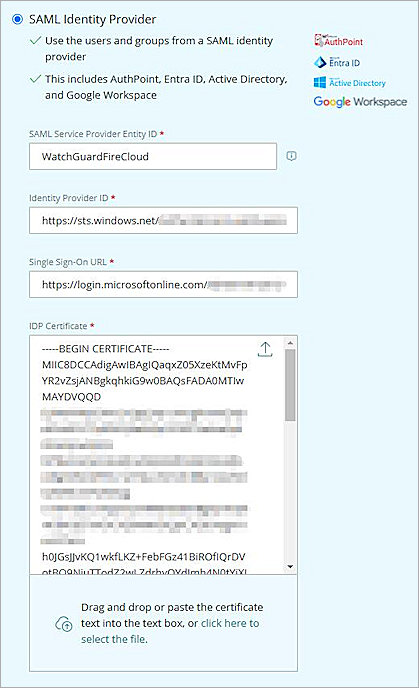
- Click Save.
- Click Done.
- Select Client Download > Download Installer.

- Run the WatchGuard Agent installer on your Windows computer.
- Click Install. The installation of the WatchGuard Agent can take several minutes.
- When the installation is complete, click Finish.
- After the WatchGuard Agent is installed, the agent automatically downloads and installs the Connection Manager. When this is finished, the Connection Manager opens and you are prompted to enter your credentials to connect to FireCloud.
Caution: You cannot install the WatchGuard Connection Manager on computers that have Panda endpoint security products installed. The WatchGuard Connection Manager is only compatible with WatchGuard Endpoint Security products.
Test the Integration
To test Microsoft Entra MFA with your WatchGuard FireCloud, you can choose any method (Microsoft Authenticator number matching, Microsoft Authenticator code, SMS code, or Phone call).
Microsoft Authenticator number matching is enabled for all authenticator push notifications. In this example, we show the Microsoft Authenticator number matching method.
- Open the WatchGuard Connection Manager.
- In the Sign in text box, type your user principal name.
- Click Next.
- In the Enter password text box, type your password.
- Click Sign in.
The Approve sign in request page opens. - To complete the approval, enter the number you see in your authenticator app.
- Click Yes on your authentication app.
- Click Yes.
You are connected to FireCloud.