Applies To: WatchGuard Cloud-managed Access Points (AP130, AP230W, AP330, AP332CR, AP430CR, AP432)
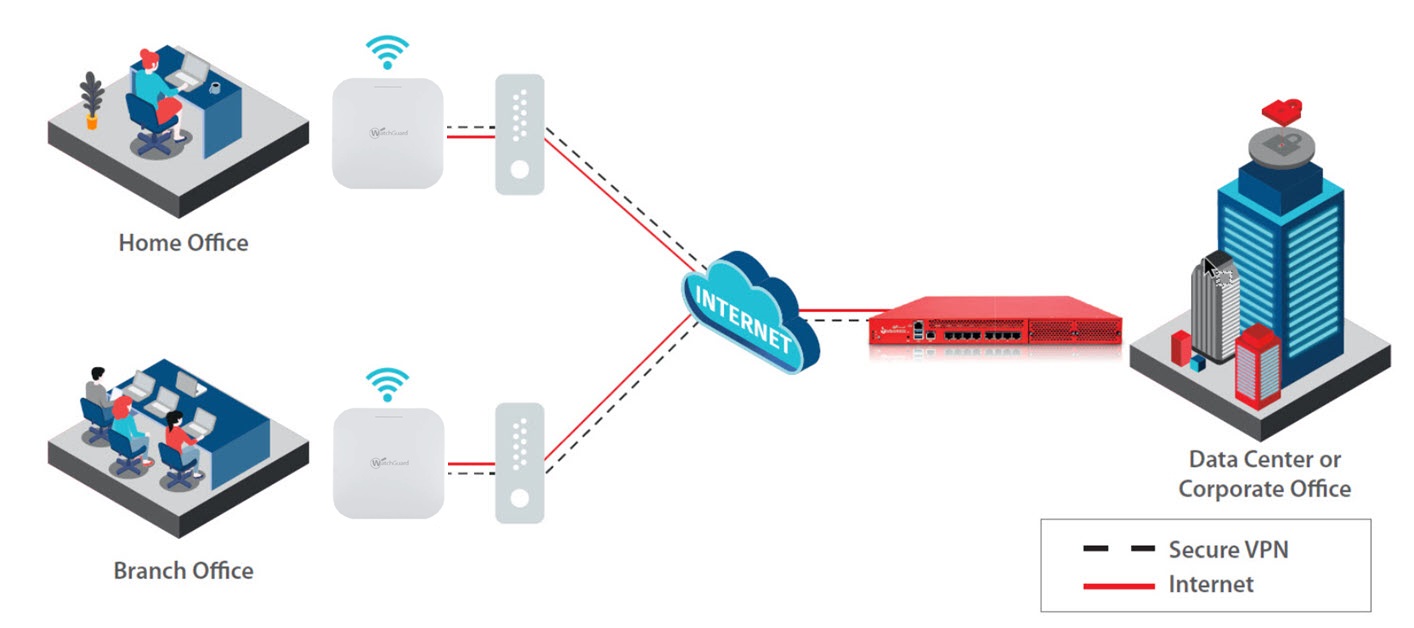
You can create a secure VPN tunnel between a WatchGuard Cloud-managed access point and a cloud-managed Firebox.
Access Point VPN is currently only supported with a single cloud-managed Firebox. Cloud-managed FireClusters are not supported.
A VPN tunnel offers a better and secure way for remote workers to connect back to the corporate data center over an IKEv2 (IKE Version 2) VPN with no user configuration required.
For example:
- A remote worker located at home that requires a secure connection to the corporate network.
- A small branch office that does not require a firewall but requires secure connectivity to the corporate network.
To learn more about how to set up an access point VPN, go to the VPN Connectivity for Access Points video tutorial (11 minutes).
Access Point VPN Requirements
To create an Access Point VPN, you must have:
- Cloud-managed Firebox with Mobile VPN (IKEv2) enabled
- SSID with NAT enabled on your access point
The Access Point VPN feature does not support an SSID with a VLAN or PPSK enabled, or if the SSID is configured with a Captive Portal.
- WatchGuard USP Wi-Fi license
Network Requirements
If the access point you use for the VPN is located behind another firewall or router, make sure these ports are open for VPN communications:
- UDP port 500
- UDP port 4500
Typically, you do not have to specify ESP IP Protocol 50 because it is encapsulated within UDP port 4500 packets. This port is used for NAT Traversal, and ESP cannot use NAT. In most cases, the access point will be the perimeter device and will always use NAT traversal.
Make sure outbound IPSec pass-through is enabled on your firewall or router. Many devices already have this enabled by default. On a WatchGuard Firebox, you can enable the option to add a pass-through policy in the VPN global settings in Fireware Web UI or Policy Manager. For more information, go to About Global VPN Settings in the Fireware Help.
Configure an Access Point VPN
To configure an Access Point VPN, follow these steps:
- Configure a Firebox with Mobile VPN (IKEv2)
- Add an Access Point Site
- Add an SSID with NAT
- Configure the Access Point VPN
- Deploy the Site Configuration to an Access Point
- Test the Access Point VPN
Configure a Firebox with Mobile VPN (IKEv2)
Mobile Virtual Private Networking (Mobile VPN) creates a secure connection between a remote device, such as an access point, and network resources behind the Firebox.
Cloud-managed Fireboxes and WatchGuard access points support Mobile VPN with IKEv2 for the VPN connection, which uses IPSec to provide strong encryption and authentication.
To configure a VPN between an access point and a cloud-managed Firebox, you must first configure a Mobile VPN with IKEv2 on the Firebox.
- From a Subscriber account, select Configure > Devices.
- Select the Firebox.
- Select Device Configuration.
The Device Configuration page opens. - In the VPN section, select Add Mobile VPN.
The Add Mobile VPN page opens. - Select IKEv2.
The Mobile VPN with IKEv2 configuration page opens.
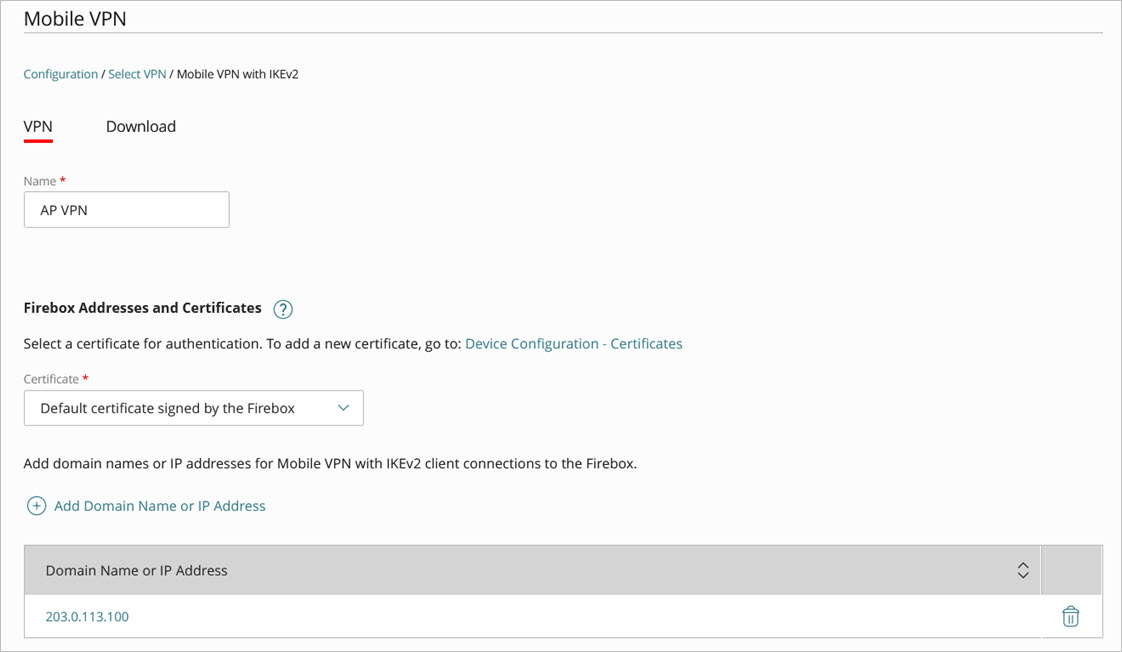
- Type a Name for the VPN.
- In the Firebox Addresses section, click Add Domain Name or IP Address. Add the domain name or public IP address of the Firebox.
- Click Save.
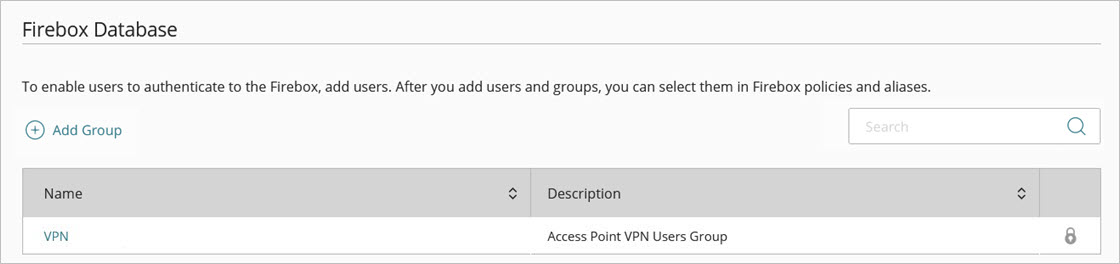
When you configure and deploy the Access Point VPN, the Firebox automatically creates a corresponding authentication group and users for the Access Point VPN users for the Mobile VPN. The group name is the name of the access point site, and the user name for the access point that appears in the group details is the serial number of the device.
For more information, go to Configure Mobile VPN with IKEv2 for a Cloud-Managed Firebox.
Add an Access Point Site
You configure a VPN in an Access Point Site. For more information on Access Point Sites, go to About Access Point Sites.
To configure an Access Point VPN, from WatchGuard Cloud:
- From a Subscriber account, select Configure > Access Point Sites.
The Access Point Sites page opens. - Click Add Site.
You can also select and configure an existing Access Point Site.
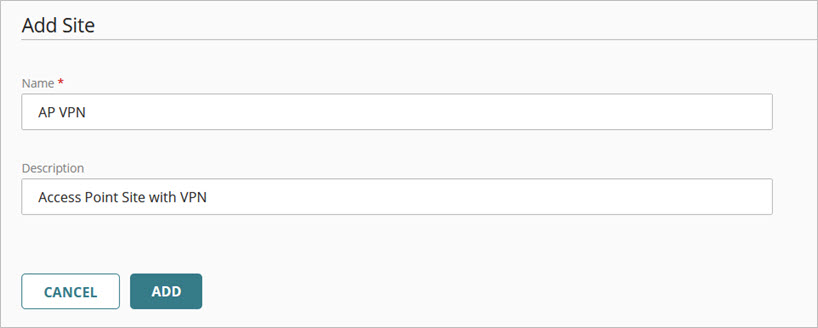
- Type a Name and Description for the Access Point Site, then click Add.
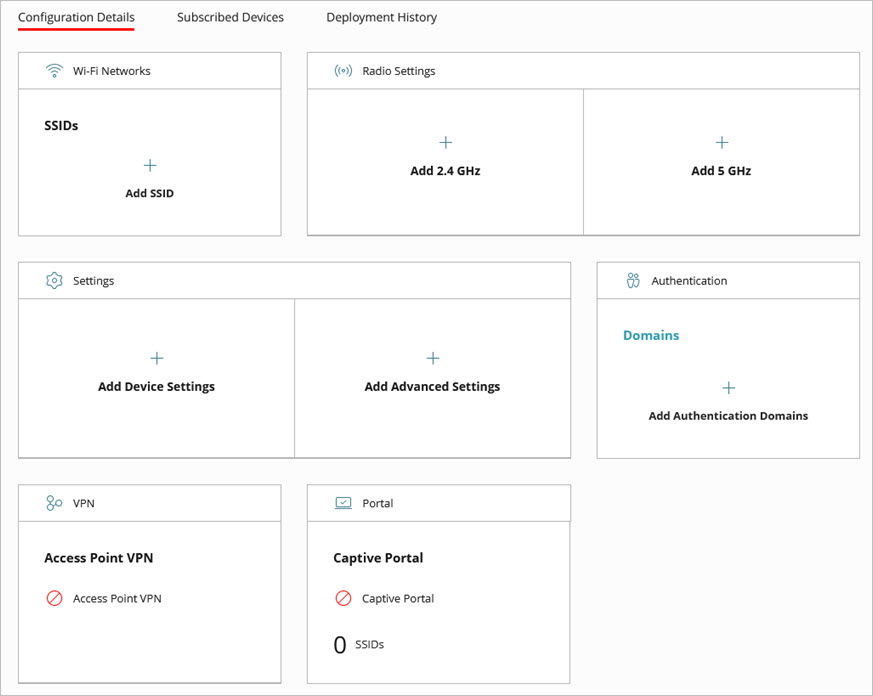
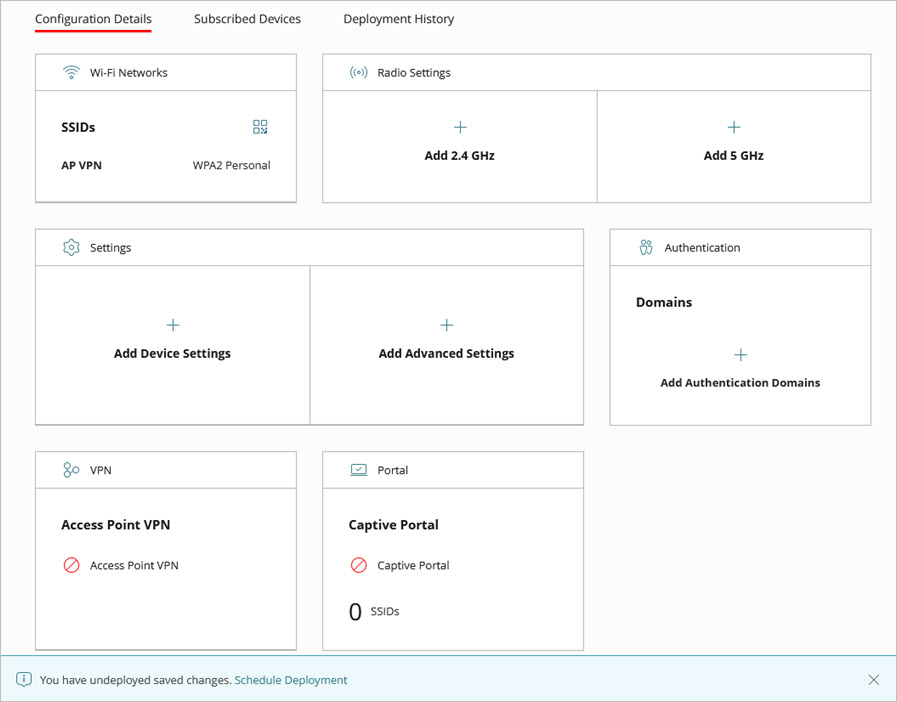
The Access Point Site configuration page opens.
Add an SSID with NAT
To add a NAT-enabled SSID to the site for the Access Point VPN:
- In the Wi-Fi Networks tile, click Add SSID.
The Add SSID page opens.

Configure these SSID settings:
- SSID Name — Type the SSID name. This is the name for this wireless network that appears to clients.
- Broadcast SSID — Select the Broadcast SSID check box to broadcast the SSID name to wireless clients. Clear this check box if you want to hide the SSID name.
- SSID Type — Select a Private wireless network.
- Radio — Select the access point radios (2.4 GHz, 5 GHz, or both 2.4 GHz and 5 GHz) that will broadcast this SSID.
- Security — Select the type of security and passphrase for this SSID. We recommend you use at minimum WPA2 Personal.
- In the Network section, you must select NAT.
The Access Point VPN cannot work with an SSID in bridged mode or with a VLAN enabled.
- Configure these settings when you enable NAT on the SSID:
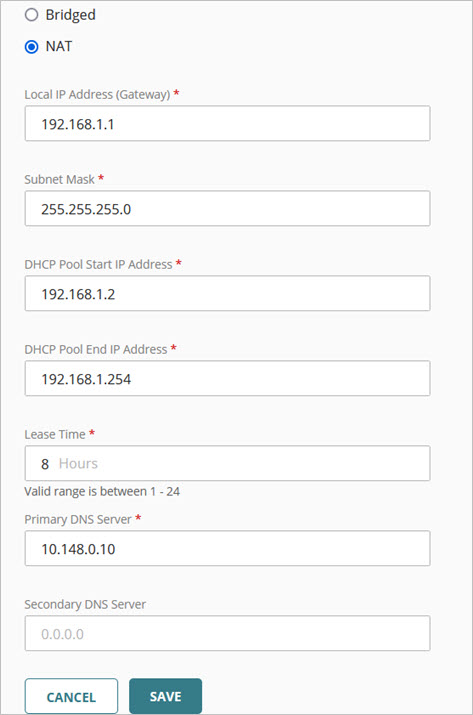
- Local IP Address (Gateway) — An IP address in the selected network outside of the DHCP address pool. This address is used as the gateway address for the clients on the wireless network.
Make sure you configure an IP address range that does not conflict with your existing network's IP addresses.
- Subnet Mask — The net mask for the selected network.
- DHCP Pool Start IP Address — The starting IP address of the DHCP address pool in the selected network.
- DHCP Pool End IP Address — The end IP address of the DHCP address pool in the selected network.
- Lease Time — The DHCP lease time in hours (1 to 24).
- Primary and Secondary DNS Server — The primary and secondary DNS servers to which wireless clients make DNS queries. The primary DNS server should be your corporate network DNS server.
- Click Add to add the SSID to the site.
- Click Back to return to the site configuration settings page.
- Click Schedule Deployment to deploy the site configuration with the new SSID.
If you do not deploy the SSID configuration, the SSID will not be available for you to select in the Access Point VPN configuration in the next step.
Configure the Access Point VPN
To enable and configure the Access Point VPN:
- From the Access Point Site configuration page, click Access Point VPN.
The Access Point VPN page opens.
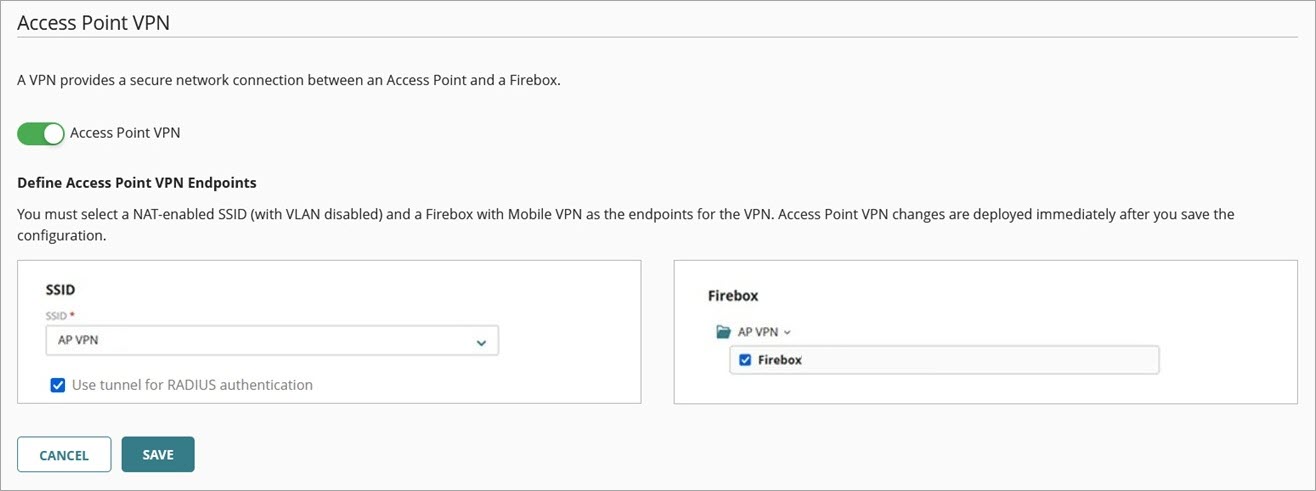
- Enable Access Point VPN.
- From the SSID drop-down list, select the SSID with NAT enabled that you created.
The SSID cannot have a VLAN enabled. - (Optional) Select the Use tunnel for RADIUS authentication check box to send RADIUS authentication traffic over the tunnel to a RADIUS server located behind the Firebox tunnel endpoint. The SSIDs configured in the Access Point VPN and any other SSIDs that use Enterprise authentication with the same RADIUS server will pass authentication traffic over the tunnel. This feature only appears if you have configured Enterprise authentication with a RADIUS server on the SSID configured for Access Point VPN.
- From the Firebox drop-down list, select the cloud-managed Firebox with Mobile VPN enabled.
Only SSIDs with NAT enabled and cloud-managed Fireboxes with Mobile VPN (IKEv2) enabled are displayed in the VPN configuration. Make sure you configure these items before you start the access point VPN configuration.
- Click Save.
After you save the Access Point VPN, the configuration is deployed immediately.
When you save and deploy the Access Point VPN, the Firebox automatically creates a corresponding authentication group and users for the Access Point VPN.
Deploy the Site Configuration to an Access Point
When you have completed the SSID and VPN configuration in your site, you must deploy the configuration to an access point by subscribing the device to the site.
- Return to the site configuration settings page.
- Click the Subscribed Devices tab.
The Subscribed Devices tab shows a list of all devices subscribed to the site.
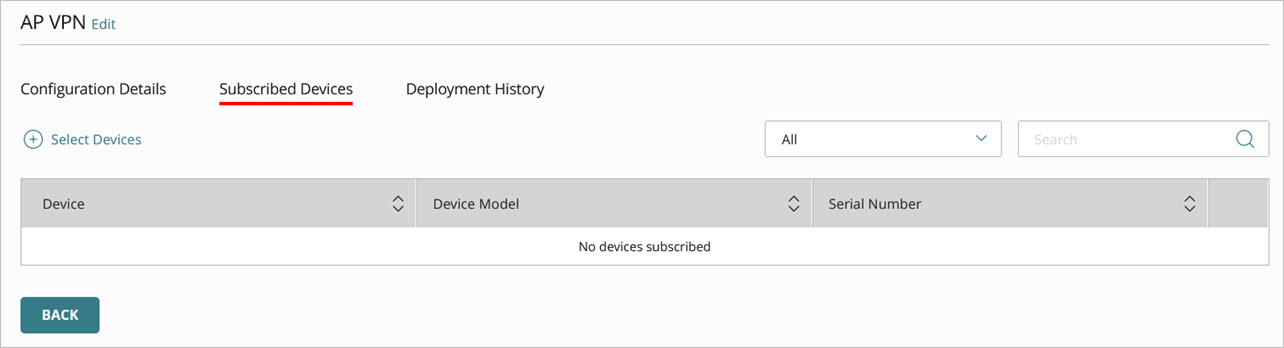
- To select devices to subscribe to this site, click Select Devices.
The Select Devices page opens. This list shows all devices in the currently selected account that do not already subscribe to this site.
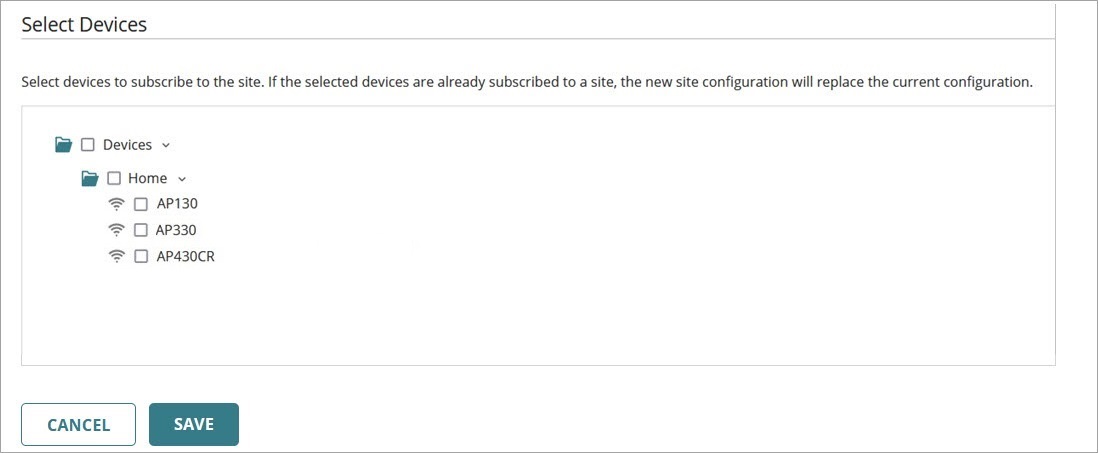
- Click the check box next to the devices you want to subscribe to the VPN site.
- Click Save.
The site is immediately deployed to the cloud for the selected devices to download.
Test the Access Point VPN
If the Access Point VPN is set up correctly, the access point appears in the Live Status > VPN > Mobile VPN page on the Firebox that you set up with Mobile VPN with IKEv2.
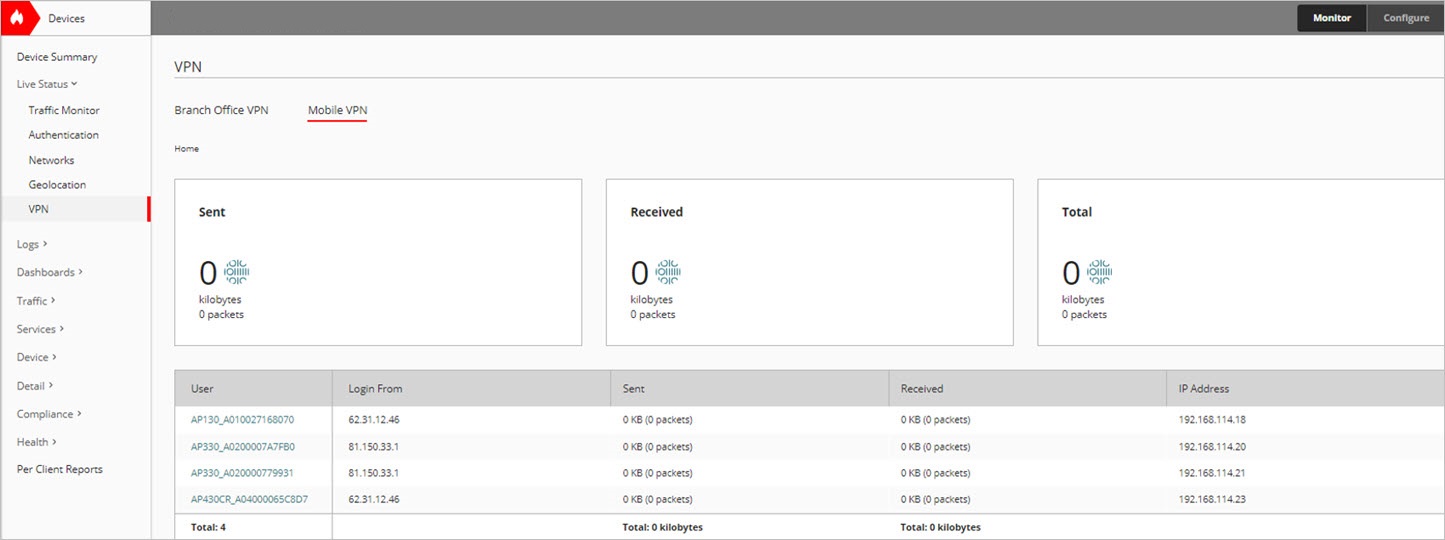
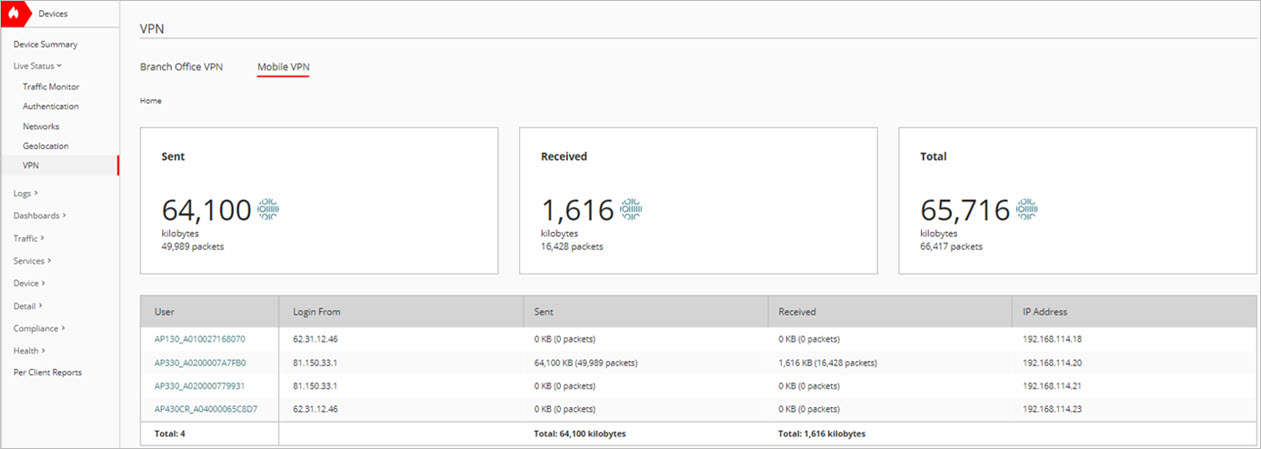
To test your connection, associate a wireless client with the SSID you created for your Access Point VPN, then attempt to connect to resources behind the Firebox.
You should see traffic sent and received over the VPN.
Configure Access Point SSID Settings