Applies To: Locally-managed Fireboxes
You can create a report schedule to generate specific Dimension reports for a list of one or more Fireboxes or WatchGuard servers to send as a PDF to the destination you specify. You can also edit and delete report schedules. The report schedules that you create appear in the Manage Tasks list, with the name and description of the report and the schedule recurrence settings.
Because you can select to send reports to an email address, before Dimension can send the reports you schedule, you must configure the Notification Setup setting in the Notifications settings for your Dimension server. For more information, go to Configure Notification Settings for Dimension.
Only users with Super Administrator, Global Administrator, or Report Administrator credentials can schedule reports.
Before you can create a report schedule to send reports to a directory on an FTP or SFTP server, you must add the server to the FTP Servers list in the Log Server Reporting settings. For more information, go to Configure Reporting Settings.
Available Dimension Report Categories and Destinations
When you create a report schedule, you select which reports to include in the schedule. The reports that you can select for your schedule depend on the report destination you select when you create the schedule.
| Destination | Available Report Categories |
|---|---|
| Summary Reports | |
| Directory | Detail and Summary Reports |
| ConnectWise | ConnectWise Reports |
For more information about which reports are available for each destination, go to About Dimension Reports.
If Dimension is in Anonymized Mode, you cannot include server reports, compliance reports, and detail reports in a report schedule. Before these reports can be scheduled, you must disable Anonymized Mode in the Visibility settings; they cannot be included in a schedule when the Anonymization Officer logs in to temporarily disable Anonymized Mode.
For more information about Anonymized Mode, go to Anonymize Reports in Dimension.
If you include more than one destination in the same schedule, the reports you can select are those that are available for the destination with the most restricted list. For example, when you select to send reports to ConnectWise, you can select one or more of only these reports:
- Firebox Statistics
- Intrusion Prevention Service Summary
- Most Popular Domains
- WebBlocker (Summary, by Category)
If you select to send reports in an email, you can select to include any summary report in the schedule. But, if you select to send reports to ConnectWise and to send them in an email, because you selected ConnectWise as one of the destinations for the reports in the schedule, you can only select to include reports from the ConnectWise reports list in your schedule.
If your report schedule includes server reports and you select to send the reports in an email and to a directory location, your report selection is not limited; you can select from any of the available server reports.
Create a Dimension Report Schedule
To create a Dimension report schedule, complete the Create Schedule wizard and specify the devices or servers to include in the report data, the types of reports to run on the log messages from the selected devices or servers, how often the reports are generated, and the location where the reports are sent. The options that appear on each page of the wizard depend on the options you specify in the previous page of the wizard.
To create a report schedule:
- Select

 > Administration > Administration > Manage Tasks.
The Manage Tasks page opens. - To unlock the configuration so you can make changes, click
 .
.
For more information about how to unlock and lock the Dimension configuration, go to Lock and Unlock the Dimension Configuration.. - From the Add drop-down list, select Schedule Reports.
The Create Schedule wizard opens, with the Name & Description page selected.

- In the Schedule Name text box, type a name for this report schedule.
- (Optional) In the Description text box, type a description of the report schedule.
- Click Next.
The Resource Selection page opens. - Select an option:
- Devices
- Servers
- From the drop-down list, select an option:
- For devices — All Devices or Specify Devices
- For servers — All Servers or Specify Servers
- If you selected Specify Devices or Specify Servers, click
 .
.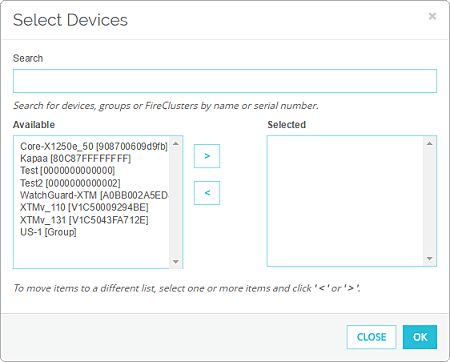
- To search for Fireboxes, groups, or FireClusters that are included in the Available list, in the Search text box, type the name or serial number to search on.
- From the Available list, select one or more Fireboxes, FireClusters, or groups and click
 .
.
The devices or servers are moved to the Selected list. - Click OK.
The selected devices appear in the Resource Selection list.
- Click Next.
The Destination Selection page opens. - Select the check box for one or more destinations for this report schedule:
- In the text box, type the email address to send the reports to. Click
The email address is added to the destination email list.- To specify the subject and body text for the email, click Show email subject and body settings.
- In the first text box, type the subject line for the email.
- In the second text box, type the body text for the email.
You must specify an FTP server or remote backup location before you can send reports to that location. For more information, see Configure Reporting Settings.
- From the drop-down list, select an option:
- FTP Server
- Remote backup location
- If you selected FTP Server:
- From the drop-down list, select the name of the FTP server.
- In the text box, type the path to the subdirectory on the FTP server to store the reports generated by this schedule.
- If you selected Remote backup location, in the text box, type the path to the subdirectory to store the reports generated by this schedule.
- To send an email notification to the administrator when the reports are sent to the specified directory, select the Send an email notification to the administrator when reports are sent to a directory or ConnectWise check box.
Before you can send a report to ConnectWise, you must configure the reporting settings for ConnectWise. For more information, see Configure Reporting Settings.
- From the drop-down list, select a ConnectWise company name.
- To send an email notification to the administrator when the reports are sent to ConnectWise, select the Send an email notification to the administrator when reports are sent to a directory or ConnectWise check box.
- Click Next.
The Report Selection page opens. - From the Report Types drop-down list, select an option:
The available options depend on the destinations you specified for this report schedule. Not all options are available for all destinations.- Executive Summary Reports
- ConnectWise Reports
- Specify Reports
- If you select Specify Reports, in the Available Report Types section, click .
In the Select Reports dialog box, select the reports to include.- From the Report types drop-down list, select a report type.
- From the Available list, select one or more reports and click .
The reports are moved to the Selected list. - Click OK.
The selected reports appear in the Available Report Types list. - To remove a report from the Available Report Types list, select the report and click
 .
.
- From the PDF Report Language drop-down list, select the language to use for the report:
- English (United States)
- French (France)
- Japanese
- Spanish (Latin America)
- From the Time Zone drop-down list, select the time zone for the report data.
- From the Report Template drop-down list, select the report template to use for the report.
- From the Report Output Options drop-down list, select an option:
- Single — Generate a separate report file for each selected report type and each selected Firebox.
- Combined — Generate an aggregated report file for all selected Fireboxes. Tip!
- Single and Combined — Generate a separate report file for each selected report type and each selected Firebox, and generate a separate report file for each report type that includes all selected Fireboxes. Tip!
- From the Run Reports drop-down list, select an option:
- Daily
- Weekly
- Monthly
If you selected ConnectWise Reports for the Report Type, this option is not available. ConnectWise Reports are automatically generated on a daily schedule.
- To select the time the report starts to run, adjacent to Start Time, click
 and specify the hour, minute, and time of day: AM or PM.
Or, in the Start Time text box, type the hour, minute, and time of day the report starts. - Click Finish.
The schedule appears in the Manage Tasks list.
Edit a Dimension Report Schedule
When you edit a schedule to change the options included in the schedule, you can modify all settings except for the name of the schedule.
To edit a report schedule:
- From the Manage Tasks list, select a scheduled report and click Edit.
The Edit Schedule dialog box opens. - Select a tab and modify the settings:
- Name & Description
- Resource Selection
- Destination Selection
- Reports Selection
- Click Save.
The updated report schedule appears in the Manage Tasks list.
Delete a Dimension Report Schedule
To delete a schedule:
- From the Manage Tasks list, select a scheduled report and click Remove.
A confirmation message appears. - Click Yes.
The Manage Tasks list appears without the report schedule you deleted.