Applies To: ThreatSync+ NDR
This feature is only available with a ThreatSync+ NDR or Total NDR license. For more information, go to About ThreatSync+ NDR Licenses and About Total NDR Licenses.
To monitor and detect threats in your AWS workloads, ThreatSync+ NDR requires access to your AWS flow log data. To collect this data and monitor the AWS log traffic, you must add and configure a cloud integration in WatchGuard Cloud.
Configuration of an AWS VPC flow logs integration is a two-step process. You must first complete configuration in the AWS Management Console, and then create the AWS VPC flow logs integration in the ThreatSync+ Integrations UI.
Before You Begin
To configure AWS in the AWS Management Console, make sure:
- You have an AWS user account with administrator privileges.
- You can connect to the AWS Management Console.
- Workloads are running in AWS that can generate flow logs.
For more information, go to Logging IP traffic using VPC Flow Logs in the AWS documentation.
Before you can create a ThreatSync+ NDR cloud integration with AWS VPC flow logs, you must:
- Create a S3 Bucket in the AWS Management Console
- Update Bucket Permissions
- Enable VPC Flow Logs in AWS
Create a S3 Bucket in the AWS Management Console
In AWS, an Amazon S3 bucket is an object storage container where flow logs are stored.
To create a S3 bucket in AWS:
- Log in to the AWS Management Console at AWS Management Console.
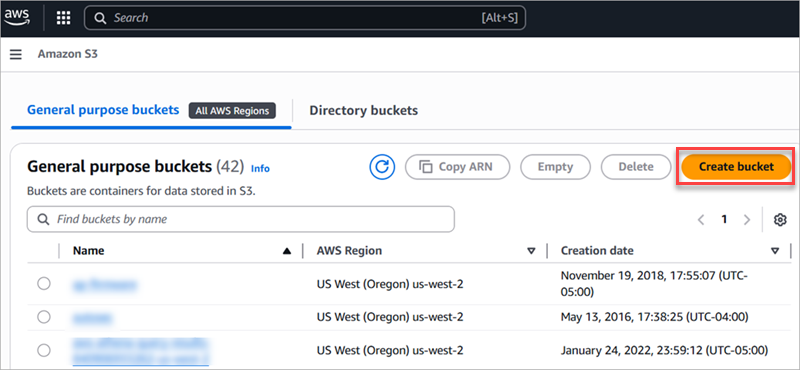
- Search for the S3 service.

- On the General purpose buckets tab, click Create bucket.
- Enter a unique bucket name. Keep the default values for other options on this page.
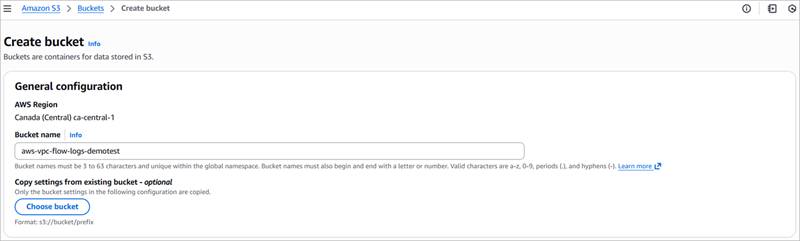
- Click Create bucket.
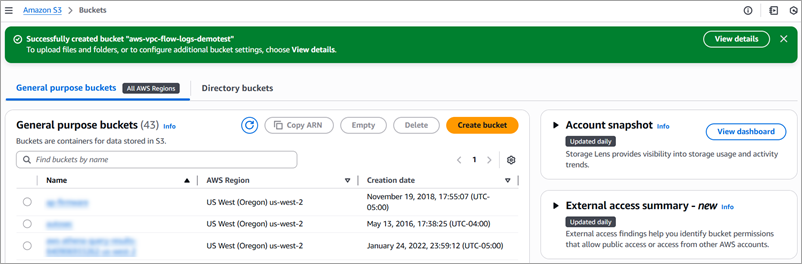
- Copy the bucket name and save it. You will need these values when you create an AWS VPC flow logs cloud integration in ThreatSync+ NDR.
For more information, go to Create a Bucket in the AWS documentation.
Update Bucket Permissions
ThreatSync+ NDR collects flow logs from the AWS S3 bucket. Read permissions for the bucket is required to access logs stored in the AWS S3 bucket.
To update bucket permissions:
- Click View Details next to the bucket you just created, or search for the bucket by name.
The Bucket Details page opens. - Select the Permissions tab.
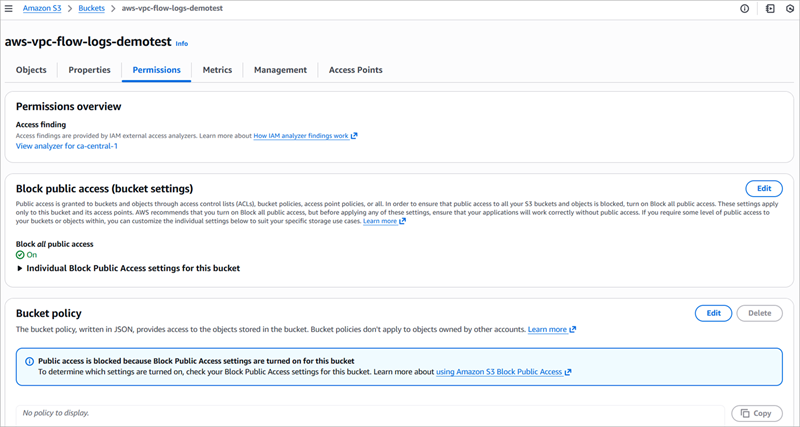
- In the Bucket policy section, click Edit.
- Click Add new statement to add placeholder policy text.
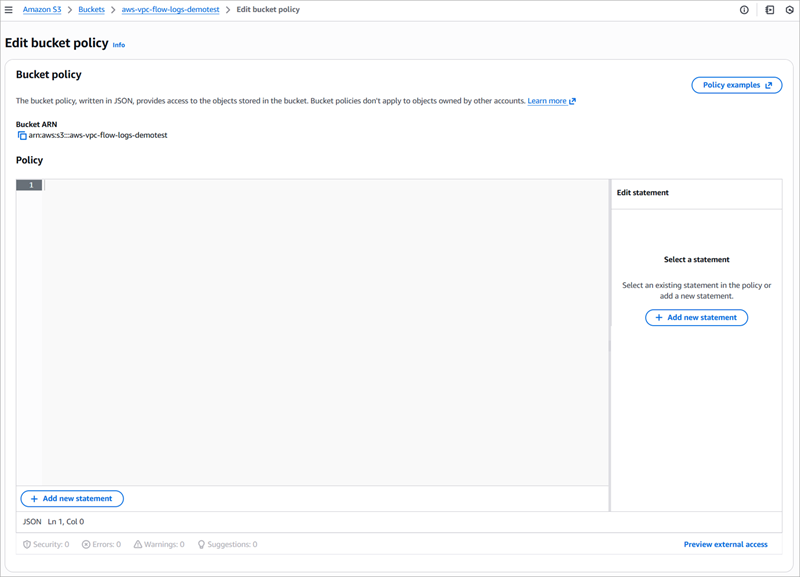
- An empty policy is created.
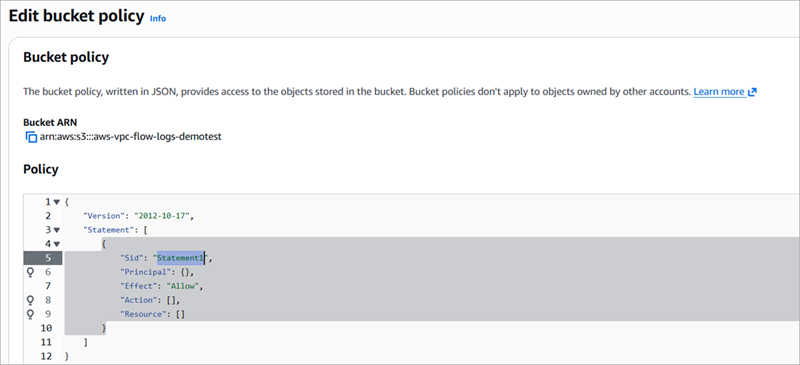
- Add a policy statement that provides read-only access to the WatchGuard Cloud AWS account. Each WatchGuard Cloud region uses a different name. Select the one that corresponds to your account. Copy and paste the snippet below and replace [Bucket Name] with the name of your bucket.
WatchGuard Cloud requires read-only permissions for ListBucket and GetObject.
{

                "Sid": "AllowBucketReadToNDR",

                "Effect": "Allow",

                "Principal": {

                    "AWS": "arn:aws:iam::939669539178:role/prod-us-west-2-saas-integration-IAM-Role"

                },

                "Action": [

                    "s3:GetObject",

                    "s3:ListBucket"

                ],

                "Resource": [

                    "arn:aws:s3:::[Bucket Name]",

                    "arn:aws:s3:::[Bucket Name]/*"

                ]

}{
"Sid": "AllowBucketReadToNDR",
"Effect": "Allow",
"Principal": {
"AWS": "arn:aws:iam::939669539178:role/prod-eu-central-1-saas-integration-IAM-Role"
},
"Action": [
"s3:GetObject",
"s3:ListBucket"
],
"Resource": [
"arn:aws:s3:::[Bucket Name]",
"arn:aws:s3:::[Bucket Name]/*"
]
}{
"Sid": "AllowBucketReadToNDR",
"Effect": "Allow",
"Principal": {
"AWS": "arn:aws:iam::939669539178:role/prod-ap-northeast-1-saas-integration-IAM-Role"
},
"Action": [
"s3:GetObject",
"s3:ListBucket"
],
"Resource": [
"arn:aws:s3:::[Bucket Name]",
"arn:aws:s3:::[Bucket Name]/*"
]
}In this example, a snippet for WatchGuard Cloud in Japan is entered in the bucket policy:
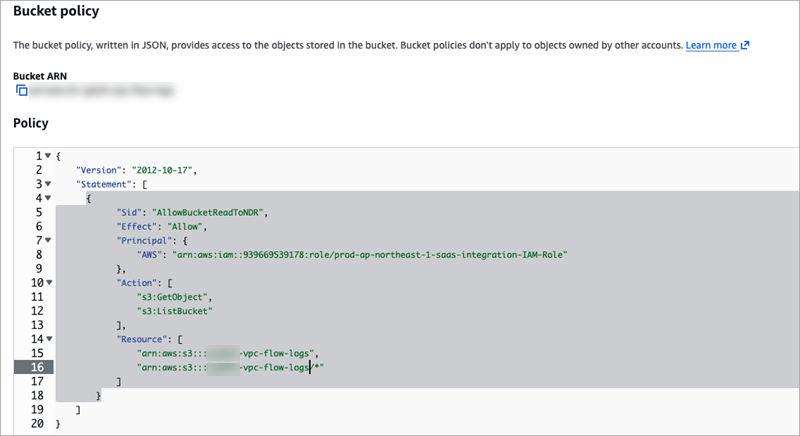
- Click Save changes.
Enable VPC Flow Logs in AWS
Configure AWS workloads to send flow logs to the S3 bucket that you created.
To configure AWS VPC flow logs:
- In the AWS Management Console, go to the VPC dashboard.
- Select the VPC you want to monitor.
- On the Flow Logs tab, click Create flow log.
The Create flow log page opens.
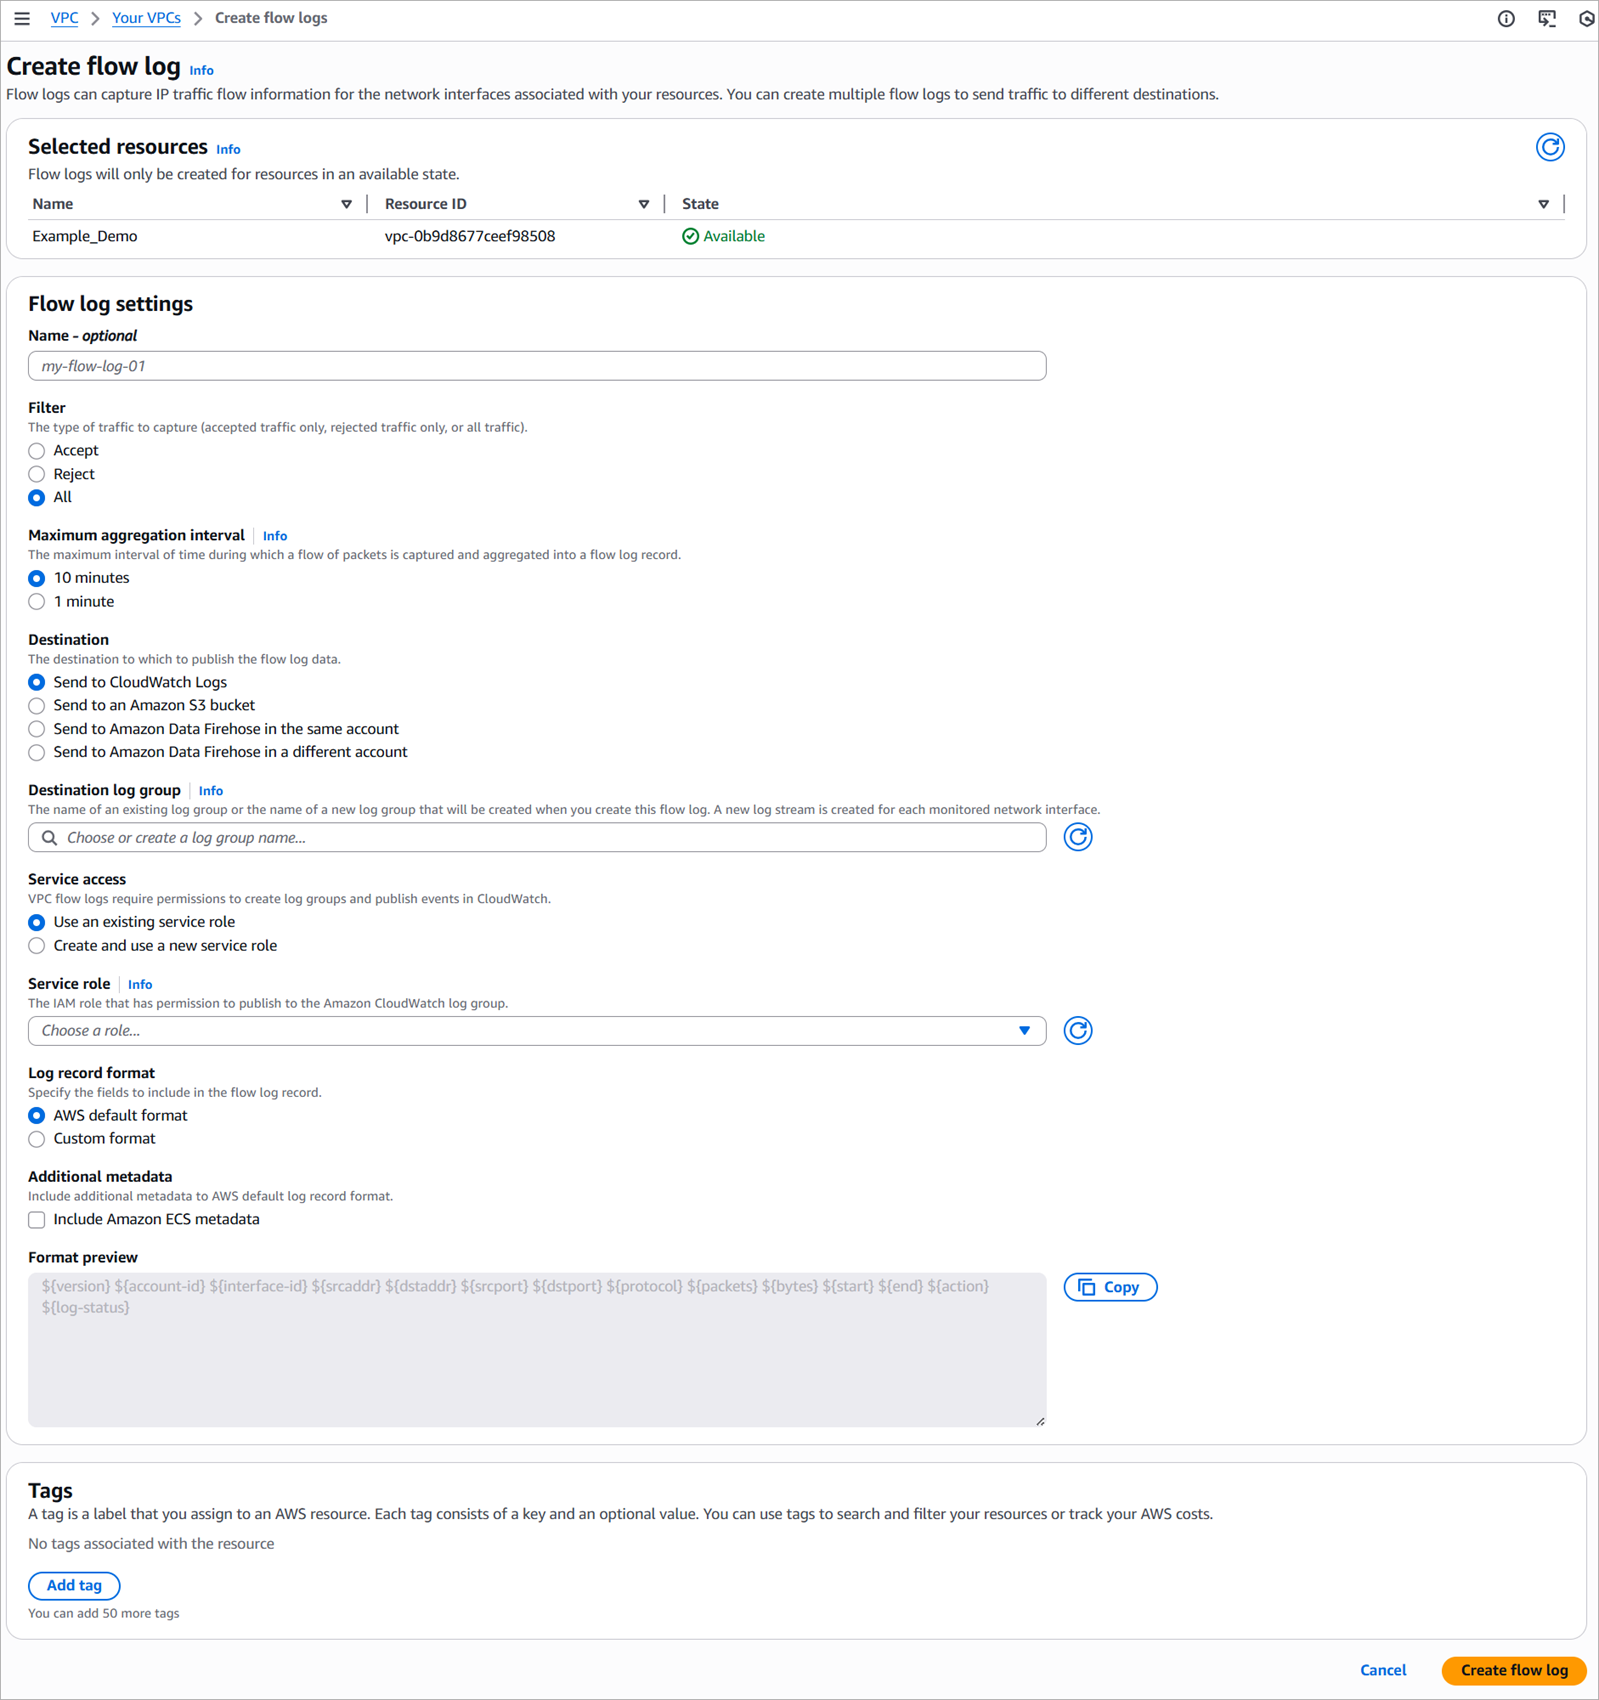
- In the Flow log settings section, select these options:
- In the Filter section, select All.
- In the Maximum aggregation interval section, select 10 minutes.
- In the Destination section, select Send to an Amazon S3 bucket. Enter the name of the Amazon S3 bucket you created.
- In the Log record format section, select Custom format.
- Select these attributes from the drop-down list in this order:
${version} ${account-id} ${interface-id} ${start} ${end} ${srcaddr} ${srcport} ${dstaddr} ${dstport} ${protocol} ${bytes} ${packets} ${pkt-srcaddr} ${pkt-dstaddr} ${action} ${log-status} ${vpc-id} ${subnet-id} ${instance-id} ${tcp-flags} ${type} ${region} ${az-id} ${sublocation-type} ${sublocation-id} ${pkt-src-aws-service} ${pkt-dst-aws-service} ${flow-direction} ${traffic-path}

- Verify that the Format preview section shows the attributes in the correct order.
- Click Create flow log.
For more information, go to Create a flow log that publishes to Amazon S3 in the AWS documentation.
Create an AWS VPC Flow Logs Cloud Integration
To create an AWS VPC flow logs cloud integration, you must have the Amazon S3 bucket name, account name, and VPC ID.
To add a cloud integration, from WatchGuard Cloud:
- Select Configure > ThreatSync+ Integrations > Cloud Integration.
The Cloud Integrations page opens. - Click Add Cloud Integration.

- From the Cloud Service drop-down list, select AWS VPC Flow Logs.
- In the AWS Account ID text box, enter your AWS Account ID.
- In the AWS Bucket Name text box, enter your AWS bucket name.
- To add VPC identifiers, click Add Regions and VPC IDs.
The Add Regions and VPC IDs dialog box opens.- In the Region section, select your region.
- In the VPC ID section, enter one or more VPC IDs in the text box and press Enter. You can paste multiple VPC IDs, separated by commas.

- Click Add.
The VPC Identifier shows in the list.
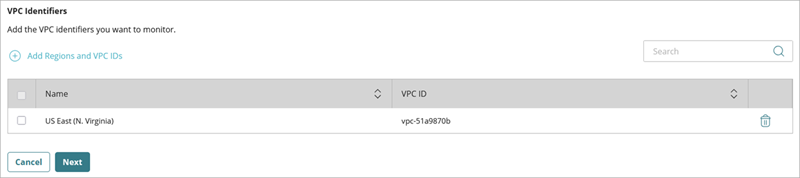
- Click Next.
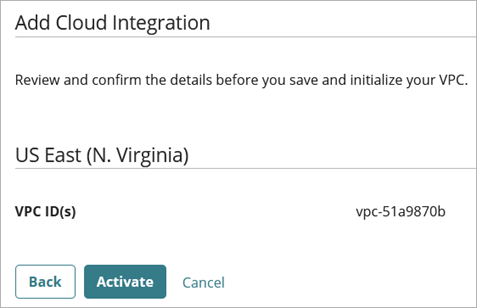
- Click Activate.
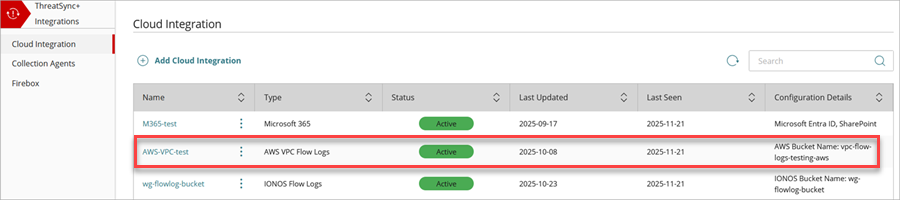
- After the status changes from Initializing to Active, the cloud integration configuration is complete. It might take up to 30 minutes for the status to change to Active.
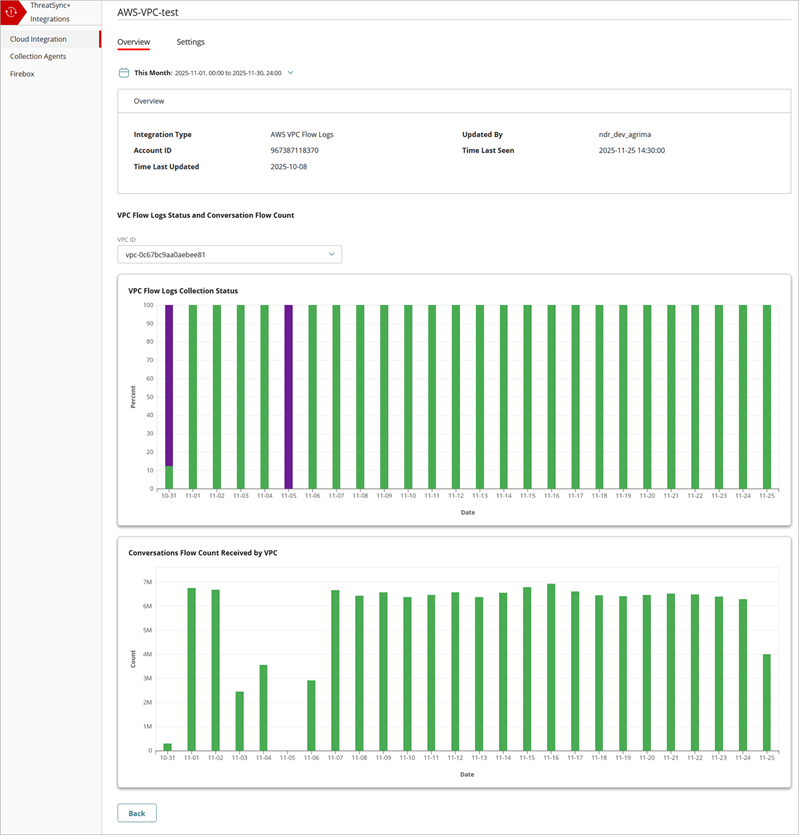
- To view the VPC Flow Logs Collection Status and Conversations Flow Count charts, click the cloud integration name in the Name column.
It might take up to 90 minutes for ThreatSync+ NDR to learn your environment and start to show alerts in the Monitor menu.
Edit an AWS VPC Flow Logs Cloud Integration
You can edit an existing, active AWS VPC cloud integration to change the description, add or edit a VPC ID, or mute repeated failure notifications.
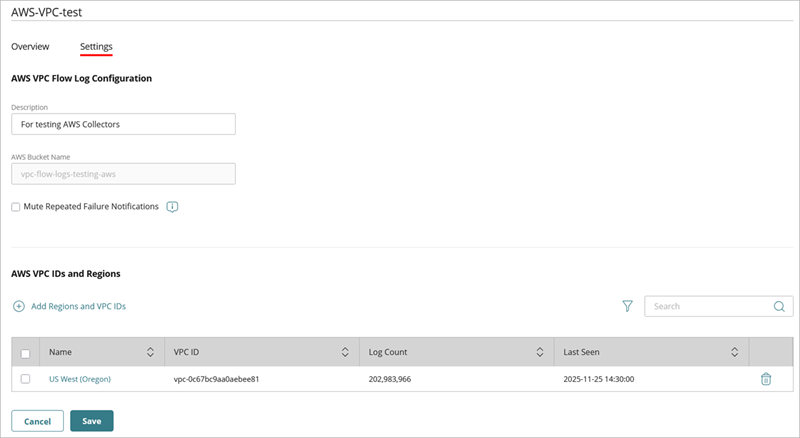
To edit an AWS VPC cloud integration:
- Select Configure > ThreatSync+ Integrations > Cloud Integration.
The Cloud Integrations page opens. - Click the name of the cloud integration you want to edit.
The Cloud Integration Details page opens, with the Overview tab selected by default. - (Optional) In the Description text box, edit the name of the cloud integration.
- Select the Mute Repeated Failure Notifications check box if you only want a single notification sent for this cloud integration when a cloud integration failure occurs.
- (Optional) In the AWS VPC IDs and Regions section, add or edit a VPC ID.
- Click Save.
About ThreatSync+ Cloud Integration — AWS VPC Flow Logs