Configure Dynamic Routing on a Cloud-Managed Firebox
Applies To: Cloud-managed Fireboxes
This document applies to Fireboxes you manage in WatchGuard Cloud. For information that applies to Fireboxes managed in Fireware Web UI or WatchGuard System Manager, go to:
Overview
A route is the sequence of devices through which network traffic must travel to get from the source to the destination. Each device in this sequence, usually called a router, stores information about the networks it is connected to inside a route table. Dynamic routing automatically updates routing tables as the configuration of a network changes. This makes sure that network packets can reach their intended destination, even if a router in the path fails.
For a cloud-managed Firebox, you can add dynamic routing from the Firebox to another network with a dynamic routing configuration file. To create or modify a dynamic routing configuration file, you must use routing commands. For more information about routing configuration files, go to About Sample Routing Configuration Files in Fireware Help.
Your operator role determines what you can see and do in WatchGuard Cloud. Your role must have the Devices permission to view or configure this feature. For more information, go to Manage WatchGuard Cloud Operators and Roles.
Dynamic Routing Protocols
Cloud-managed Fireboxes support the RIP v1, RIP v2, RIPng, OSPF, OSPFv3, and BGP v4 protocols.
- For IPv4 dynamic routing, you must use RIP, OSPF, or BGP.
- For IPv6 dynamic routing, you must use RIPng, OSPFv3, or BGP.
For more information about these routing protocols, go to About Dynamic Routing and Protocols for Cloud-Managed Fireboxes.
Configure IPv4 Routing with RIP
When you enable RIP, a dynamic routing policy called DR-RIP-Allow is automatically created. You can edit this policy to add authentication and restrict the policy to listen on only the correct interfaces. The DR-RIP-Allow policy is configured to allow RIP multicasts to the reserved multicast address for RIP v2.
If you use RIP v1, you must configure the RIP policy to allow RIP broadcasts from the network broadcast IP address to the Firebox. For example, if your external network IP address is 203.0.113.2/24, the RIP policy must allow traffic from the broadcast address 203.0.113.255 to the Firebox.
To configure dynamic routing with RIP for IPv4, from WatchGuard Cloud:
- Select Configure > Devices.
- Select the cloud-managed Firebox.
- Click Device Configuration.
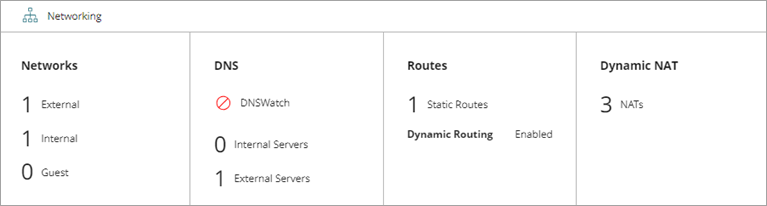
- In the Networking section, click the Routes widget.
The Routes page opens.

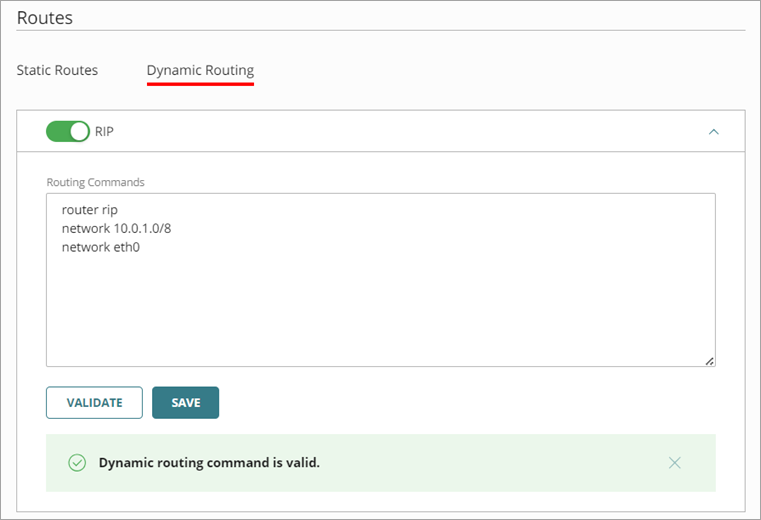
- Select the Dynamic Routing tab.
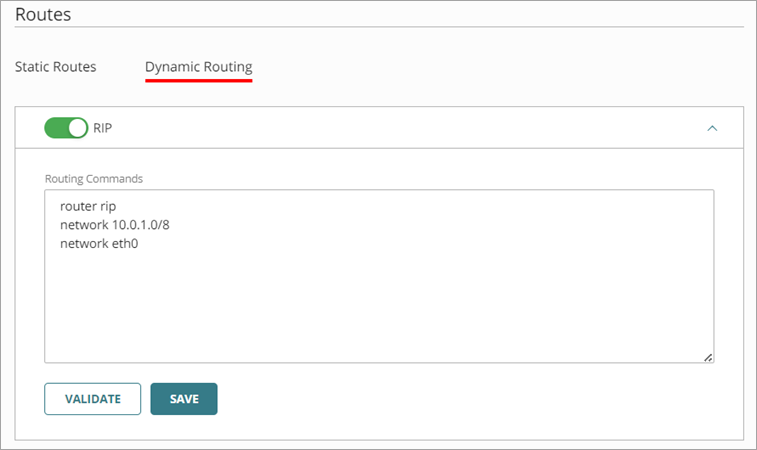
- Enable the RIP dynamic routing protocol.
The Routing Commands text box opens.You can enable more than one routing protocol at the same time.

- In the Routing Commands text box, paste the text of your routing daemon configuration file. To get started, you must have at least two commands in your RIP configuration file. These commands, in this order, start the RIP process:
- router rip (RIP routing protocol that uses hop count to determine the best path, with a limit of 15 hops)
- network <Network IP address of the interface you want the process to listen on and distribute through the protocol>
- neighbor <IP address of neighboring RIP router>
For more information about routing configuration files, go to About Sample Routing Configuration Files in Fireware Help.

- (Optional) To validate the configuration of a dynamic routing protocol, click Validate. For more information, go to Validate a Dynamic Routing Configuration.
- Click Save.
For configuration changes to take effect on a cloud-managed Firebox, you must deploy the configuration update to the Firebox. For more information, go to Manage Device Configuration Deployment for Fireboxes.
Configure IPv4 Routing with OSPF
When you enable OSPF, a dynamic routing policy called DR-OSPF-Allow is automatically created.
OSPF protocol has these requirements:
- If you have more than one OSPF area, one area must be area 0.0.0.0 (the backbone area).
- All areas must be adjacent to the backbone area. If they are not, you must configure a virtual link to the backbone area.
- The OSPF authentication password must be 1 to 8 characters in length. If you specify a password that includes 9 or more characters, the password is truncated to 8 characters.
WatchGuard Cloud supports OSPFv2 for IPv4 dynamic routing.
To configure dynamic routing with OSPF for IPv4, from WatchGuard Cloud:
- Select Configure > Devices.
- Select the cloud-managed Firebox.
- Click Device Configuration.
- In the Networking section, click the Routes widget.
The Routes page opens.
- Select the Dynamic Routing tab.
- Enable the OSPF dynamic routing protocol.
The Routing Commands text box opens. - In the Routing Commands text box, paste the text of your routing daemon configuration file. To get started, you must have at least two commands in your OSPF configuration file. These commands, in this order, start the OSPF process:
- router ospf (Link-state routing protocol that calculates optimal paths using cost-based metrics)
- network <Network IP address of the interface you want the process to listen on and distribute through the protocol>
- area <area ID in x.x.x.x format, such as 0.0.0.0>
For more information about routing configuration files, go to About Sample Routing Configuration Files in Fireware Help.

- (Optional) To validate the configuration of a dynamic routing protocol, click Validate. For more information, go to Validate a Dynamic Routing Configuration.
- Click Save.
For configuration changes to take effect on a cloud-managed Firebox, you must deploy the configuration update to the Firebox. For more information, go to Manage Device Configuration Deployment for Fireboxes.
Configure IPv4 Routing with BGP
When you enable BGP, a dynamic routing policy called DR-BGP-Allow is automatically created.
To participate in BGP with an ISP, you must have a public autonomous system (AS) number. For internal BGP between private networks, you must use a private AS number. For more information, go to About Border Gateway Protocol (BGP) in Fireware Help.
You can configure dynamic routing with BGP for both IPv4 and IPv6 networks.
To configure dynamic routing with BGP, from WatchGuard Cloud:
- Select Configure > Devices.
- Select the cloud-managed Firebox.
- Click Device Configuration.
- In the Networking section, click the Routes widget.
The Routes page opens.
- Select the Dynamic Routing tab.
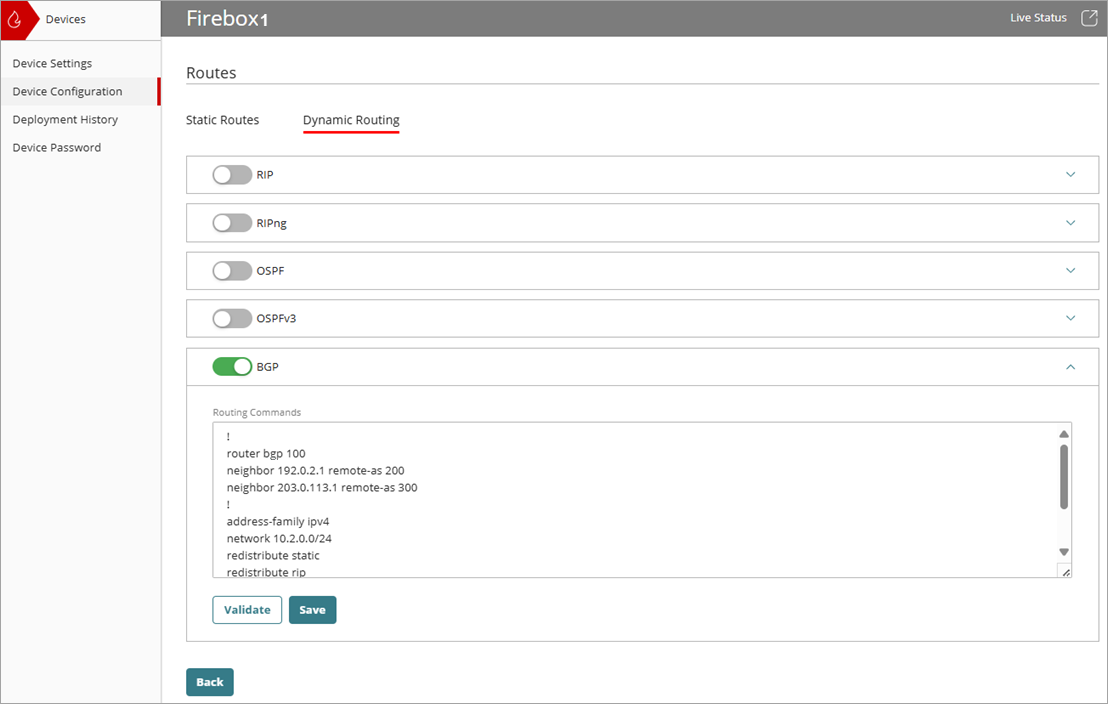
- Enable the BGP dynamic routing protocol.
The Routing Commands text box opens. - In the Routing Commands text box, paste the text of your routing daemon configuration file. To get started, you need only three commands in your BGP configuration file. These three commands start the BGP process, set up a peer relationship with the ISP, and create a route for a network to the Internet.
Use the commands in this order:- router BGP <BGP autonomous system number supplied by your ISP>
- neighbor <IP address of neighboring BGP router> remote-as <BGP autonomous number>
- network <Network IP address that you want to advertise a route to from the Internet>
- redistribute <Take routes from another routing protocol or source and advertise them into BGP>
The network and redistribute commands are under the address-family section.
For example:
! Start BGP
router bgp 100
neighbor 192.0.2.1 remote-as 200
neighbor 203.0.113.1 remote-as 300
! IPv4 unicast address family context for BGP
address-family ipv4
! Advertise the local network
network 10.2.0.0/24
! Inject routes (static, rip, and ospf)
redistribute static
redistribute rip
redistribute ospf
! Exit the address-family context and BGP mode
exit-address-family
exit
For more information about routing configuration files, go to About Sample Routing Configuration Files in Fireware Help.
- (Optional) To validate the configuration of a dynamic routing protocol, click Validate. For more information, go to Validate a Dynamic Routing Configuration.
- Click Save.
For configuration changes to take effect on a cloud-managed Firebox, you must deploy the configuration update to the Firebox. For more information, go to Manage Device Configuration Deployment for Fireboxes.
Configure IPv6 Routing
When you have IPv6 enabled for a network, you can configure dynamic routing with the RIPng, OSPF v3, and BGP protocols. For information about how to enable IPv6 for a network, go to Configure a Firebox External Network or Configure a Firebox Internal or Guest Network.
WatchGuard Cloud automatically creates dynamic routing policies for the protocols you enable:
- RIPng — DR-RIPng-Allow
- OSPF v3 — DR-OSPFv3-Allow
- BGP — DR-BGP-Allow
To configure dynamic routing for IPv6, from WatchGuard Cloud:
- Select Configure > Devices.
- Select the cloud-managed Firebox.
- Click Device Configuration.
- In the Networking section, click the Routes widget.
The Routes page opens.
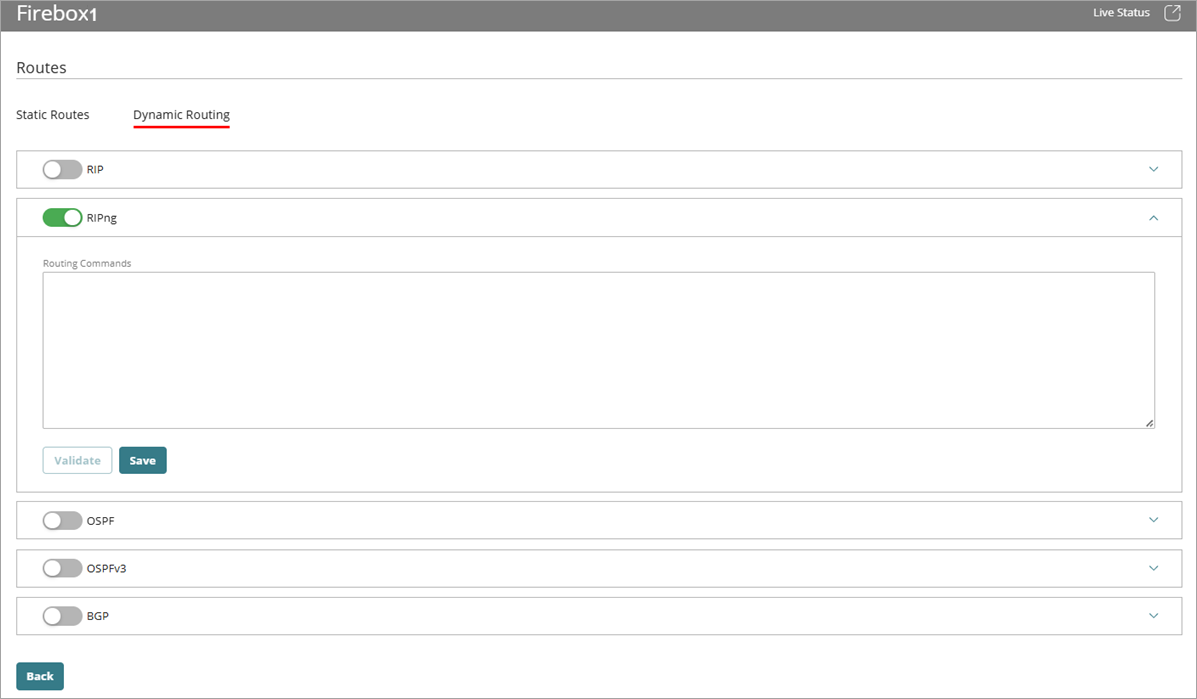
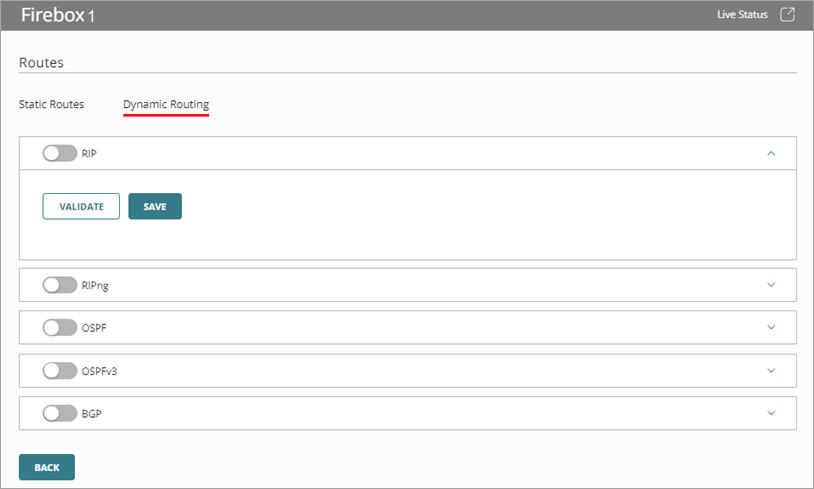
- Select the Dynamic Routing tab.
- Enable one or more of these dynamic routing protocols: RIPng, OSPFv3, BGP.
The Routing Commands text box opens.You can enable more than one routing protocol at the same time.
- In the Routing Commands text box, paste the text of your routing daemon configuration file. For more information about routing configuration files, go to About Sample Routing Configuration Files in Fireware Help.
- (Optional) To validate the configuration of a dynamic routing protocol, click Validate. For more information, go to Validate a Dynamic Routing Configuration.
- Click Save.
For configuration changes to take effect on a cloud-managed Firebox, you must deploy the configuration update to the Firebox. For more information, go to Manage Device Configuration Deployment for Fireboxes.
Validate a Dynamic Routing Configuration
Your cloud-managed Firebox can validate the dynamic routing protocol configuration. The configuration includes the contents of the Routing Commands text box, and the Firebox validates the routing commands in the configuration against its current configuration.
Validation makes sure that the dynamic routing configuration is correctly set up and works as intended. The Firebox confirms that the routing protocols are enabled, the necessary firewall policies are in place, and the routes are correctly advertised, received, and prioritized.
Make sure the cloud-managed Firebox is connected to WatchGuard Cloud so that validation can take place.
To validate a dynamic routing configuration, from WatchGuard Cloud:
- Select Configure > Devices.
- Select the cloud-managed Firebox.
- Click Device Configuration.
- In the Networking section, click the Routes widget.
The Routes page opens.
- Select the Dynamic Routing tab.
- Select a dynamic routing protocol which you previously configured routing commands for.
The Routing Commands text box opens.
- Click Validate.
The Firebox validates the configuration.
If the configuration is not valid, an error message appears with information about the configuration error and its location. You can correct the issue and try to validate the configuration again.
Disable a Dynamic Routing Configuration
When you disable a dynamic routing configuration, WatchGuard Cloud automatically removes the associated dynamic routing policy, but the routing commands you entered remain in the configuration for the disabled dynamic routing protocol. If you re-enable the configuration, you do not need to enter those commands again.
To disable a dynamic routing configuration, from WatchGuard Cloud:
- Click the Routes widget.
The Routes page opens. - Select the Dynamic Routing tab.

- Disable a dynamic routing protocol which you previously configured.
- Click Save.
For configuration changes to take effect on a cloud-managed Firebox, you must deploy the configuration update to the Firebox. For more information, go to Manage Device Configuration Deployment for Fireboxes.
Monitor Dynamic Routing
When you enable dynamic routing and add protocol routing commands, you can view the current dynamic routing information from the Live Status > Networks > Dynamic Routing page. For more information, go to Monitor Networks on Fireboxes and FireClusters.
About Dynamic Routing and Protocols for Cloud-Managed Fireboxes