
Related Topics
Use WebBlocker Actions in Proxy Definitions
The basic configuration you created with Subscription Services > WebBlocker > Activate is a WebBlocker action (a set of WebBlocker settings) that you can apply to an HTTP or HTTPS proxy definition. From Policy Manager, you can define additional WebBlocker actions if you want to apply different settings to different proxies.
Define Additional WebBlocker Actions
- Select Setup > Actions > WebBlocker.
The WebBlocker Actions dialog box appears.

- Click Add. Or, to define a new action based on an existing one, select that action and click Clone.
- Configure the WebBlocker action as described in Configure WebBlocker.
Select the WebBlocker Action For a Policy
You can select the WebBlocker action used by each policy from within the WebBlocker configuration or when you edit the proxy action.
To select the WebBlocker action from the WebBlocker configuration:
To select the WebBlocker action when you edit an HTTP-proxy action:
- Double-click the HTTP-Proxy policy.
The Edit Policy Properties dialog box appears. - Select the Policy tab.
- Adjacent to the Proxy action drop-down list, click the View/Edit Proxy icon
 .
.
The HTTP Proxy Action Configuration dialog box appears.
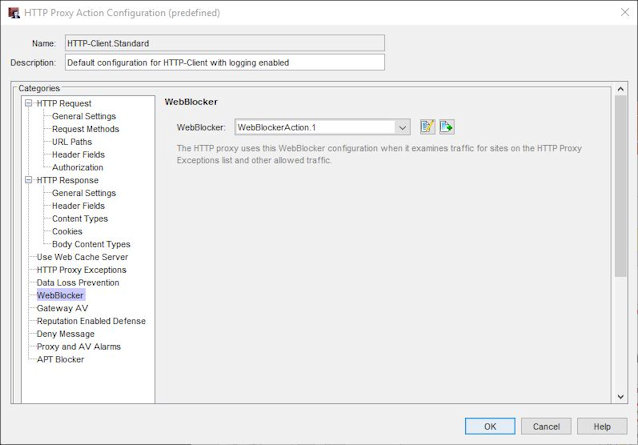
- From the categories list, select WebBlocker.
- From the WebBlocker drop-down list, select the WebBlocker action for this policy.
For two examples of how to use WebBlocker actions with policies, see:
- Configure WebBlocker Actions for Groups with Firebox Authentication
- Configure WebBlocker Actions for Groups with Active Directory Authentication
Schedule WebBlocker Actions
You can set an operating schedule for the policy. You can use the predefined settings in the drop-down list or create custom schedules. You use these time periods to set rules for when to deny different websites. For example, you can deny sports websites during usual business hours of operation, but allow users to browse at lunch time, evenings, and weekends.
To set a schedule for a policy:
- Open the policy to edit it, and select the Advanced tab.
- Select a schedule from the drop-down list, or click the New/Clone icon to make a new schedule.
For more information, see Create Schedules for Firebox Actions. - Configure an HTTP policy that uses the schedule.
You can also configure two HTTP or HTTPS policies, but create a schedule for only one of them. Each policy uses one of the proxy actions. Each of these proxy actions points to one of at least two WebBlocker actions.