
Related Topics
Customize Access Portal Page Elements with CSS
To customize page elements of the Access Portal, you can download a CSS file from your Firebox. After you edit the file, upload it to your Firebox to preview and save the changes.
In the CSS file, you can specify settings for these page elements:
- Links
- Buttons
- Text boxes
- Drop-down lists
- Login window
- Applications page
To customize the page title, header and login logos, and the background image, see Customize the Access Portal Images.
Download the CSS File
You must download the CSS file from your Firebox.
- Select Subscription Services > Access Portal.
- Select the User Connection Settings tab.
- In the VPN Portal section, select Configure.
The VPN Portal configuration page appears. - Select the Customization tab.
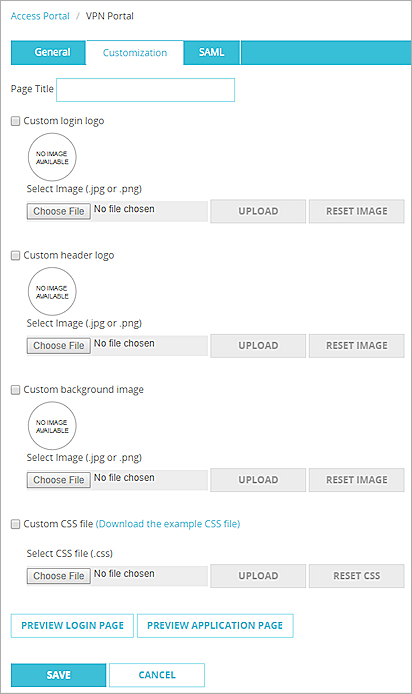
- Adjacent to the Custom CSS file check box, click Download the example CSS file.
The CSS file opens in your browser. - To edit the CSS file, save it to your local computer. For information about which elements you can edit, see the Edit the CSS File section.
For information about which elements you can edit, see the next section of this topic.
- Select Subscription Services > Access Portal.
- Select the User Connection Settings tab.
- In the VPN Portal section, select Configure.
The VPN Portal Settings dialog box appears. - Select the Customization tab.
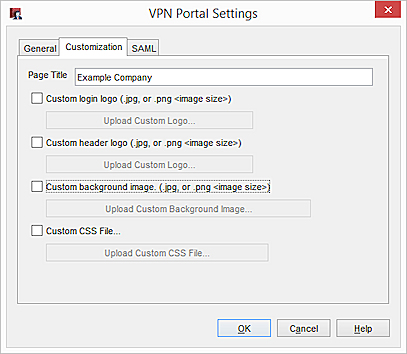
- Select Download the example CSS file.
The CSS file opens in your browser. - To edit the CSS file, save it to your local computer. For information about which elements you can edit, see the Edit the CSS File section.
For information about which elements you can edit, see the next section of this topic.
Edit the CSS File
To edit the CSS file you saved from the Firebox, open it in a text editor. You can change the style of the elements in this list.
| Element | Example | CSS Code |
|---|---|---|
| Link |
|
a { |
| Button — Secondary |
|
.btn { |
| Button — Primary |

|
.btn.primary { /* primary buttons emphasize the button the user should click (for example the login button) */ background: #36bed6; /* background color of primary buttons */ color: #ffffff; /* text color of primary buttons */ } |
|
Button — Hover |
|
.btn:hover { /* hovered buttons are buttons the user's mouse is over */ background-color: #eaf6fa; /* background color of hovered buttons */ color: #36bed6; /* text color of hovered buttons */ } |
| Button — Active |
|
.btn:active { /* active buttons are buttons the user is currently clicking on */ background-color: #eaf6fa; /* background color of active buttons */ color: #36bed6; /* text color of active buttons */ } |
| Button — Focus |
|
.btn:focus { /* focused buttons are buttons the user has either tabbed to or clicked on */ background-color: #eaf6fa; /* background color of focused buttons */ color: #36bed6; /* text color of focused buttons */ } |
| Text (input) box |

|
input { /* used for text boxes like the username and passphrase on the login page */ border: 1px solid #97dfeb; /* border of the input box */ } |
| Drop-down list |

|
select { /* used for the drop down selection lists like the domain list on the login page */ background-image: /* controls the colors of the arrow on the right side of the select */ linear-gradient(55deg, transparent 55%, #36bed6 50%), /* left side of arrow */ linear-gradient(125deg, #36bed6 50%, transparent 50%), /* right side of arrow */ linear-gradient(to bottom, #36bed6, #36bed6), /* left border of arrow box */ linear-gradient(to right, #eaf6fa, #eaf6fa); /* arrow box background */ border: 1px solid #97dfeb; /* border of the select */ } |
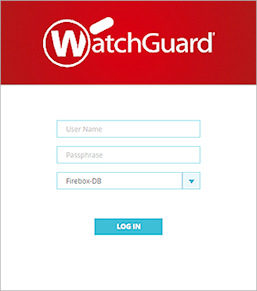
| Login window |
|
#login-window > header { background: #b32317; /* background color behind the logo on the login page */ } #login-window > header > .logo { height: 150px; /* logo height */ width: 300px; /* logo width */ } |
| Applications page | 
|
#applications-page > header { background: #333333; /* background color of header bar at the top of the page */ } #applications-page > header > .logo { background: #b32317; /* background color behind the logo in the header bar at the top of the page*/ } #applications-page > #applications .tabs > .tab-bar > .tab { background: #36bed6; /* background color of the tabs */ color: #ffffff; /* text color of the tabs */ } #applications-page > #applications .tabs > .tab-bar > .tab.active { background: #ffffff; /* background color of the selected tab */ color: #36bed6; /* text color of the selected tab */ } |
Upload the Edited CSS File
After you edit the CSS file, you must upload it to your Firebox.
- Select Subscription Services > Access Portal.
- Select the User Connection Settings tab.
- In the VPN Portal section, click Configure.
- Select the Customization tab.
- Select the Custom CSS file check box.
- Click Choose File and browse to the edited CSS file.
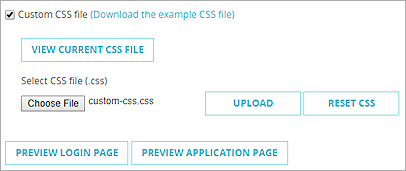
- Click Upload.
A confirmation message appears when the file upload completes. - Click Preview Login Page or Preview Application Page to preview your changes.
The preview page opens in a new window. - Click Save.
- Select Subscription Services > Access Portal.
- Select the User Connection Settings tab.
- In the VPN Portal section, click Configure.
- Select the Customization tab.
- Select Custom CSS File.
- Click the Upload Custom CSS File button.
- Browse to the edited CSS file and click OK.
The Upload Custom CSS File dialog box appears.
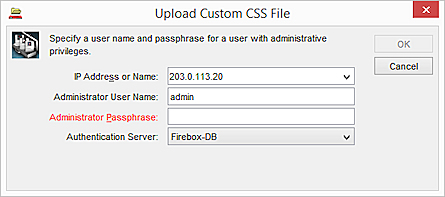
- Type the IP address, user name, and password for your Firebox.
- Click OK.
A confirmation dialog box appears.
See Also
Customize the Access Portal Design