
Related Topics
Use Gateway Wireless Controller Maps
In Fireware Web UI, Wireless Deployment Maps is a dynamic tool that can help you to visualize your wireless environment, determine where to install your APs, and how to best configure them for your network. You can use the graphs and charts available in the map views to see the location and coverage details (signal strength, wireless band, and SSIDs) for your APs. This can help you find any channel or location conflicts, and optimize your deployment scenario.
The Maps page includes two views: the Wireless Coverage Map and the Channel Conflict Map. The Wireless Coverage Map shows the location of your APs in relation to one another. The Channel Conflict Map show the location of your APs and any other wireless devices in the vicinity, and shows the channel and bandwidth details for each device.
Before you use the Maps page to see your APs, make sure that all your APs are online and the information for each AP is current. If a change has occurred on an AP since the last scan of the area, a warning message appears for that device on the Maps page. You must scan the APs again to get the most recent data. For more information, see Scan the Area for Devices.
To see information on the Gateway Wireless Controller Maps page, the Firebox must first scan the area for APs:
- Select Dashboard > Gateway Wireless Controller.
The Gateway Wireless Controller page appears. - Select the Maps tab.
- If the Gateway Wireless Controller has not recently scanned the area, click Display Maps.
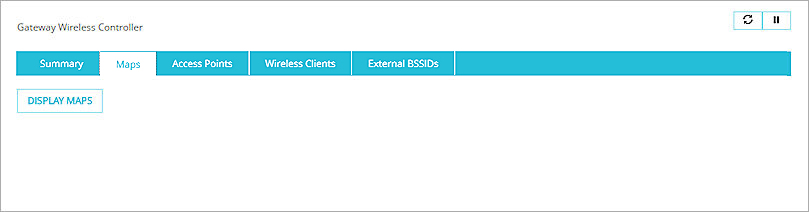
The Gateway Wireless Controller scans the area for APs
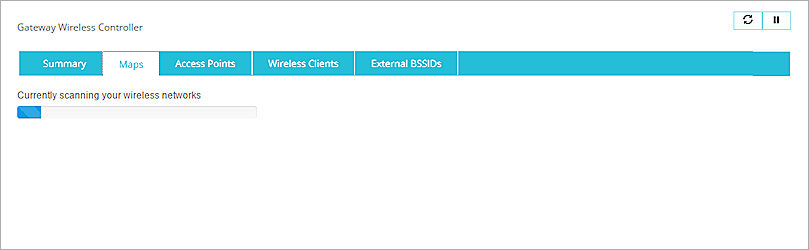
The Wireless Deployment Maps appear, with the Wireless Coverage Map selected by default.

Read the Maps
In the Wireless Deployment Maps your APs are represented by colored dots. The color of the dots depends on the map view and the status of the AP.
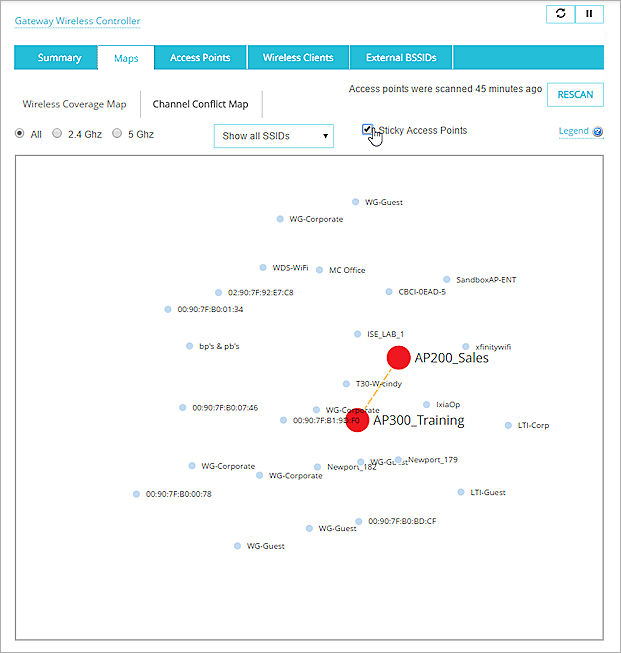
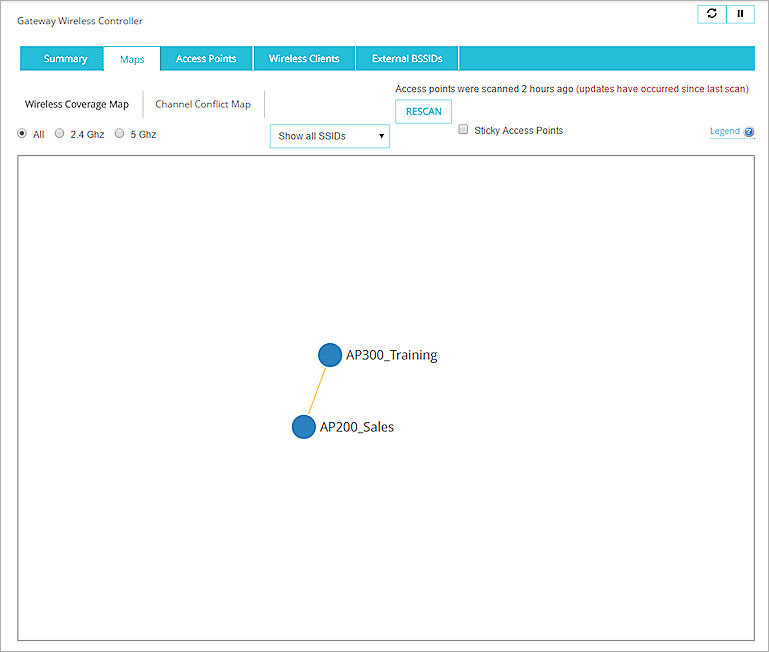
Wireless Coverage Map View
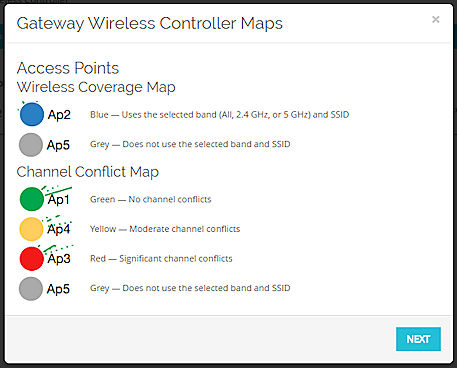
On the Wireless Coverage Map, APs appear in their physical locations to one another. The color of the AP dot specifies whether it uses the band and SSID filters you specify.

|
Uses the selected band (All, 2.4 GHz, or 5 GHz) and SSID |

|
Does not use the selected band and SSID |

|
Rogue access points that are not paired with your Firebox or specified as a rogue access point exception |
Channel Conflict Map View
For each AP on the Channel Conflict Map, the color of the dot indicates whether there are any channel conflicts between the AP and the other wireless access points in the area.

|
No channel conflicts |

|
Moderate channel conflicts |

|
Significant channel conflicts |
|
|
Does not use the selected band and SSID |

|
External access points that are not part of your deployment, and are not paired with your Firebox |
|
|
Rogue access points that are not paired with your Firebox or specified as a rogue access point exception |
Links Between Access Points
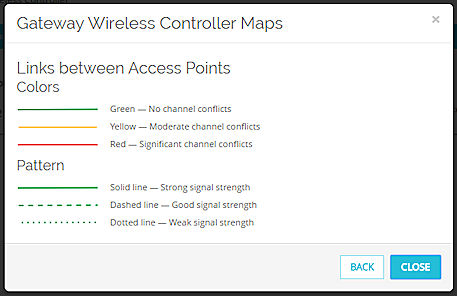
On both Wireless Deployment Maps, the connector links between the APs and other wireless access points appear as lines with a pattern. The color of each line represents the status of channel conflicts between the access points. The length and pattern of the line represent the strength of the signal between the access points.
| Link Line Colors | |

|
No channel conflicts |

|
Moderate channel conflicts |

|
Significant channel conflicts |
| Link Line Patterns | |
|
|
Strong signal strength |

|
Good signal strength |

|
Weak signal strength |
Use the Legend
To help you read the Wireless Deployment Maps, you can use the Legend that appears on both Maps pages.
- At the top of the Wireless Coverage Map or Channel Conflict Map pages, click Legend
 .
.
The Gateway Wireless Controller Maps dialog box appears. - Review the definitions of the Access Points icons and links.
Click Next in the legend to view the next page of the Gateway Wireless Controller Maps Legend.
Click Back to view the previous page of the Gateway Wireless Controller Maps Legend.
Click Close to exit the Legend.
Select a Radio Band View
To help you refine your view of the APs that appear on the Map page, you can select which radio bands to include in the map: 2.4 GHz, 5 GHz, or both. The default view is to show all connections between APs. APs that are included in the radio band view appear with a colored dot and show colored line links to other devices, as described in the previous sections. When you select an option to include only one radio band in the map view, devices that do not use that radio band are not removed from the map. Instead, they appear as a gray dot and do not show a colored line link to other devices.
Show 2.4 GHz Radio Bands
To include connections in the map display only for APs that use the 2.4 GHz band, above the map, select 2.4 GHz.
The map display updates to only include links between your local APs that use the 2.4 GHz band.
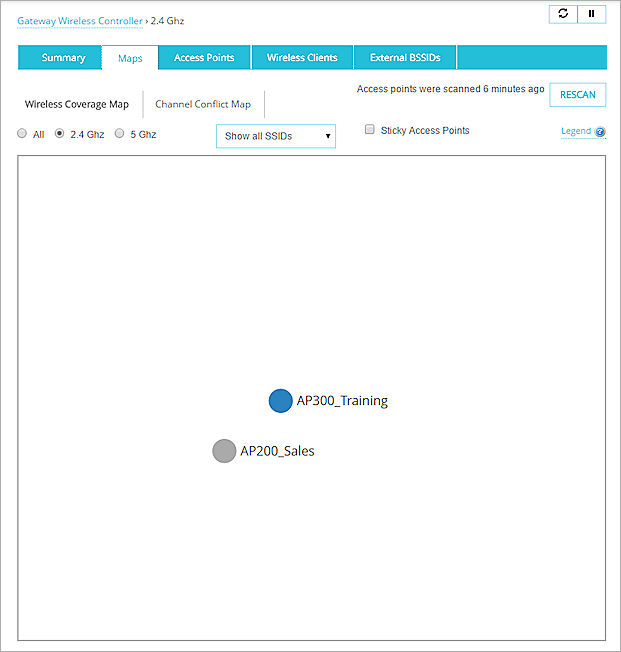
Only the APs that use the 2.4 GHz band appear with a blue dot. APs that use the 5 GHz band have a grey dot.
Show 5 GHz Radio Bands
To only include connections in the map display for AP devices that use the 5 GHz band, above the map, select 5 GHz.
The map display updates to only include links between your local AP devices that use the 5 GHz band.
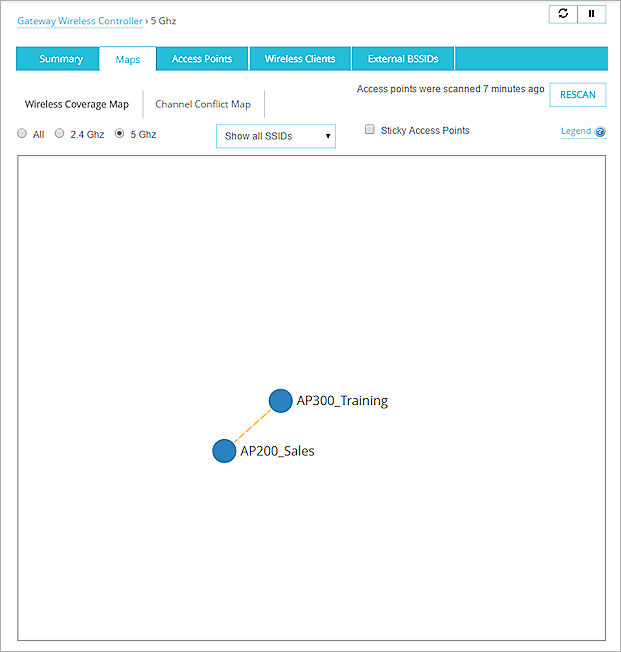
Only the AP devices that use the 5 GHz band appear with a blue dot. Any AP devices that use the 2.4 GHz band will have a gray dot.
Show All Radio Bands
To include connections in the map display for AP devices that use the 2.4 GHz or the 5 GHz band, above the map, select All.
The map display updates to include the links between all of your local AP devices in the map.
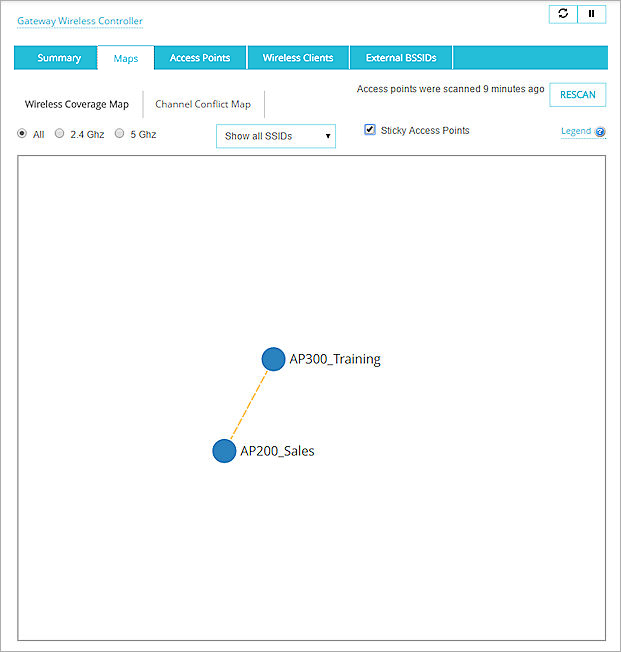
When All is selected, all of the AP devices in the map appear with a blue dot.
Filter Maps by SSID
Another method you can use to help you further refine your view of the APs that appear on the Maps pages is to select which SSIDs to include in the maps. The default view is to show all APs. APs that use the SSID you select appear with a colored dot and show colored line links to other APs, as described in the previous sections. When you select an option to include only one SSID in the map view, the other APs are not removed from the map. Instead, they appear with a gray dot and do not show a colored line link to other APs.
To select the SSID to show on the Maps page:
- From the Show All SSIDs drop-down list, select one SSID.
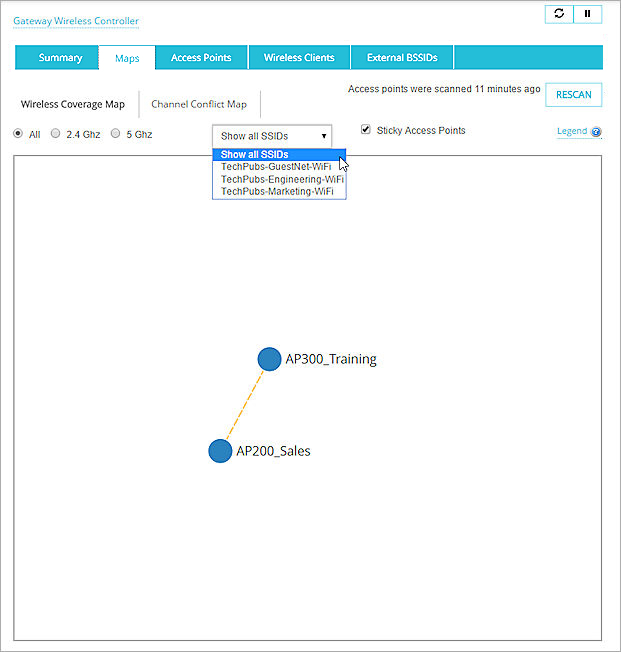
The Maps page refreshes to only include devices that use the SSID you selected.
- To include all available SSIDs in the maps, select Show all SSIDs.
Anchor Access Points
Because the views of the Maps page are dynamically generated, the devices that appear in the maps move around based on their physical location, and can often overlap another device in the map. To make it easier to see the connections and possible conflicts to other access points in the map, you can anchor any AP to a particular location on the map.
After you anchor your APs, the length of the link lines between the APs and external access points does not indicate the signal strength between the devices.
Though you can use this feature for both Maps page display options, this is particularly helpful for the Channel Conflict Map, because there can be many devices and SSIDs that overlap in the map.
To anchor your APs:
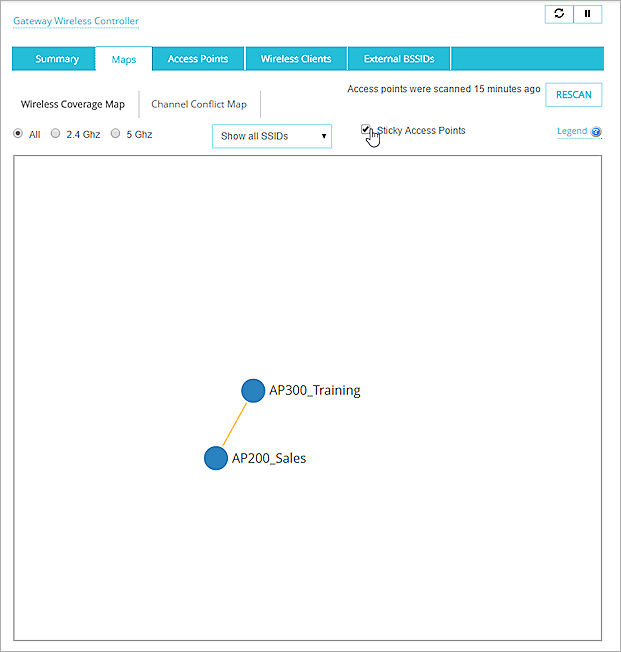
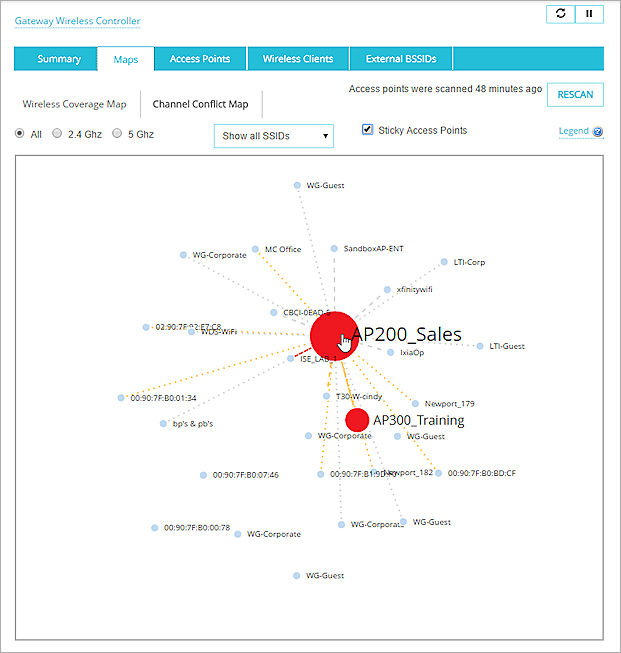
- At the top of the Maps page, select the Sticky Access Points check box.
All access points on the maps are anchored to their current locations. - Select an AP and drag it to another location on the map.
Select each AP and drag it to another location.

Select each AP device and drag it to another location.
Select each AP device and drag it to another location.

Select each AP device and drag it to another location.

Select each AP device and drag it to another location.

Select each AP device and drag it to another location.

Select each AP device and drag it to another location.
Select each AP device and drag it to another location.
Select each AP device and drag it to another location.
Move an Access Point
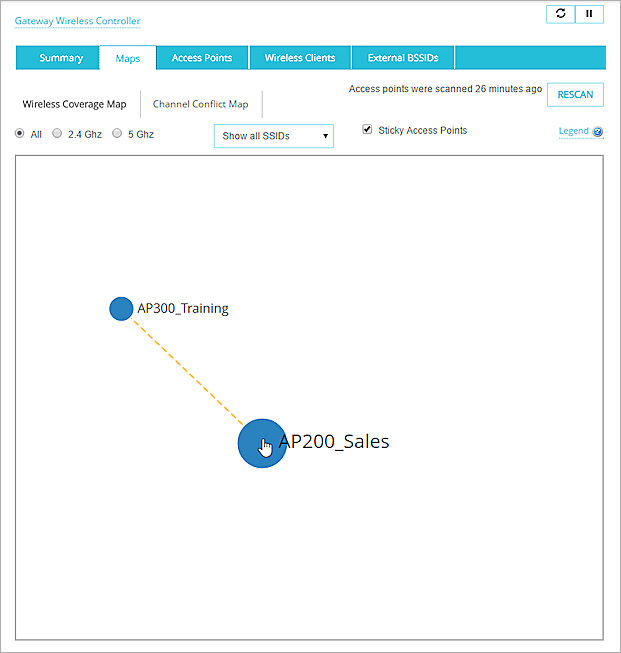
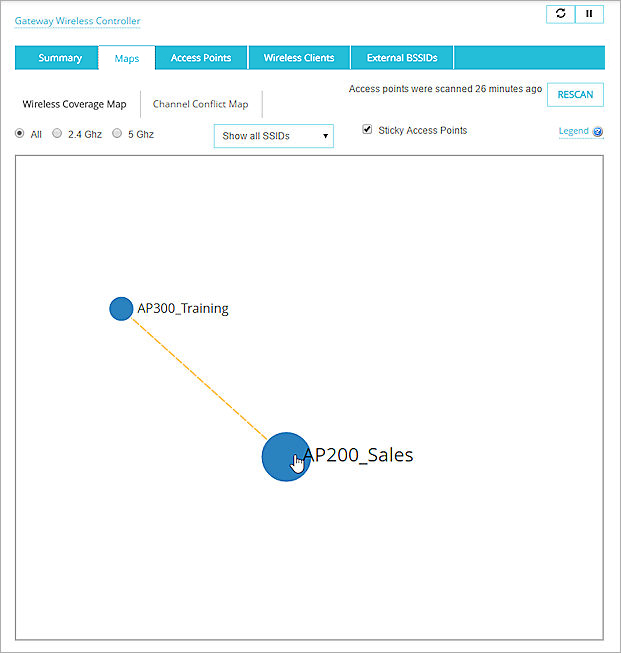
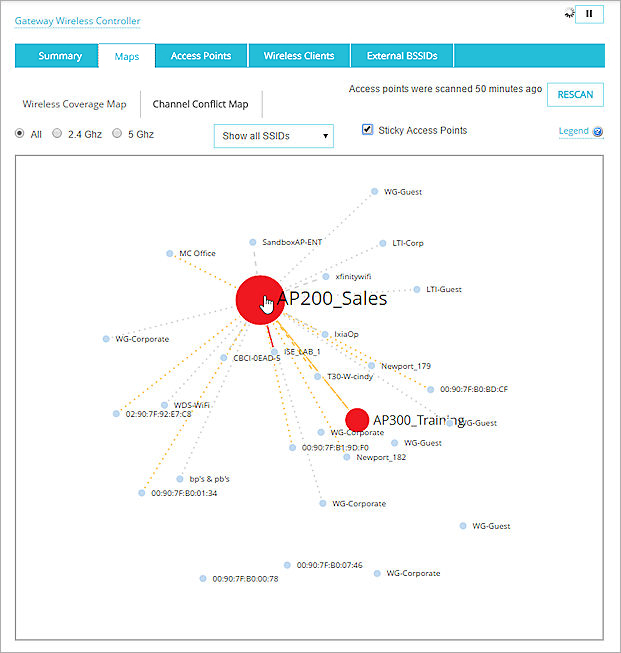
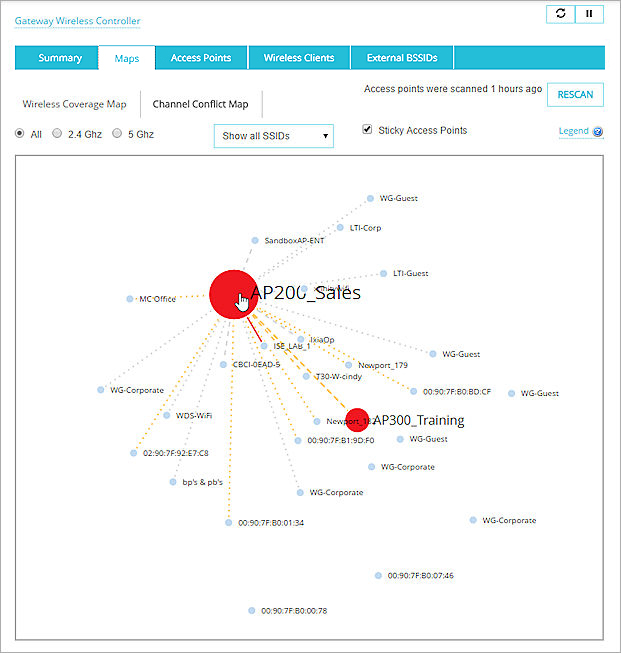
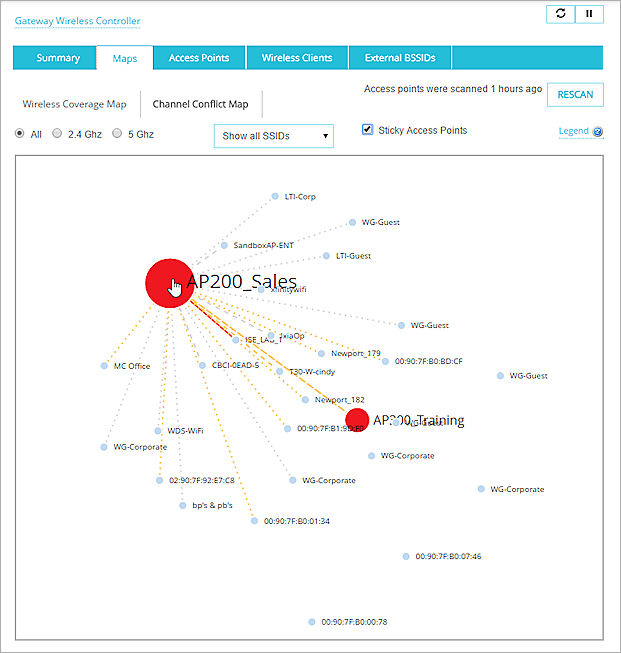
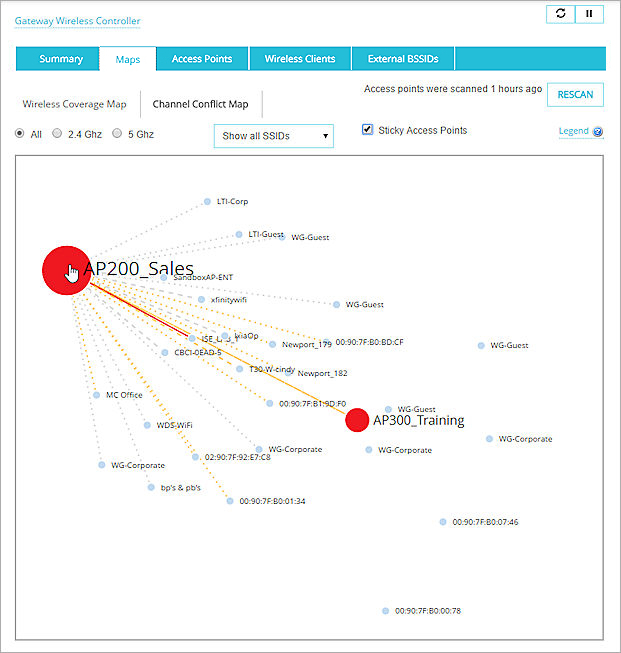
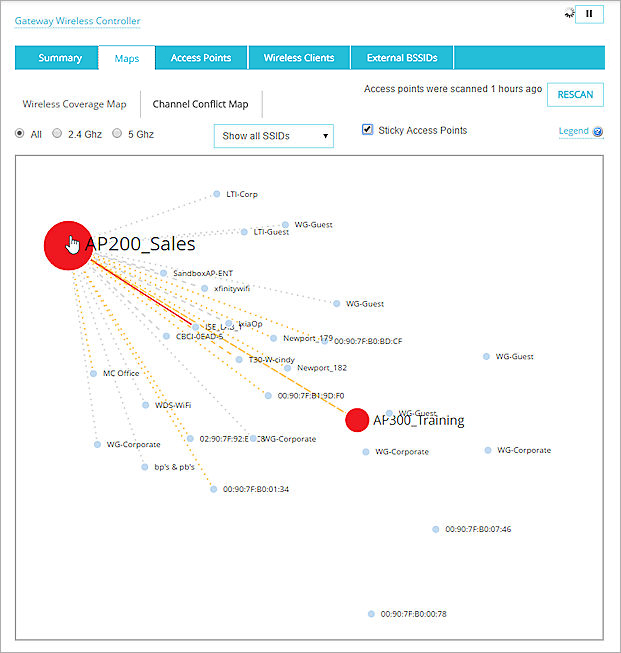
When many APs appear in your maps, it can be difficult to see the connections to the other APs in the map. To make it easier to see the connections to an AP, you can use your mouse to select the AP and manually move it to another location on the map. If you have selected the Sticky Access Points check box, when you move the AP to another location on the map, it is anchored to the new location.
When you hover your mouse over an AP, the colored dot and text for the AP expand so you can better see the AP and select it.
Select an AP with your mouse and move it to another location on the map.
Grab an AP device with your mouse and move it to another location on the map.

Grab an AP device with your mouse and move it to another location on the map.

Grab an AP device with your mouse and move it to another location on the map.

Grab an AP device with your mouse and move it to another location on the map.
Grab an AP device with your mouse and move it to another location on the map.
Grab an AP device with your mouse and move it to another location on the map.
Grab an AP device with your mouse and move it to another location on the map.

Grab an AP device with your mouse and move it to another location on the map.
Grab an AP device with your mouse and move it to another location on the map.

Grab an AP device with your mouse and move it to another location on the map.
Grab an AP device with your mouse and move it to another location on the map.

Grab an AP device with your mouse and move it to another location on the map.

Grab an AP device with your mouse and move it to another location on the map.
Grab an AP device with your mouse and move it to another location on the map.
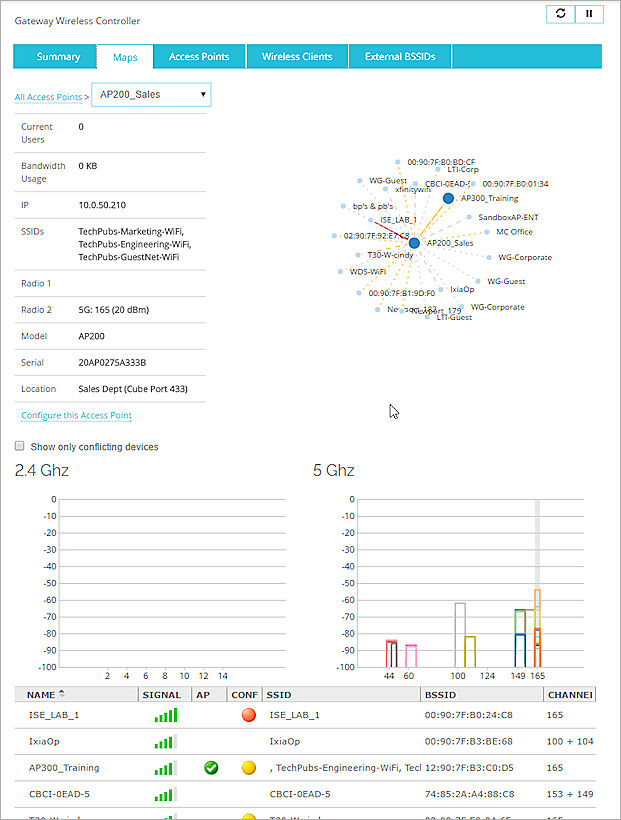
See Access Point Information & Details
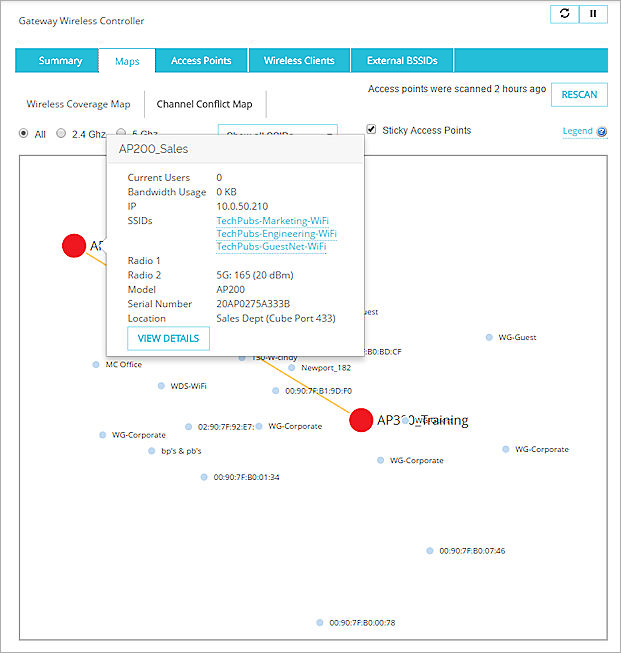
When you select an AP on either of the maps, you can click the AP to see information about that AP. The available information includes:
- Current Users — Current number of connected users
- Bandwidth Usage — Amount of bandwidth in use on the AP, in kilobytes
- IP — IP address of the AP
- SSIDs — SSIDs for the AP
- Radio 1 — Settings for Radio 1
- Radio 2 — Settings for Radio 2
- Model — AP model number
- Serial Number — AP serial number
- Location — Current location of the AP
If you select a external access point (small, light blue dot), you can see these details about the access point:
- BSSID — BSSID number assigned to the external access point
- Channel — Wireless channel used by the external access point
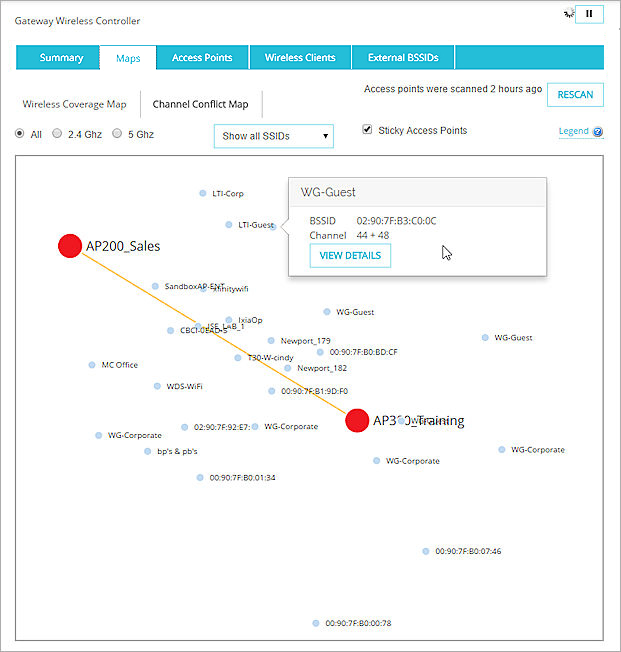
To see more detailed information about the selected AP or external access point:
Click View Details.
The detailed page view for the selected AP or access point appears.
The Details page for an AP or a external access point includes a smaller version of the map for the selected device, with only the connections for that AP or external access point.
Also included are all the details that appeared in the Information dialog box, as well as a table of the bandwidth usage for each radio band (2.4 GHz and 5 GHz), and a table with the connection details for all the wireless access points in the area.
Details page for a paired AP.

Details page for an external access point device.
To see information for only the wireless access points that have a channel conflict with the selected AP or external access point:
Select the Show only conflicting devices check box.
The information page updates to remove any devices that do not have a channel conflict with the AP.
If you find channel conflicts in your AP configuration, and you want to change the configuration for the AP, you can click Configure this Access Point to go directly to the Network > Gateway Wireless Controller page for the selected AP.
For more information about how to configure your AP, see Configure APs with the Gateway Wireless Controller.
To see information for another AP from this information page, from the Access Points drop-down list, select another AP.
To return to the previous Maps page, in the breadcrumbs, click All Access Points.
Scan the Area for Devices
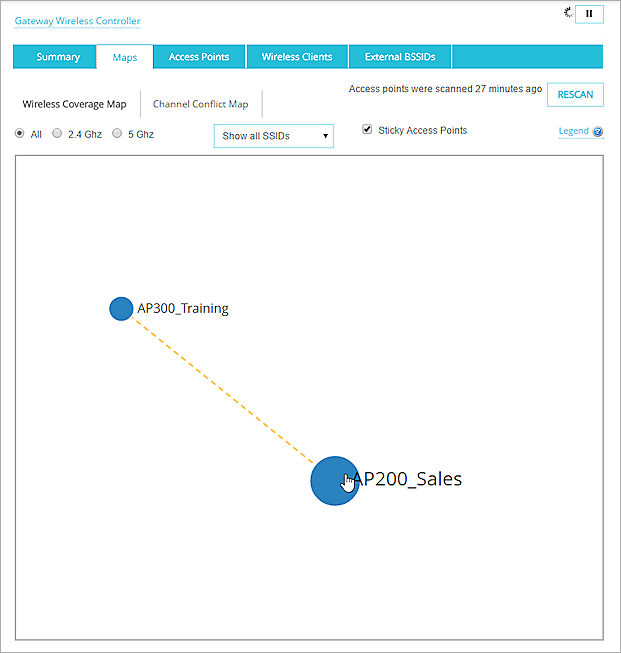
At the top right side of the Maps page, you can see the amount of time that has elapsed since your Firebox last scanned the area to locate your active APs and any other local, external access point or wireless devices. The information from each scan is cached in the map for 8 hours. To refresh the location data that appears on the Maps page, you must manually scan the area again.
To complete a new scan of the area:
At the top right of the Maps page, click Rescan.
The Firebox scans the area to find all the active APs and other local wireless devices.
See Also
Monitor Wireless Connections (Gateway Wireless Controller)