
Related Topics
Manage Device Certificates (WSM)
In Firebox System Manager, you can:
- See a list of the current Firebox certificates and their properties.
- Update the trusted CA certificates
- Remove a certificate from the device.
- Create a certificate signing request (CSR).
- Import a certificate or CRL (certificate revocation list).
- Export a certificate for re-signing or distribution.
When you import, update, or delete a certificate on a FireCluster member, the change automatically synchronizes to the other FireCluster member. You do not need to import separate certificates for FireCluster members.
See Current Certificates
To see the current list of certificates:
- Open Firebox System Manager.
- Select View > Certificates.
The Certificates dialog box appears.

In this dialog box, you can see a list of all certificates and certificate signing requests (CSRs). The list includes:
- The status and type of the certificate.
- The algorithm used by the certificate.
- The subject name or identifier of the certificate.
By default, trusted CA certificates do not appear in this list. You can choose to show all of the certificates from trusted CAs.
- To show all of the certificates from trusted CAs, select the Show Trusted CAs for Proxies check box.
- To hide the trusted CA certificates again, clear the Show Trusted CAs for Proxies check box.
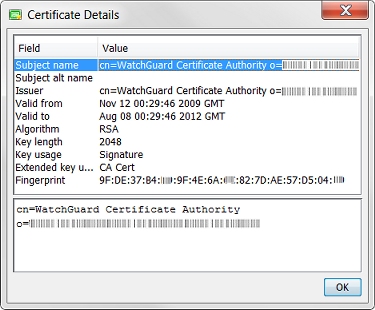
- To see additional information on a certificate in the list, select the certificate and click Details.
The Certificate Details dialog box appears with information about which CA signed the certificate and the certificate fingerprint. You can use this information to troubleshoot or uniquely identify certificates.
Update Trusted CA Certificates
Your Firebox can automatically get new versions of the trusted CA certificates stored on the device and automatically install the new certificates. This update makes sure that all the trusted CA certificates on your device are the latest version. Any expired certificates are updated, and new trusted CA certificates are added to your device. The updated certificates are downloaded from a secure WatchGuard server. The device checks for updates every 48 hours.
To enable automatic updates:
- In Policy Manager, select Setup > Certificates.
- Select the Enable automatic update of CA certificates check box.
- Click OK.
Delete a Certificate
When you delete a certificate, it can no longer be used for authentication. If you delete one of the automatically generated certificates, such as the self-signed certificate used by default for the proxy, your Firebox creates a new self-signed certificate for this purpose the next time it reboots. The device does not create a new self-signed certificate automatically if you have imported a different certificate.
The Proxy Authority certificate must not be deleted and left with no certificate. The Firebox automatically replaces the missing certificate with a default certificate if the device restarts.
To remove a certificate from the device:
- Select the certificate in the Certificates dialog box.
- Click Delete.
The Remove Certificate dialog box appears. - In the User Name and Passphrase text boxes, type the credentials for a user account with Device Administrator (read/write) privileges.
- Click OK.
The Certificate is deleted.
Import a CRL from a File
You can import a certificate revocation list (CRL) that you have previously downloaded from your local computer. CRLs are used only to verify the status of certificates used for VPN authentication. Certificates must be in PEM (base64) encoded format.
- Select View > Certificates.
The Certificates dialog box appears. - Click Import Certificate/CRL.
- Select the Import a CRL tab.
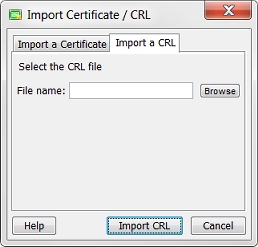
- Click Browse and find the file.
- Click Import CRL.
The Import CRL dialog box appears. - In the User Name and Passphrase text boxes, type the credentials for a user account with Device Administrator (read/write) privileges.
- Click OK.
The CRL you specified is appended to the CRL on your device.
Import a Certificate from a File
You can import a certificate from the Windows clipboard, or from a file on your local computer. Certificates must be in Base64 PEM encoded format or PFX file format.
Before you import a certificate to use with the proxy content inspection feature, you must import each previous certificate in the chain of trust of the type Other. Start with the root CA certificate and proceed to the end entity certificate, in that order.
To import a CA certificate for your Firebox to use to validate other certificates when they are imported and create a chain of trust, make sure to select the IPSec, Web Server, Other category when you import the CA certificate and do not include the private key.
About PFX Files
A PFX certificate bundle contains all the required certificates and private key, and is uploaded as a single file.
To use a PFX bundle for HTTPS content inspection, you must have two PFX files:
- The first proxy authority PFX file must have the root CA certificate that issued the proxy authority certificate, and the proxy authority certificate with its private key.
- The second proxy server PFX file must have the proxy authority certificate, and the proxy server certificate with its private key.
For more information, see About Certificates and Use Certificates with HTTPS Proxy Content Inspection.
Import Certificate
To import a certificate file:
- Select View > Certificates.
The Certificates dialog box appears. - Click Import Certificate/CRL.
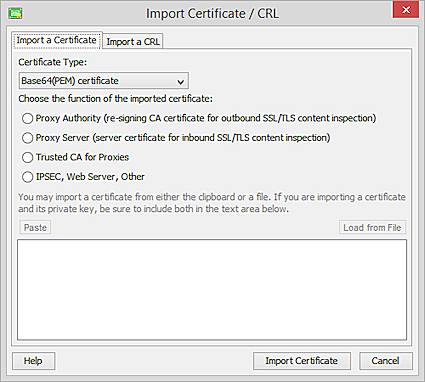
- From the Certificate Type drop-down list, select the Base64 (PEM) certificate or PFX file type.
- Select the option that matches the function of the certificate:
- Proxy Authority (re-signing CA certificate for outbound SSL/TLS content inspection) — Select this option if the certificate is for a proxy policy that manages web traffic requested by users on trusted or optional networks from a web server on an external network. A certificate you import for this purpose must be a CA certificate. Make sure you have imported the CA certificate used to sign this certificate with the Other category before you import the CA certificate used to re-encrypt traffic with a proxy.
- Proxy Server (server certificate for inbound SSL/TLS content inspection) — Select this option if the certificate is for a proxy policy that manages web traffic requested by users on an external network from a web server protected by the device. Make sure you have imported the CA certificate used to sign this certificate with the Other category before you import the CA certificate used to re-encrypt traffic from a web server.
- Trusted CA for Proxies — Select this option for a certificate that is used to trust traffic that is not re-encrypted by a proxy, such as a root certificate or intermediate CA certificate used to sign the certificate of an external web server.
- IPSec, Web Server, Other — Select this option if:
- The certificate is for authentication, is a device IPSec certificate, or is a CA certificate.
- You want to import a CA certificate for your device to use to validate other certificates when they are imported and create a chain of trust. Make sure you do not include the private key when you import the CA certificate.
- If you selected Base64 (PEM) certificate as the Certificate Type, you can load the certificate from a file, or copy and paste the PEM certificate contents in the text box. If the certificate includes a private key, type the password to decrypt the key.
If you selected PFX file as the Certificate Type, type the PFX File Password, and click Browse to select the PFX file to upload.
- Click Import Certificate.
The certificate is added to the device.
Export a Certificate
You can export a certificate for re-signing by a trusted CA, or for distribution to clients on your network.
- Select View > Certificates.
- Select a certificate and click Export.
- Select a location and type a name for the certificate.
The certificate is saved in PEM format.