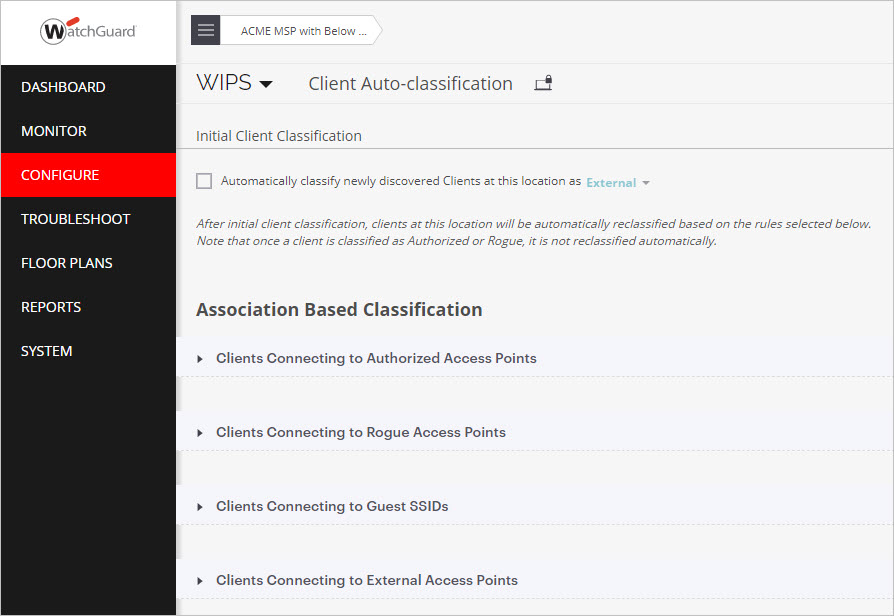
Configure Client Auto-Classification
To review the client auto-classification settings:
- Open Discover.
- From the Navigator, select the top-level location folder. We recommend you set the client auto-classification settings at the top-level location so that the settings are inherited by all subfolders.
- Select Configure > WIPS > Client Auto-classification.
- Review the default settings for your deployment.
If required, click Restore Defaults to restore the default settings.
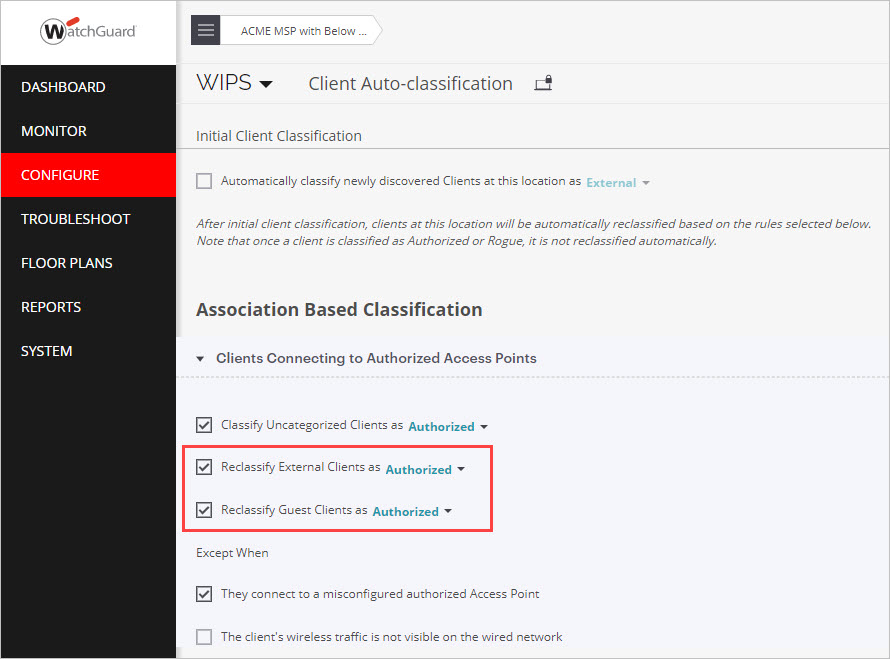
- Modify these options in the Clients Connecting to Authorized Access Points section from the default settings:
- Select Reclassify External Clients as and set the value to “Authorized”.
- Select Reclassify Guest Clients as and set the value to “Authorized”.
When you first deploy WIPS, you may encounter cases where new corporate devices mistakenly connect to your Guest network or an External AP instead of an Authorized AP, and are permanently classified as Guest or External clients. To prevent this, you can reclassify the client as Authorized when it successfully connects to an Authorized AP.
You can manually change the classification of a misclassified client from the Monitor > WIPS > Clients page. For more information, see Monitor WIPS Activity.
- Click Save.