Applies To: Wi-Fi Cloud-managed Access Points (AP120, AP125, AP225W, AP320, AP322, AP325, AP327X, AP420)
You can add these content types to a pro campaign.
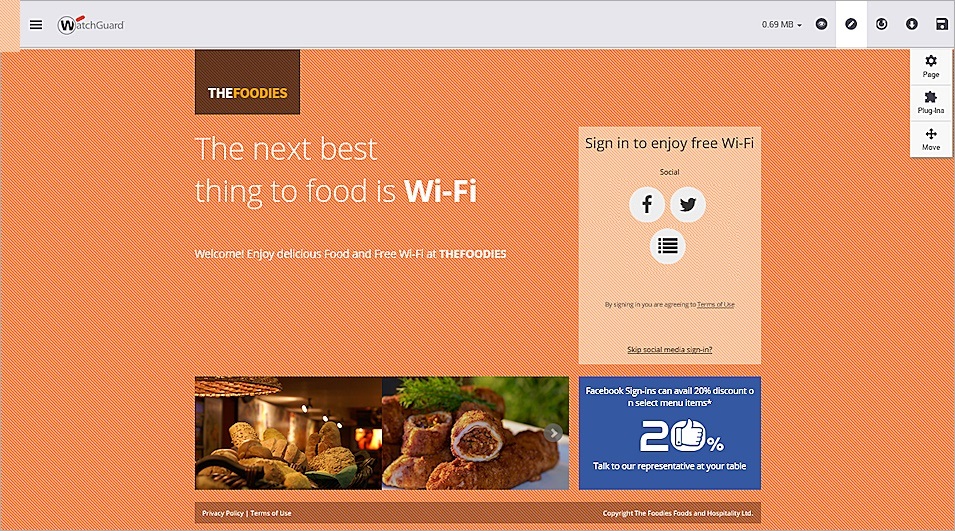
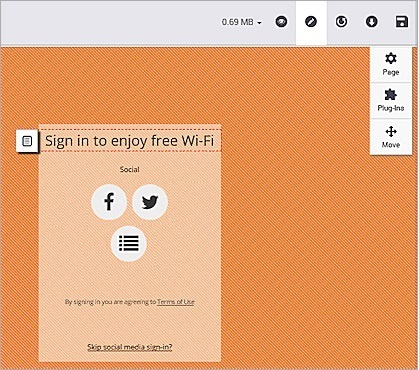
- Splash page — A splash page is displayed when a user connects to your wireless network. Splash pages provide a portal for the user to click-through or log in to your wireless network. On a splash page, you can configure images, text, terms of use policies, and social media and login links that manage how users access your network. You can also add carousel images, videos, and coupons to your splash pages.
- Landing page — A landing page is displayed in a guest user's web browser after they connect to the wireless network and click-through or log in from the initial splash page. Landing pages provide additional information and marketing opportunities to the end user after they have connected to your network. Landing pages are only available in Pro Campaigns,
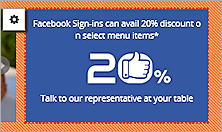
- Coupons — Coupons provide marketing opportunities to the end user after they have connected to your network. You can enable Engagement and send coupons when a user attempts to go to a web site (such as a competitor web site) while connected to your network. Coupons are only available in Pro Campaigns.
- Text Messages — Text messages provide marketing opportunities to the end user after they have connected to your network. You can enable Engagement and send MMS or SMS text messages when a user attempts to go to a web site (such as a competitor web site) while connected to your network. Text messages are only available in Pro Campaigns.
To add content to a pro campaign:
- Open Engage,
- Select an existing campaign, or add a new campaign.
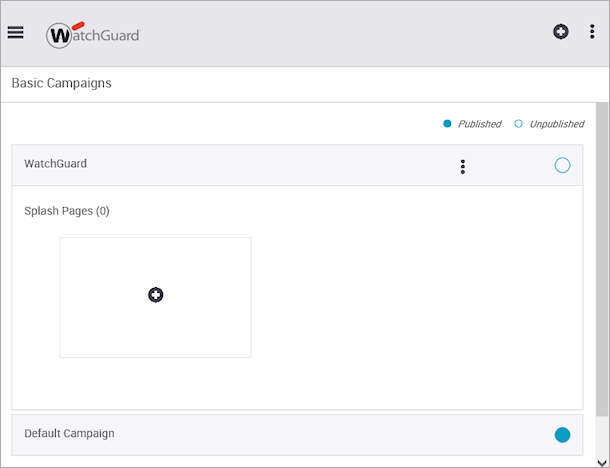
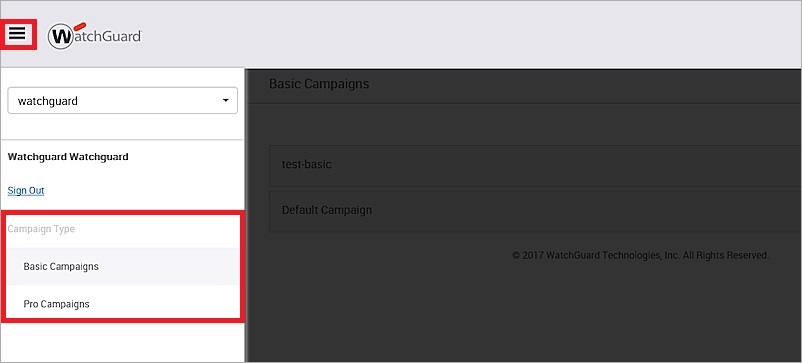
You can click ![]() in the top-left of the page to switch between Basic Campaigns and Pro Campaigns.
in the top-left of the page to switch between Basic Campaigns and Pro Campaigns.
- On a Pro Campaign, select
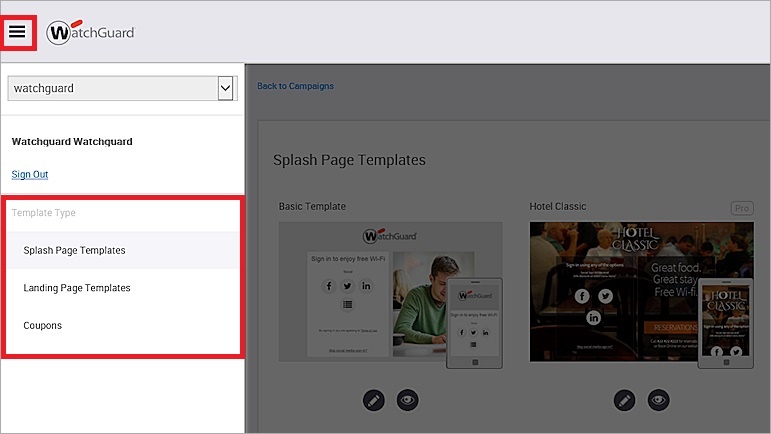
 in the top-left of the page to choose between Splash Pages, Landing Pages, Coupons, or Text Messages.
- Click the
 icon to add and customize new content.
Each campaign can have one or more splash pages, landing pages, coupons, and text message content.
- Click
 to preview how the page is displayed.
 - Click
 to edit the page.
 - Click
 to reset the page to the default settings.
 - Click
 to download the page files to your local computer. For example, you can download an existing splash page you created from a template, customize the splash page, then upload the splash page on the campaigns page. For more information on how to upload a custom splash page, see Manage Campaigns.
 - Click
 to save your edits to the page.
 - Click
 Page to configure the page settings.
For more information on page configuration, see Page Settings. - Click
 Plug-Ins to select the plug-ins to use on your page.
For more information on plug-in configuration, see Plug-In Settings. - Click
 Move to move elements (such as text boxes and images) on your landing page.
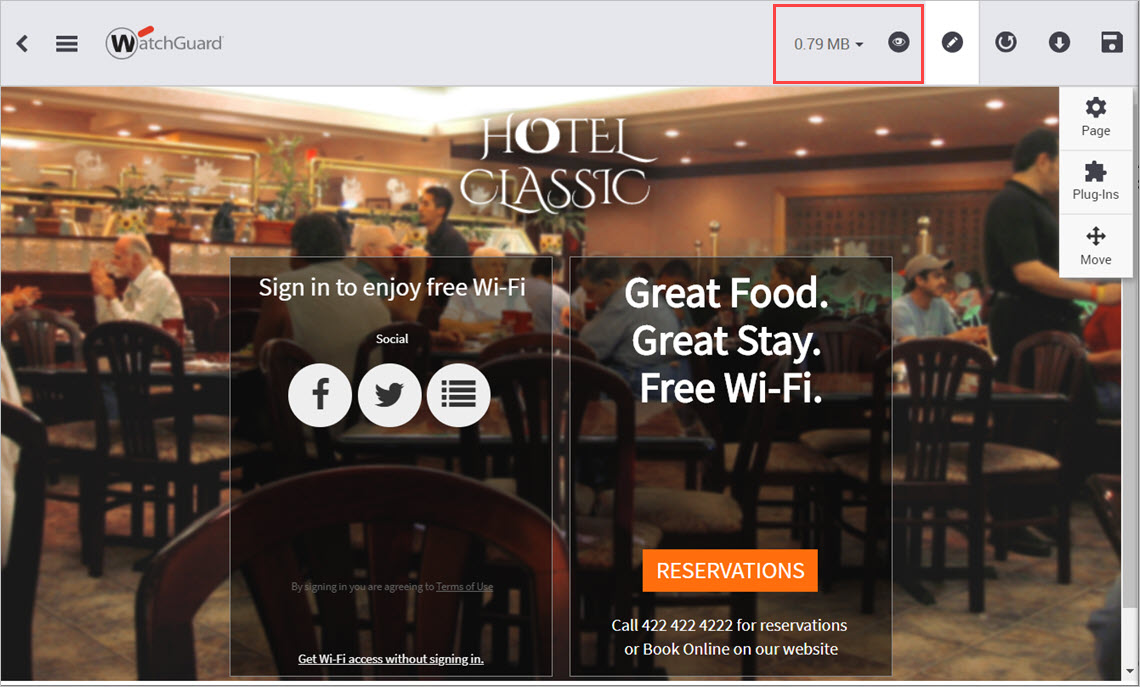
Preview Splash Page
Click ![]() to preview how your splash page will appear in a web browser.
to preview how your splash page will appear in a web browser.
The current page size is displayed in MB. The size of the splash page cannot exceed 2 MB.
You can view desktop and mobile versions of your splash page to preview how the page will appear on a specific device.
Edit Pro Campaign Content
You can add and edit these elements in your campaign:
- Edit Page Text
- Edit Background Image
- Add Image Carousel
- Add Videos
- Configure Buttons
- Move Splash Page Elements
- Configure Engagement
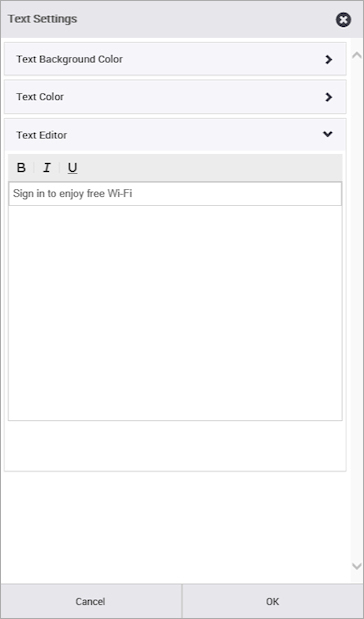
Edit Page Text
To edit the text portions of a splash or landing page, select the element you want to edit then enter your text,
You can also click the ![]() icon to open the Text Settings page to customize the text and text color.
icon to open the Text Settings page to customize the text and text color.
Edit Background Image
To edit or change a background picture for a page:
- Click an image.
- Click the
 icon to modify the settings for the background image.
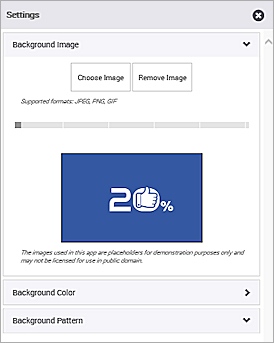
- To upload a new image, click Choose Image.
You can upload .jpg, .png, or .gif files. - To remove an image, select the image, then click Remove Image.
- To change the color of the background image, select Background Color.
- To change the pattern of the background image, select Background Pattern.
For more information, see Page Settings.
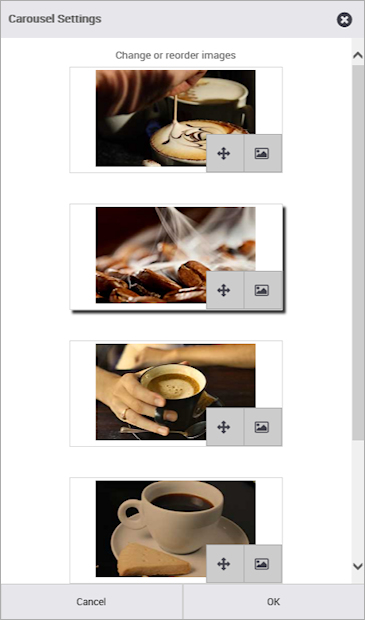
Add Image Carousel
In a Pro Campaign, you can add image carousels that display a slide show of images.
- In a Pro Campaign template, select an image carousel, then click to open the carousel settings.
- From the settings page, you can change and reorder the images.
Add Videos
In a Pro Campaign, you can add videos to your splash pages or landing pages in a Pro Campaign.
- In a Pro Campaign template, select a video, then click
 to open the video settings.
 - Type the URL to a YouTube or Vimeo video.

Configure Buttons
In a Pro Campaign, you can use buttons to link users to other web pages, display polls, surveys, and videos, coupons, and Apple Store and Google Play downloads.
-
In a Pro Campaign template, select a button, then click
to open the button settings. - You can modify visibility status, background and text colors, text, and button types.
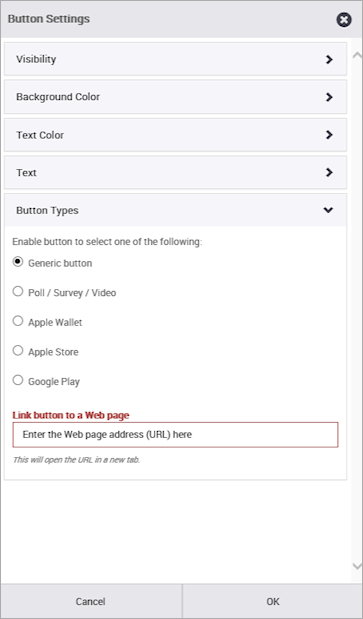
- Generic button — Inserts a generic button that links to the specified URL.
- Poll / Survey / Video — You can use these types of providers for polls, surveys, and videos. Type the embedded HTML code to open the poll, survey, or video in a popup window.
- Poll (Google Form)
- Survey (Survey Monkey, Google Form)
- Video (YouTube, Vimeo)
- Apple Wallet — Download a coupon, pass, or ticket to the Apple Wallet on a user's device. Supports PassSource and PassDoc providers. Type a link to the .pkpass file to download.
- Apple Store — Add an app link to allow the user to go directly to the Apple Store to download the specified application.
- Google Play — Add an app link to allow the user to go directly to the Google Play store to download the specified application.
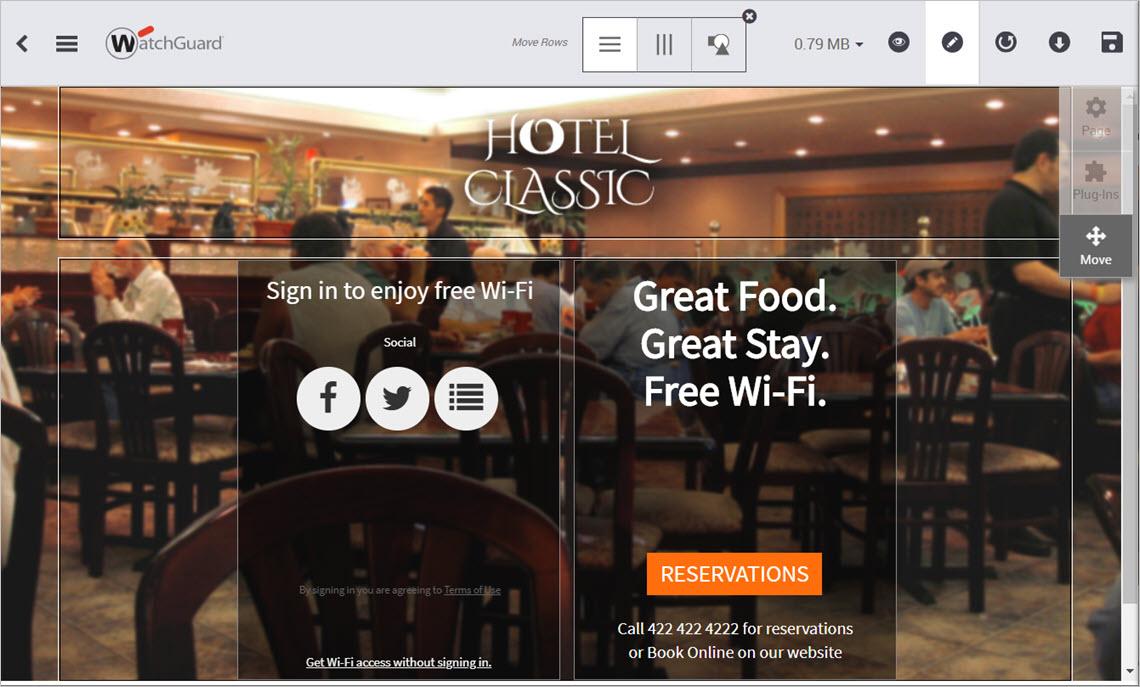
Move Splash Page Elements
You can move object and containers of a splash page template, such as text boxes and images.
Click the ![]() Move icon to display and move objects on the splash page. You can move rows, columns, or objects within a container using the selections at the top of the page.
Move icon to display and move objects on the splash page. You can move rows, columns, or objects within a container using the selections at the top of the page.
Click on a container or an object within a container and drag with your mouse to move the element to a new location.
You cannot not add or remove containers for a splash page template.
Configure Engagement
You can use Engagement to actively intercept user requests to specific web sites when they are connected to your guest wireless network.
When a guest user connects to your wireless network, you can engage with the user by sending targeted marketing with the help of coupons and text messages. For example, for a retail establishment, you can send the guest user a coupon or promotional text message when they try to access the web site of a competitor.
You can view engagement reports to help you improve the effectiveness of your promotional offers. For more information, see Interception Analytics.
You must use Analyze to configure the Engagement settings for the portal campaign you have designed here in Engage. For more information, see Guest Engagement.
To configure Engagement:
- Select the
 icon on the Pro Campaigns management page.
![]()
The Engagement configuration page appears.
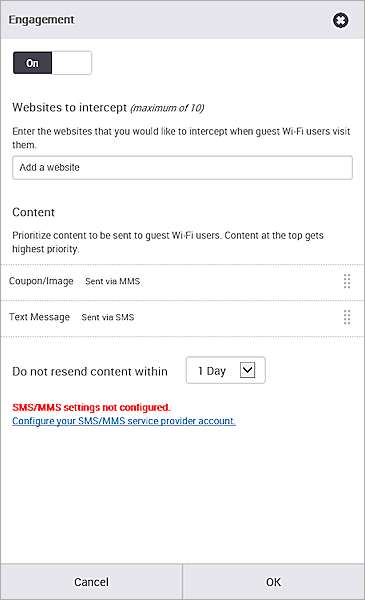
- Turn Engagement On.
- In the Websites to intercept text box, type a list of web sites (such as, example.com) to intercept with your engagement coupon or message.
You can add up to 10 sites. - In the Content section, prioritize the content to send to guest wireless users.
The content at the top of the list receives the highest priority. - From the Do not resend content within drop-down list, select the frequency of interception.
- To configure your SMS/MMS settings, click the Configure your SMS/MMS service provider account link.
For more information, see Configure SMS and Email Settings. - Click OK.