Authorized WiFi Policy
Applies To: Wi-Fi Cloud-managed Access Points (AP120, AP125, AP225W, AP320, AP322, AP325, AP327X, AP420)
The Authorized WiFi Policy specifies the SSIDs allowed to be broadcast, allowed AP vendor types, required security and encryption settings, and other settings that allow an AP to be considered Authorized.
WIPS identifies and continually monitors Authorized APs and makes sure they conform to the access parameters you specify in your security policy. When an SSID configuration does not match the Authorized WiFi Policy, the SSID is marked as a Misconfigured SSID.
There are two ways you can define your policy for authorized Wi-Fi access points:
- Use SSID Profiles — In the default configuration, the Use SSID Profiles to verify managed access point configuration option is selected. This option uses the settings of your SSID Profiles to validate the configuration of your APs. We recommend that you use this option to simplify the security settings of your Wi-Fi deployment if you are protecting a WatchGuard AP network.

- Use Authorized WiFi Policy — If you want to provide specific policy settings such as allowed AP vendors or allowed networks, you can also create an Authorized WiFi Policy for each SSID you use. You must disable the Use SSID Profiles to verify managed access point configuration option to apply a new policy. We recommend you use Authorized WiFi Policies when you use WatchGuard APs as dedicated WIPS Sensors in a third-party AP network.
Add an Authorized WiFi Profile
To create a custom Authorized WiFi Policy for an SSID:
- Open Discover.
- From the Navigator, select the location where the Authorized WiFi Policy will be applied. Make sure that you select the correct top-level location. Settings are inherited by subfolders automatically. If you select a subfolder that has inherited a policy, you can enable editing of the policy to customize it for the specific subfolder location.
- Select Configure > WIPS > Authorized WiFi Policy.
- Clear the Use SSID Profile to verify managed access point configuration check box if you want to create custom Authorized WiFi Policies for your deployment.
- Click Add Authorized WiFi Profile, or select an existing profile to edit.
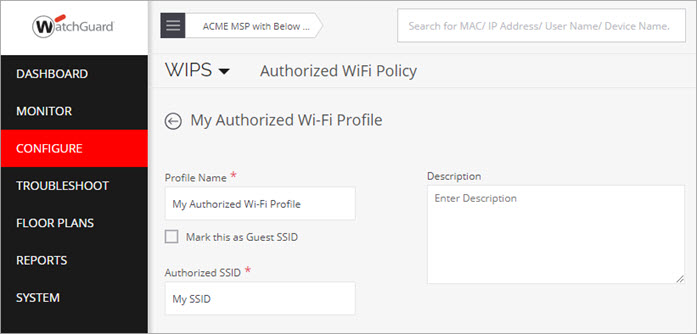
- Type a descriptive Profile Name.
- (Optional) Type an optional description to describe the policy.
- (Optional) Select the Mark this as Guest SSID check box if you intend this SSID to be used by guest users. Do not select this check box for private SSIDs.
- Select the Authorized SSID for this policy. The list displays any SSIDs that are already deployed. You can also type the SSID name (case-sensitive). This SSID can be an SSID Profile you created in Wi-Fi Cloud to be broadcast by WatchGuard APs, or it can be an SSID broadcast by third-party APs.
- Configure these settings in the Authorized WiFi Policy:
- Network Protocol — The network protocol of the SSID. Any is the default value. You can select one or more protocols from 802.11a, 802.11b, and 802.11b/g after you deselect Any.
- Security Settings — Security protocol for the SSID. Any is the default value. You can select one or more protocols from 802.11i, Open, WPA, and WEP after you deselect Any.
- Encryption Protocol — Encryption protocol for the SSID. This field is enabled only when the security protocol for the SSID is WPA or 802.11i.
- Authentication Framework — Authentication protocols for the SSID. This field is enabled only when the security protocol for the SSID is WPA or 802.11i.
- Authentication Type — Higher layer authentication types that clients can use while connecting to the SSID. Authentication types do not determine the classification of APs, but are used to generate an event if a client uses a non-allowed authentication type. Wi-Fi Cloud generates this event if it can detect authentication protocol handshake frames. Any is the default value. You can select one or more options from PEAP, EAP-TLS, LEAP, EAP-TTLS, EAP-FAST, and EAP-SIM after you deselect Any.
- AP Capabilities — Additional capabilities of the APs. If you select any of these advanced capabilities, the classification logic allows APs with and without these capabilities. Any is the default value. You can select one or more Turbo/Super techniques used by Atheros chipsets to get higher throughput (Turbo, 802.11n, and SuperAG) after you deselect Any.
- MFP/802.11w — Indicates whether MFP/802.11w is enabled or disabled on the SSID. Any is the default value. You can select an option from MFP/802.11w enabled or MFP/802.11 disabled, after you deselect Any.
- Allowed Networks — Select the networks where wireless traffic on the SSID is mapped through Authorized APs. Select Any to allow wireless traffic on this SSID to be mapped to any network. Alternatively, you can deselect Any and choose from networks that are discovered automatically or add new networks that are not yet discovered.
- Allowed AP Vendors — AP vendors that are allowed to be connected to the SSID or network. Any is the default value that allows all devices. To select one or more vendors from a predefined list of AP vendors, clear the Any check box. If you used WatchGuard Go to create your Wi-Fi networks, the Allowed AP Vendors setting is set to WatchGuard, which allows only WatchGuard-branded devices on the network.
- Click Save to save the policy or click Save & Apply to save the policy and apply it to the current location.
Repeat these steps for each SSID that you want to protect.
Advanced Settings
Click the Advanced Settings link at the bottom of the Authorized WiFi Policy page to configure Access Point Pre-Classification and No WiFi Networks settings.
Access Point Pre-Classification
Pre-classification of access points helps WIPS identify potential authorized and rogue APs. By default, access points connected to a monitored subnet are pre-classified as potentially authorized or rogue. For example, if an unclassified AP is connected to the network and pre-classified as authorized or rogue, you can monitor the AP and re-classify the AP as required.

You can also pre-classify APs based on the signal strength with which they are visible. If you enable signal strength based pre-classification, you can define a signal strength threshold. APs with a signal strength greater than the threshold are automatically classified as potentially authorized or rogue.
We recommend you do not use the signal strength pre-classification option in high-density business environments with other nearby Wi-Fi deployments.
This feature can result in legitimate neighborhood APs being classified as Rogue and subject to intrusion prevention containment if you have enabled intrusion prevention. In addition, signal strength based classification does not detect rogue APs that operate with a signal strength weaker than the threshold, such as smart phones that run Wi-Fi hotspots.
No Wi-Fi Networks
If there are any networks at the location that are not allowed to have APs connected to them, you can add them to the "No Wi-Fi" Networks configuration in the Authorized WiFi Policy.
If an AP at this location is connected to a "No Wi-Fi" network, the device is classified as a Rogue AP, even if it matches an Authorized WiFi Policy applied at the location. The "No Wi-Fi" network selection at a location takes precedence over any Authorized WiFi Policies applied at the location.
To configure "No Wi-Fi" networks:
- Click the Advanced Settings link at the bottom of the Authorized WiFi Policy page.
- Select Define No WiFi Networks from the drop-down list.
- You can drag a detected network in the System Detected Networks section into the Add Networks section.
You can also type a network address to add to the list.
For example, 192.168.1.0/24 refers to a 192.168.1.x network with a subnet mask of 255.255.255.0.
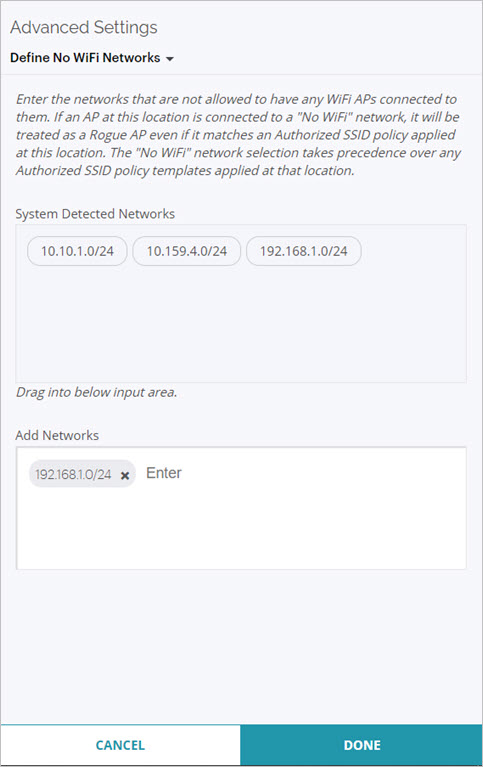
- Click Done to save the No WiFi Networks configuration.
- Click Save to save the Authorized WiFi Policy configuration.