Applies To: Wi-Fi Cloud-managed Access Points (AP120, AP125, AP225W, AP320, AP322, AP325, AP327X, AP420)
You can configure the quality of service (QoS) parameters such as upload and download bandwidths, blackout time, login timeout, and the redirect URL for each plug-in selected in a portal.
The redirect URL is the URL of the page that guest users are redirected to after they log in.
The redirect URL can be a custom URL, campaigns URL, or third-party URL.
- Custom Redirect URL — Select the Custom option for redirect URL, and enter an HTTP or HTTPS URL to redirect the guest user opting to log in through the plug-in for which the Redirect URL is being configured. The guest user is redirected to the specified URL where they can authenticate using the plug-in. Analyze does not send analytics data to the custom URL when this option is selected.
- Campaigns Redirect URL — Select Campaigns if you want the plug-in to have a custom landing page as specified in the campaign. This can be used when you want to display offers to guests logging in through a specific plug-in. You must have the required campaign published through the Engage app to be able to select a Campaign. The guest user is redirected to the landing page of the selected campaign when successfully logged in.
- Third-party Redirect URL — Analyze redirects the guest user to the redirect URL specified in the third-party endpoint. Analyze sends guest user related analytics data to the third-party endpoint based on the key-value pairs defined in the endpoint. You must have the corresponding third-party analytics endpoint configured with method type as "Redirect" before you can select the redirect URL as a third-party redirect URL. For more information on how to configure endpoints for third party integration, see Configure End Points for Third-Party Integration.
Based on the analytics data, a personalized message or a personalized offer can be presented to the guest on the redirect URL
If the redirect URL has not been configured, the user is redirected to the redirect URL specified in the SSID profile. If a redirect endpoint has been assigned to the redirect URL under the Plug-in QoS tab, this URL has a higher precedence than the redirect URL in the SSID profile.
QoS can be defined in both the plug-in and in the SSID profile applied to the device. The plug-in QoS settings receive the highest precedence.
To configure QoS parameters:
- Select Portals.
- Click the portal name.
- Click the Plug-in QoS tab.
The list of enabled plug-ins appears.
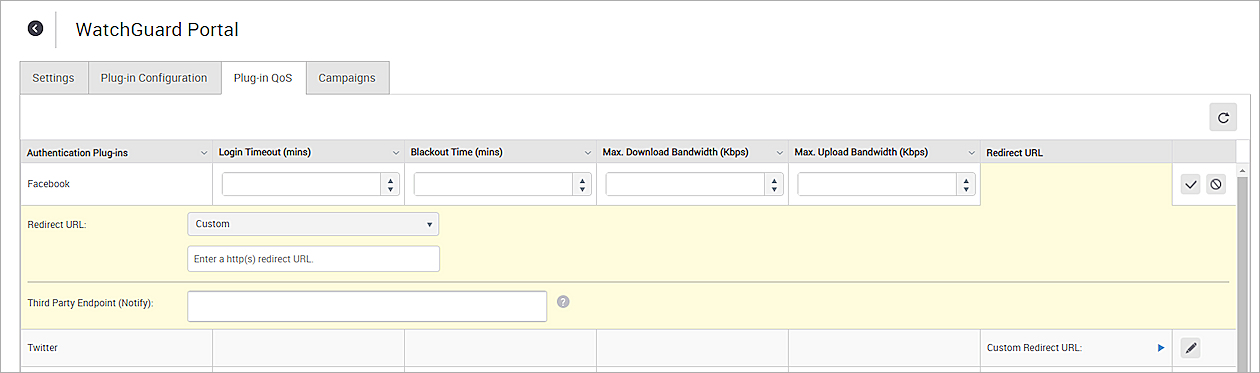
- Specify the QoS parameter values:
- Login Timeout (mins) — The time period in minutes after which the guest user session for the portal expires. The user must re-authenticate with their credentials to continue using the Wi-Fi service. A value of zero indicates that the user session will not time out and the user must explicitly log out of the portal. A non-zero timeout configured on the portal takes precedence over the timeout configured on an SSID profile.
- Blackout Time (mins) — The time period in minutes for which a user cannot log in to the portal after the last successful login has timed out. A value of zero indicates no blackout time. A blackout time configured on the portal takes precedence over the blackout time configured on the SSID profile.
- Max Download Bandwidth (Kbps) — Maximum download bandwidth, in Kbps for this portal plug-in.
- Max Upload Bandwidth (Kbps) — Maximum upload bandwidth, in Kbps for this portal plug-in.
- Click
 for the corresponding to the plug-in for which you want to configure the redirect URL and select the type of redirect URL.
 - If the value of the Redirect URL is Custom, enter an HTTP or HTTPS URL. If the value of the redirect URL is Third-Party, select the appropriate third-party endpoint. If the value of the redirect URL is Campaign, select the required campaign that you created in Engage.
- From the Third Party Endpoint (Notify) drop-down list, select the name of an Endpoint you have configured. On successful authentication, the notification parameters are sent to the End Point URI of the third-party Endpoint using the configured method type.
- Click
 to update and save the plug-in configuration.