Applies To: WatchGuard Cloud-managed Access Points (AP130, AP330, AP332CR, AP430CR, AP432)
To manage a WatchGuard access point with WatchGuard Cloud, you must add the access point to WatchGuard Cloud as a cloud-managed device.
Before You Begin
Before you add an access point to WatchGuard Cloud, make sure that:
- You have activated the access point in your WatchGuard account at watchguard.com/activate. For more information, go to Activate an Access Point.
- The access point has a current WatchGuard Standard or USP Wi-Fi license. For more information, go to About Wi-Fi in WatchGuard Cloud Access Point Licenses.
- The access point is allocated to a Subscriber account (Service Providers only). For more information, go to Access Point Allocation.
Required Ports
The access points use TCP port 443 to connect to WatchGuard Cloud.
Access points must also be able to connect to these destinations:
- *.watchguard.io for product activation and feature key updates
- *.watchguard.com for WatchGuard Cloud registration and connections
- Access points must be able to resolve DNS queries with the DNS server the device receives from DHCP.
- Access points must initially be able to connect to *.pool.ntp.org on NTP port 123 (TCP/UDP) for the default access point time synchronization servers, and for any custom NTP servers set for the device.
If you set up an access point behind a firewall that performs inspection on HTTPS traffic, you must add *.watchguard.io to the content inspection exception / bypass list to enable the access point to receive a feature key from WatchGuard servers. On the WatchGuard Firebox, this is enabled by default for cloud-managed Fireboxes in WatchGuard Cloud.
Add an Access Point to WatchGuard Cloud
To add an access point to WatchGuard Cloud:
- Log in to your WatchGuard Cloud Subscriber account.
- Select Configure > Devices.
- In Device Manager, click Add Device.
A list of activated devices opens. - Select the Access Point tab.
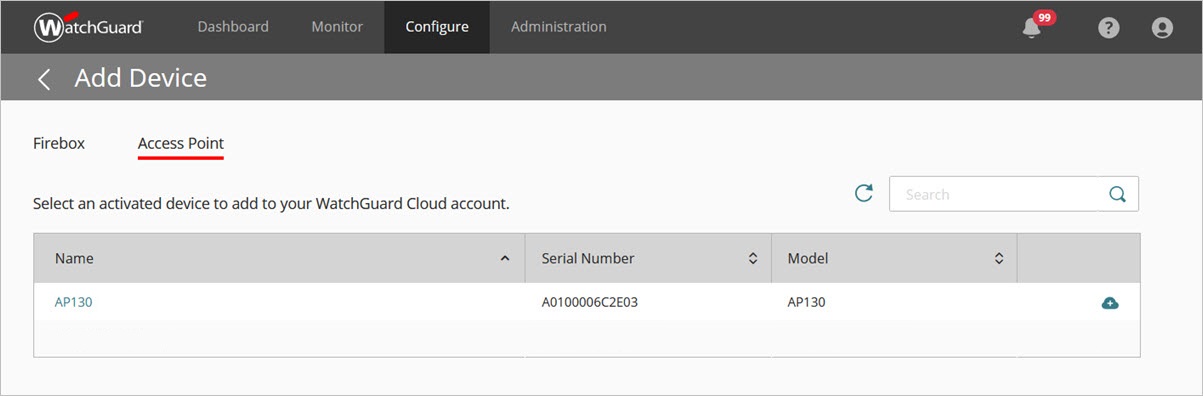
- Click the Name of the access point you want to add or click
 . Tip!
A confirmation dialog box opens.
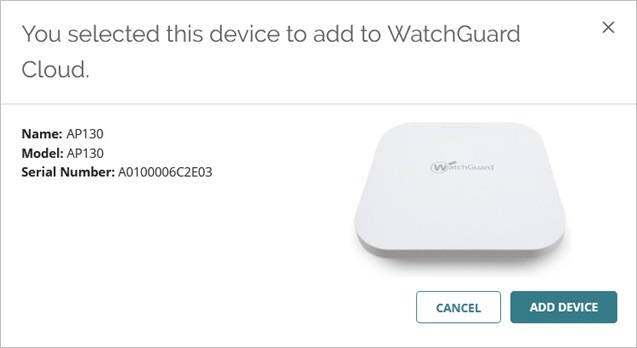
- Click Add Device.
The Add Device to WatchGuard Cloud page appears. - Type a Device Name and an optional Description for the access point.
The default name is the registered name of the device.
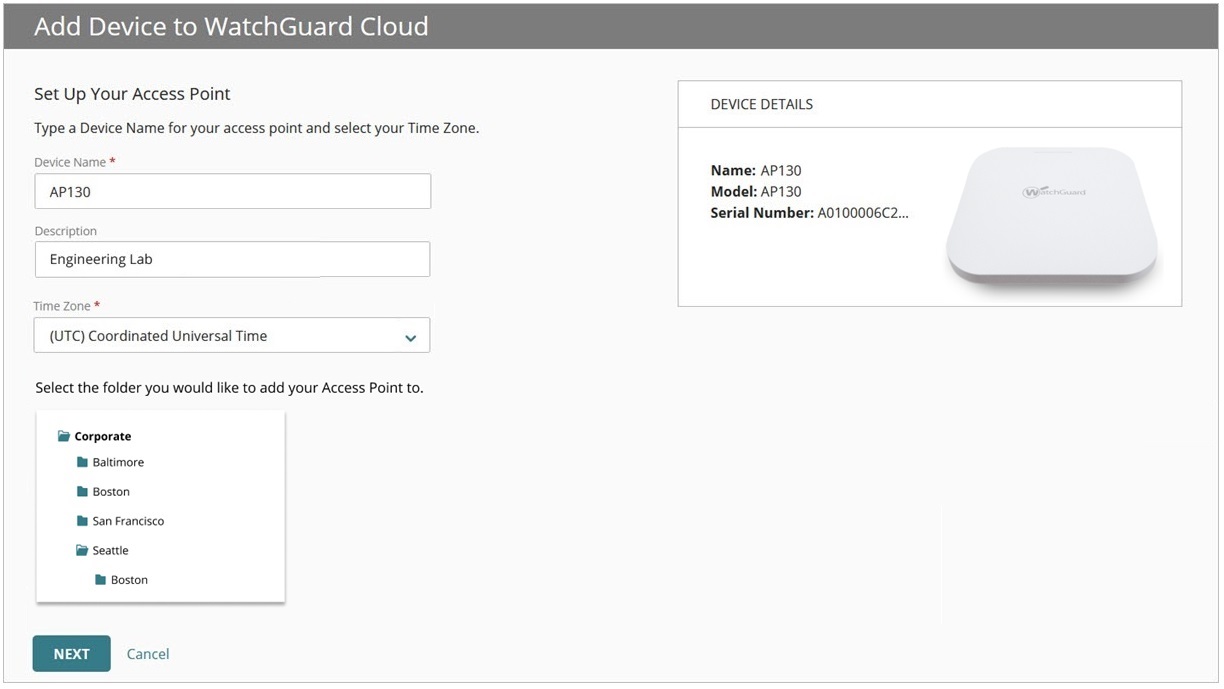
- Select the Time Zone of the location where the access point is installed. Click Next.
- Select the folder that you want to add your device to. Device Folders help you to see status and summarized data for groups of devices.
If you only have one root folder, the folder list does not appear. - From the IP Address Configuration drop-down list, select and configure one of these options, then click Next.
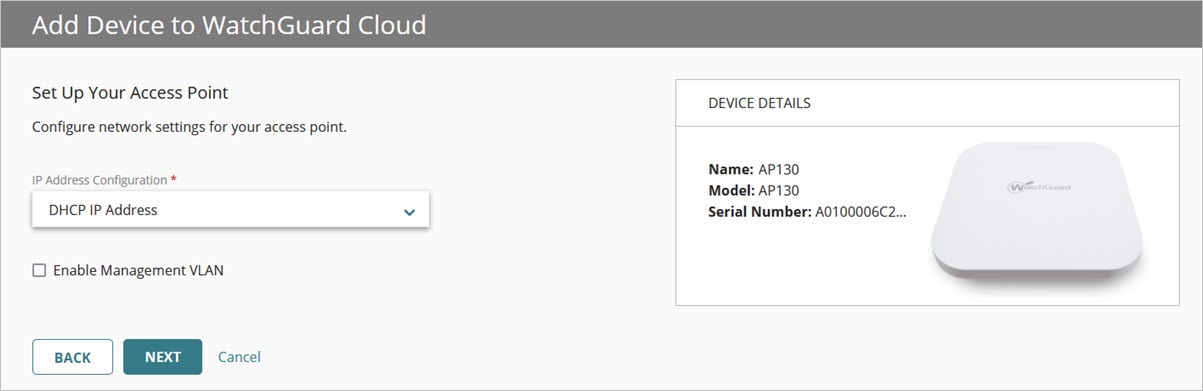
DHCP IP Address
Select this option to configure the access point to use DHCP to request an IP address.
Static IP Address
Select this option to configure the access point to use a static IP address.
Configure the Network IP Address and Netmask, a Gateway on the same subnet, and a DNS Server.
Enable Management VLAN
Select the Enable Management VLAN check box if you want to use a tagged VLAN for management communications to this access point. Select a VLAN ID from 1 to 4094.
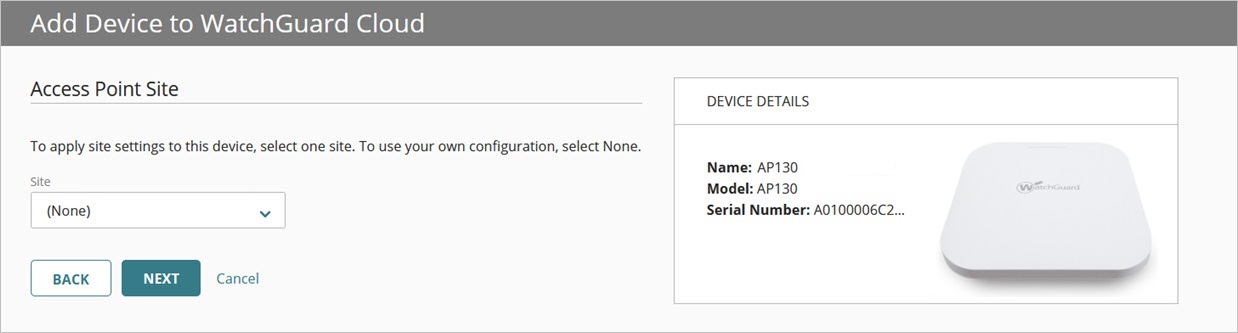
- Select the Access Point Site settings that you want to apply to the access point.
Access Point Sites enable you to manage and deploy shared wireless settings for multiple cloud-managed access points. For more information, see About Access Point Sites.
From the Site drop-down list, select an existing site, or select None to use your own configuration for the device.
Click Next.
- Type an Admin Password for the access point.
This is the administrator password for the access point Web UI and Command Line Interface (CLI) for local access to troubleshoot the device. You can change this password at a later time in the device configuration in WatchGuard Cloud. For more information, go to Access Point Device Password.
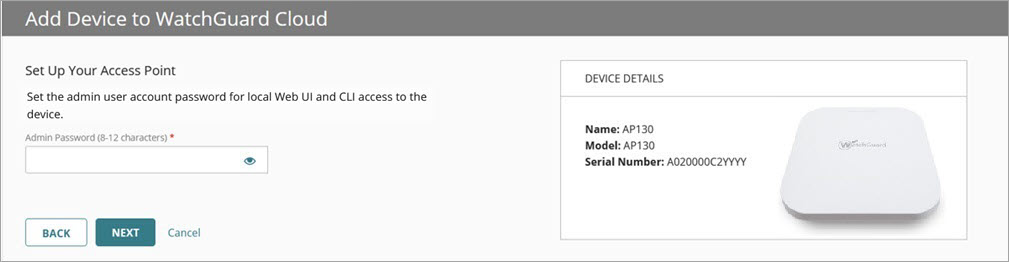
- Click Done.
The access point appears in the list of devices in WatchGuard Cloud.