Use the WatchGuard Access Point Web UI
(AP100, AP102, AP200, and AP300 devices only)
To see basic information about AP100, AP102, AP200, and AP300 devices, and manage some of the settings for the APs, you can connect directly to the WatchGuard Access Point web UI.
As of Fireware v12.1, you can no longer log in to the local Web UI of an AP100/102, AP200, or AP300. You must use the Gateway Wireless Controller to manage these devices. In Fireware v12.2 and higher, and AP firmware 1.2.9.16 and 2.0.0.11, you can use the command line interface (CLI) of the AP to perform basic commands. For more information, go to Command line access for legacy AP100, AP102, AP200, and AP300 in the WatchGuard Knowledge Base.
From the Access Point web UI, you can:
- See the current configuration details for the AP
- Manage the network settings for the AP
- Change the AP passphrase
- Upgrade the AP firmware
- View AP Logs
- Save configuration changes or revert recent changes to the AP
Because you manage the configuration, passphrases, and firmware updates for your paired WatchGuard AP from the Gateway Wireless Controller on the Firebox, it is not often necessary to use the WatchGuard Access Point web UI to directly manage the configuration of your AP.
Connect to the WatchGuard Access Point Web UI
Before you can connect your computer directly to the WatchGuard AP for the first time, you must change the network settings on your computer to enable your computer to get access to the AP. You can then connect to the AP to manage the AP settings. If you change the network settings on the AP and later want to connect directly to the AP again, you must configure your computer to use an IP address and gateway in the same network range as the IP address you set for the AP.
Connect to an AP Directly Connected to Your Computer
To directly connect to the WatchGuard Access Point web UI on an AP with factory-default settings:
- Configure your computer to use these network settings:
- IP address — 192.168.1.2
- Subnet mask — 255.255.255.0
- Gateway — 192.168.1.1
- Connect your computer directly to the AP with an Ethernet cable.
- Open a web browser and go to https://192.168.1.1.
The WatchGuard Access Point web UI login page appears.
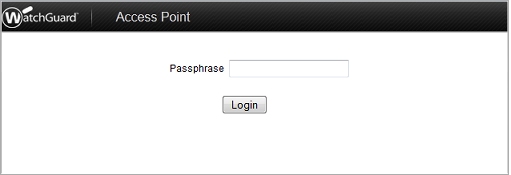
- In the Passphrase text box, type the passphrase for the AP.
The default passphrase is wgwap. - Click Login.
The WatchGuard Access Point Web UI appears, with the Access Point Status page selected.
You can now monitor and manage the settings for your AP, as described in the next sections.
Connect to an Access Point On Your Network
Before you begin, make sure you have the IP address of the AP.
- Firebox System Manager — Find the IP address of a paired AP on the Gateway Wireless Controller tab.
For more information, go to Monitor AP Status. -
For more information, go to Monitor AP Status. - Find the IP address of an unpaired AP on the Gateway Wireless Controller Access Points tab.
For more information, go to WatchGuard AP Discovery and Pairing.
To connect to the WatchGuard Access Point web UI for an AP that is connected to your Firebox:
- Open a web browser and go to https://<AP IP address>.
The WatchGuard Access Point web UI login page appears. - In the Passphrase text box, type the passphrase for the AP.
For a paired AP, the passphrase is the WatchGuard AP Passphrase configured in the Gateway Wireless Controller settings on the Firebox. For more information, go to Configure Gateway Wireless Controller Settings. - Click Login.
The WatchGuard Access Point Web UI appears, with the Access Point Status page selected.
You can now monitor and manage the settings for your AP, as described in the next sections.
Verify the Current AP Settings
On the Access Point Status page, you can verify the current network settings, model information, firmware version, and serial number for the AP. You can also revert to the factory-default settings for your AP.
When you connect to your AP, the Access Point Status page is selected by default.
To go to the Access Point Status page and review the AP settings:
- From the left navigation menu, select Status.
The Access Point Status page appears.
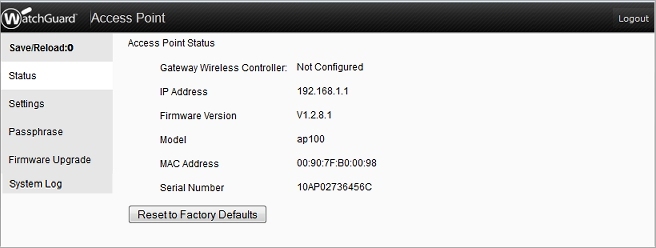
- Review the current settings for your AP.
To reset your AP to the factory-default settings:
On the Access Point Status page, click Reset to Factory Defaults.
Manage Network Settings
By default, your AP uses DHCP to automatically get an IP address from your network. When you configure your AP, you can continue to use DHCP to automatically configure the network settings, or you can use a static IP address and manually configure the network settings. To help you easily identify the AP, you can also specify a friendly device name for the AP.
- From the left navigation menu, select Settings.
The Network Settings page appears.
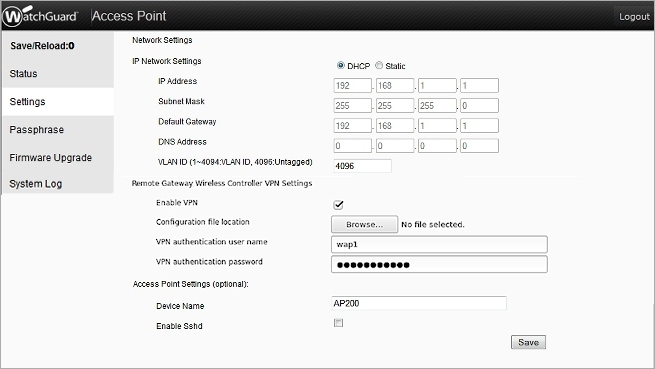
- Select an option:
- DHCP
- Static
- If you select Static, in the IP Network Setting section, type the network configuration settings for the AP.
- To specify a VLAN, in the VLAN ID text box, type the VLAN number.
- To specify a friendly name for the AP, in the Device Name text box, type a name for the AP.
- To enable SSH for technical support access, select the Enable Sshd check box.
- Click Save.
Remote Gateway Wireless Controller VPN Settings
You can deploy your APs in remote locations and manage these APs over an SSL VPN with the Gateway Wireless Controller.
You must create an SSL VPN user account on the Firebox and download a mobile VPN profile from the Firebox.
For more information, go to About AP Remote VPN Deployment.
To allow a remotely deployed AP to be managed by a Gateway Wireless Controller over a VPN:
- Select Enable VPN.
- Click Browse and select the VPN profile you downloaded from the Gateway Wireless Controller Firebox.
- In the VPN authentication user name text box, type the user name for the VPN user account.
- In the VPN authentication password text box, type the password for the VPN user account.
- Click Save.
Change the Access Point Passphrase
All APs use the same passphrase by default: wgwap. The passphrase is changed automatically when you pair the AP with a Firebox. We recommend that you do not use the WatchGuard Access Point web UI to change the AP passphrase. If you use the WatchGuard Access Point web UI to change the AP passphrase, you must use this as the pairing passphrase for this AP in the Gateway Wireless Controller on the Firebox. For more information, go to About AP Passphrases.
- From the left navigation menu, select Passphrase.
The Local passphrase page appears.
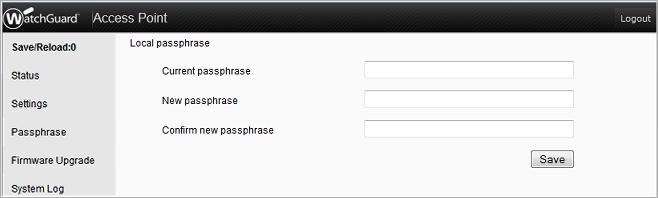
- In the Current passphrase text box, type the current passphrase for your AP.
If you have never changed the passphrase before, type the default passphrase, wgwap. - In the New passphrase and Confirm new passphrase text boxes, type the new passphrase for the AP.
- Click Save.
Upgrade the AP Firmware
When you manage your WatchGuard AP with the Gateway Access Controller on your Firebox, by default, the firmware on your AP is automatically updated when a new version is available to the controller on the Firebox. You can also choose to manually upgrade the firmware on your AP from the Access Point web UI, if a firmware update for the AP is available on the WatchGuard Software Downloads page.
Before you can upgrade your AP to a new version of firmware, you must have saved the firmware image to the computer connected to your AP.
- From the left navigation menu, select Firmware Upgrade.
The Firmware Upgrade page appears.
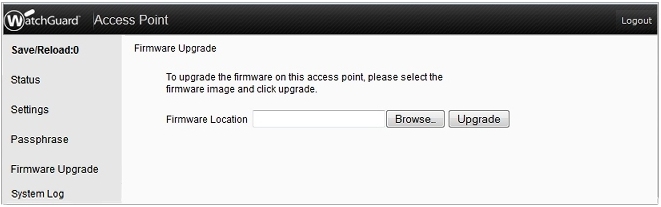
- Click Browse and select the firmware image file.
The firmware image file path appears in the Firmware Location text box. - Click Upgrade.
Do not interrupt the power to the AP while the firmware upgrade is in progress. Interruption of power during a firmware upgrade can cause the AP to start in failsafe mode. When the AP is in failsafe mode, the Access Point web UI provides a single option that enables you to upgrade the AP firmware. For more details about AP failsafe mode and recovery, go to the WatchGuard Knowledge Base.
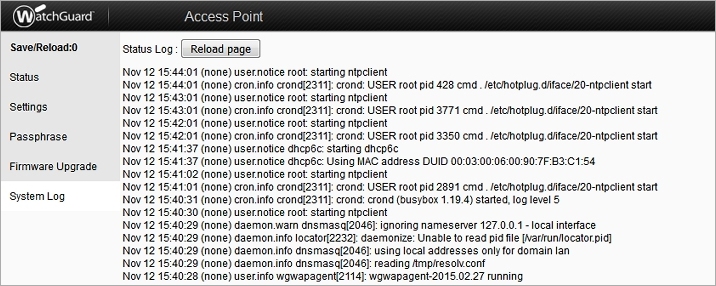
View AP Log Messages
To help you troubleshoot issues with the AP, you can review the system log messages on the AP.
To view the AP system log messages, from the left navigation menu, select System Log.
Save or Revert Configuration Changes
If you have made changes to the AP configuration that have not yet been implemented, you can choose to save your changes and apply them to the AP, or revert the changes so they are not applied to the AP.
- From the left navigation menu, select Save/Reload:0.
The Save/Reload page appears.
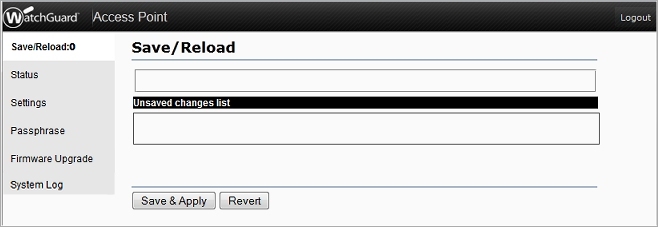
- To apply changes and save them to the AP configuration, select a change from the Unsaved changes list and click Save & Apply.
- To revert a change, select a change from the Unsaved changes list and click Revert.