HTTP-Proxy: Deny Message
When your users try to get access to content that is denied, or content you specify as potentially dangerous or inappropriate, the Firebox replaces the requested content with a deny or warn message.
You can change the text and appearance of these messages to reflect the usage guidelines or branding of your organization:
Deny Message
The Firebox shows a deny message in the web browser when users make a request that the HTTP-proxy does not allow. Users also see a deny message when the request is allowed, but the HTTP-proxy denies the response from the remote web server.
For example, if a user tries to download an .exe file and you have blocked that file type, the user sees the deny message. If the user tries to download a file that has an unknown content type and the proxy policy is configured to block unknown MIME types, the user sees the deny message in the web browser.
Warn Message (Fireware v12.5 or higher)
The Firebox shows a warn message in the web browser for all HTTP-related warn actions.
For example, if a user tries to go to a website in a WebBlocker category with the Warn action, the user sees the warn message. The user can select to continue to the website or go back to the previous page.
Configure the Deny or Warn Message
The default deny and warn message text and HTML code appears in the Deny Message and Warn Message text boxes.
To change the message text, update the content between the <body> and </body> tags. You can customize the messages with standard HTML code and can also use Unicode (UTF-8) characters.
To change the appearance of the message, update the styles defined between the <style> and </style> tags. Both the deny and warn messages use the styles defined in the Deny Message text box.
To change the text that appears in the browser title bar, update the text between the <title> and </title> tags in the deny message <head> section or the warn message <body> section.
The first line in the Deny Message text box is a component of the HTTP header and specifies the content type and character encoding for the deny and warn messages. We recommend that you do not change this line of text. You must include an empty line between the first line and the body of the deny message.
When you customize a message, make sure that the opening and closing <html> tags still appear in the Deny Message text box, and that the opening and closing <body> tags still appear in both the Deny Message and Warn Message text boxes. If these tags are not included, the default message text will appear to users instead of your custom message.
If your message text includes content, such as an image, that requires the client computer to connect to another server, the content does not appear in the message unless the client computer can resolve the address and connect to the server where the content is located.
In Fireware 12.5 or higher, you can preview any changes you make to the warn and deny messages. Because the information required to populate variables is not available until the proxy handles the traffic, the preview shows variable names, not the text that replaces them. For more information about variables, go to Deny and Warn Message Variables.
In Policy Manager, the warn message preview displays the Continue to Site and Go Back buttons as text, but they appear as buttons in the warn message your users see.
To configure the deny and warn messages:
- In the HTTP Proxy Action configuration, select Deny Message.
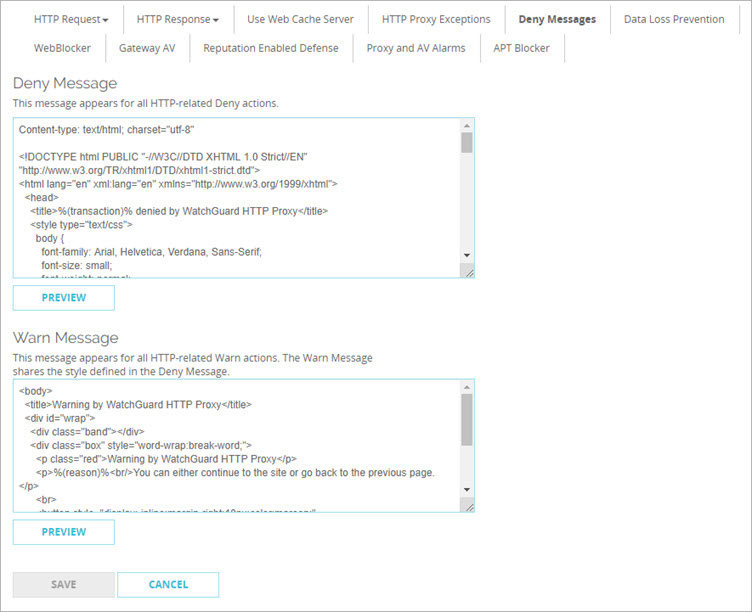
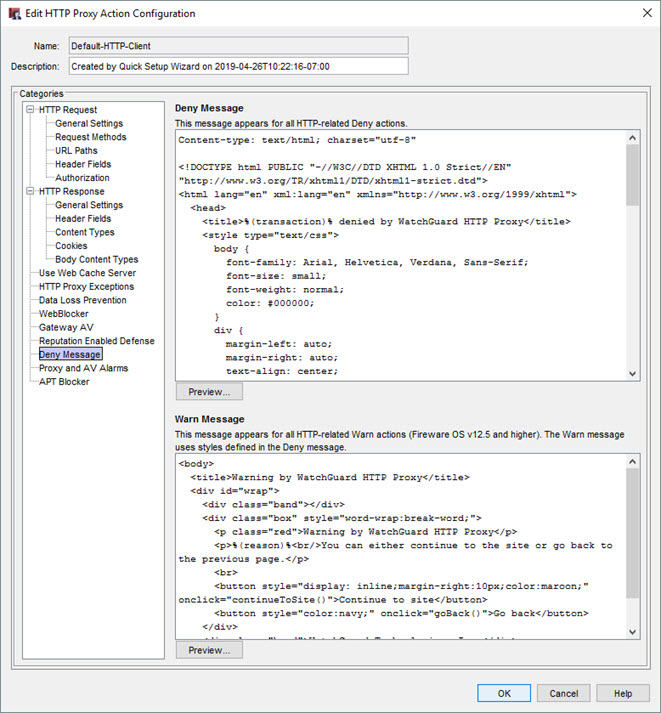
HTTP Proxy Action Deny Message configuration in Policy Manager
- In the Deny Message and Warn Message text boxes, type the deny and warn message content.
- To preview the message, in the Deny Message or Warn Message section, click Preview.
A dialog box appears.
- To change settings for other categories in this proxy, see the topic for the next category you want to modify.
- Save the configuration.
If you modified a predefined proxy action, when you save the changes you are prompted to clone (copy) your settings to a new action.
For more information on predefined proxy actions, go to About Proxy Actions.
Deny and Warn Message Variables
You can include variables in deny and warn message text. Variables are useful if you want to include information that is unique to a specific message. For example, you can add the %(user-name)% variable to include the name of the authenticated user in the message text. When the message appears in the browser, users see their user name instead of the variable name.
You can include these variables in deny and warn message text:
| Variable | Description |
|---|---|
| %(transaction)% | Includes Request or Response to show which side of the transaction caused the packet to be denied. This variable appears in the <title> element of the deny message. |
| %(reason)% | Includes the reason the Firebox warned the user or denied the content. |
| %(method)% | Includes the request method from the request. |
| %(url-host)% | Includes the server host name from the URL. If no host name was included, the IP address of the server is included. |
| %(url-path)% | Includes the path component of the URL. |
| %(user-name)% | Includes the authenticated user name. If the user did not authenticate, the user name is not included. |
| %(serial)% | Includes the serial number of the Firebox. |
| %(firewall)% | Includes the Firebox name. |