Configure Windows Devices for Mobile VPN with IKEv2
To add the VPN connection, you can:
- Automatically configure VPN settings — Download the WatchGuard automatic configuration script from the Firebox and run it on Windows devices.
- Manually configure VPN settings — Manually configure an IKEv2 VPN connection on Windows devices.
To configure pre-logon VPN connections for Windows users, go to How can I create and deploy custom IKEv2 and L2TP VPN profiles for Windows computers? in the WatchGuard Knowledge Base.
For information about which operating systems are compatible with each mobile VPN type, see the Operating System Compatibility list in the
WatchGuard provides interoperability instructions to help our customers configure WatchGuard products to work with products created by other organizations. If you need more information or technical support about configuring a non-WatchGuard product, see the documentation and support resources for that product.
Automatically Configure VPN Settings
To configure a VPN connection with the WatchGuard automatic configuration script, you must download a .TGZ file from your Firebox and extract the contents. This compressed file includes a README.txt instruction file, a .BAT configuration script, and .PEM and .CRT certificate files. For information about how to download this file, go to Configure Client Devices for Mobile VPN with IKEv2.
The automatic configuration script creates a new IKEv2 VPN connection on a Windows computer. The configuration script also installs the required CA certificate for the VPN connection. To install the required CA certificate, you must have Administrator permissions on the Windows device. The WatchGuard configuration script automatically requests Administrator permissions to install the CA certificate.
In Fireware v12.9 or higher, the Mobile VPN with IKEv2 configuration on the Firebox includes settings for split tunneling. If you configure split tunneling, the .BAT configuration script that you download from the Firebox and run on Windows devices includes a parameter that enables split tunneling and a command that adds VPN routes.
After you install the client configuration files:
- The internal resources that you added to the Allowed Network Addresses list in the Mobile VPN with IKEv2 configuration are added to the Windows routing table. These routes are added on the client only when the connection is established.
- These routes are bound to the specified VPN connection on the client. If the user computer has multiple VPN connections configured, these routes are not bound to the other VPN connections.
- When the connection disconnects, these routes are deleted from the Windows routing table.
If you edit the Allowed Network Addresses list on the Firebox after you download and install the client configuration files on user computers:
- Download updated client configuration files from the Firebox and reinstall those on user computers.
- If you remove a host or network from the Allowed Network Addresses list, but you do not install updated client configuration files on user computers, VPN clients can initiate traffic to that host or network, but the Firebox denies the traffic.
You can also configure a full tunnel (default route) VPN. For information about split tunnel and full tunnel settings on the Firebox, go to Edit the Mobile VPN with IKEv2 Configuration.
For information about split tunnel and full tunnel settings on clients, go to Internet Access Through a Mobile VPN with IKEv2 Tunnel.
In Fireware v12.8.x or lower, you cannot configure split tunneling in the Mobile VPN with IKEv2 configuration on the Firebox. Fireware v12.8.x or lower supports connections from Mobile VPN with IKEv2 clients configured for split tunneling. However, you must manually configure IKEv2 clients for split tunneling. For example, you must manually add routes on the client computer for each remote network that you require access to. For Fireboxes with Fireware v12.8.x or lower, we do not provide customer support for split tunnel configurations on IKEv2 clients. See the documentation provided by your VPN client vendor. If you require split tunneling in Fireware v12.8.x or lower, we recommend that you use Mobile VPN with SSL. For information about Mobile VPN with SSL and split tunneling, go to Options for Internet Access Through a Mobile VPN with SSL Tunnel.
In Fireware v12.9 or higher, the WatchGuard automatic configuration script includes a domain name suffix if you specify one in the network (global) DNS settings on the Firebox. In the Mobile VPN with IKEv2 configuration on the Firebox, you must select Assign the Network DNS/WINS settings to mobile clients. Mobile VPN clients inherit the domain name suffix.
For information about how to configure the network (global) DNS settings on the Firebox, go to Configure Network DNS and WINS Servers.
For information about DNS settings in the Mobile VPN with IKEv2 configuration on the Firebox, go to Edit the Mobile VPN with IKEv2 Configuration.
In Fireware v12.8.x or lower, Mobile IKEv2 clients do not inherit a domain name suffix from the Firebox. To manually configure a domain name suffix in Windows, go to Configure DNS server and suffix settings in IKEv2 and L2TP VPN clients in the WatchGuard Knowledge Base.
To automatically add a new IKEv2 VPN connection in Windows:
- Download or copy the Windows_8.1_10_11 folder to your device. This folder contains the automatic configuration file and the required CA certificate.
- In the Windows_8.1_10_11 folder, double-click the .BAT file.
- If a User Account Control dialog box opens, select Yes.
Two PowerShell windows open; one closes automatically. - If your account does not have Administrator permissions, specify the Administrator credentials when prompted. The Run as Administrator option is not supported.
- In the open PowerShell window, press any key to continue. The setup process completes.
- To find the new VPN connection, select Settings > Network & Internet > VPN.
- To connect to the VPN, click the VPN connection that you added and click Connect.
For computers with Windows 7, you must manually configure the VPN connection. The automatic configuration script is not supported. For more information, go to Configure Windows 7 Devices for Mobile VPN with IKEv2 in the WatchGuard Knowledge Base.
Manually Configure VPN Settings
To install the required CA certificate, you must have Administrator permissions on the Windows device.
To manually add a new IKEv2 VPN connection in Windows 10:
- In the Windows_8.1_10_11 folder, right-click the rootca.crt file.
- Click Install Certificate.
The Certificate Import Wizard appears. - Select the Local Machine store location and click Next.
- If a User Account Control dialog box opens that asks whether to allow this app to make changes to your device, select Yes.
- Select Place all certificates in the following store.
- Click Browse.
- From the Select Certificate Store list, select Trusted Root Certificate Authorities.
- Click Ok > Next > Finish.
- If a Security Warning dialog box opens that asks whether to install the certificate, select Yes.
- Click the Start button and select Settings > Network & Internet > VPN.
- Click Add a VPN connection.
- Specify these settings:
- VPN provider: Windows (built-in)
- Connection name: [Descriptive name such as MyCompany IKEv2 VPN]
- Server name or address: [Host name or IP address of your Firebox]
- VPN Type: IKEv2
- Type of sign-in info: User name and password
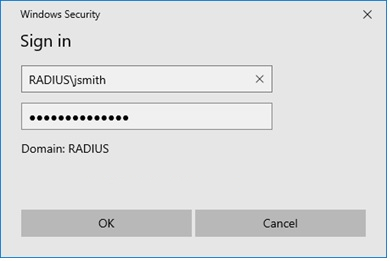
- (Optional) To save your user name and password for later use, specify those credentials now. If the Mobile VPN with IKEv2 configuration on the Firebox includes more than one authentication server, and you want to authenticate to an authentication server that is not the default authentication server, specify an authentication server name before the user name. For example, specify RADIUS\jsmith. For more information about the user name format, go to the User Name Format section.
- Click Save.
To manually add a new IKEv2 VPN connection in Windows 8.1:
- In the Windows_8.1_10_11 folder, right-click the rootca.crt file.
- Click Install Certificate.
The Certificate Import Wizard appears. - Select the Local Machine store location and click Next.
- If a User Account Control dialog box opens that asks whether to allow this app to make changes to your device, select Yes.
- Select Place all certificates in the following store.
- Click Browse.
- From the Select Certificate Store list, select Trusted Root Certificate Authorities.
- Click Ok > Next > Finish.
- If a Security Warning dialog box opens that asks whether to install the certificate, select Yes.
- Click the Start button and select PC Settings > Network > VPN.
- Click Add a VPN connection.
- Specify these settings:
- VPN provider: Microsoft
- Connection name: [Descriptive name such as MyCompany IKEv2 VPN]
- Server name or address: [Host name or IP address of your Firebox]
- (Optional) Type of sign-in info: User name and password
- (Optional) To save your user name and password for later use, specify those credentials now. If the Mobile VPN with IKEv2 configuration on the Firebox includes more than one authentication server, and you want to authenticate to an authentication server that is not the default authentication server, specify an authentication server name before the user name. For example, specify RADIUS\jsmith. For more information aboutthe user name format, go to the User Name Format section.
- Click Save.
- To open the PC Settings page, click the Back button twice.
- Click Control Panel > Network and Internet > Network and Sharing Center > Change Adapter Settings.
- Right-click the VPN adapter that you added and click Properties.
- On the Security tab, from the Type of VPN list, select IKEv2 and click OK.
- From the Data encryption drop-down list, select Require encryption.
- From the Authentication section, select Use Extensible Authentication Protocol (EAP).
- From the drop-down list, select the EAP-MSCHAP v2 option and click OK.
- In the Windows system tray, click the Internet Access icon.
- To connect to the VPN, click the VPN connection that you added and click Connect.
If you manually configure the client, we recommend that you configure a default-route (full tunnel) VPN. In Windows 10, you might have to change the IPv4 adapter properties for the IKEv2 VPN connection so that Use default gateway on remote network is selected. This is the default-route (full tunnel) option.
User Name Format
The User name format depends on which authentication server the user authenticates to:
- If the Firebox configuration includes multiple authentication servers, and you want to authenticate to an authentication server that is not the default authentication server, you must specify the authentication server in the User name text box.
- If the Firebox configuration includes multiple authentication servers, and you want to authenticate to the default authentication server, you do not have to specify the authentication server in the User name text box.
For example, the User name must be formatted in one of these ways:
To use the default authentication server
Type the user name. Example: jsmith
To use another authentication server
Type the authentication server name or domain name, and then type a backlash (\) followed by the user name. Examples:
Firebox-DB — Firebox-DB\jsmith
AuthPoint (Fireware v12.7 or higher) — authpoint\jsmith
RADIUS (Fireware v12.5 or higher) — rad1.example.com\jsmith or RADIUS\jsmith. You must type the domain name specified in the RADIUS settings on Firebox.
RADIUS (Fireware v12.4.1 or lower) — RADIUS\jsmith. You must always type RADIUS.
If your configuration includes a RADIUS server, and you upgrade from Fireware v12.4.1 or lower to Fireware v12.5 or higher, the Firebox automatically uses RADIUS as the domain name for that server. To authenticate to that server, you must specify RADIUS as the domain name.
Configure Client Devices for Mobile VPN with IKEv2
Configure iOS and macOS Devices for Mobile VPN with IKEv2
Configure Android Devices for Mobile VPN with IKEv2