You can use WatchGuard System Manager to manage VPN tunnels for your managed Fireboxes. In the VPN Tunnels section of the Device page, you can see all tunnels that include the selected device. You can also add, edit, or remove a VPN tunnel.
See VPN Tunnels
From WatchGuard System Manager:
- Connect to Your Management Server with WSM.
- Select the Device Management tab.
- Expand the Devices list.
- Select a Firebox.
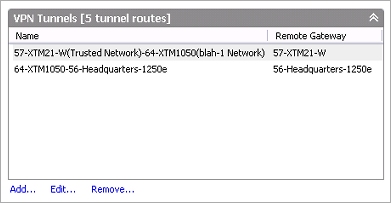
The Device Management page for the selected Firebox appears. - Find the VPN Tunnels section.
This section shows all tunnels for which this device is a VPN endpoint.
Add a VPN Tunnel
In the VPN Tunnels section:
- Click Add.
The Add VPN Wizard starts. - Complete the Add VPN Wizard to configure your VPN tunnel.
After you add a VPN tunnel to your configuration, the VPN tunnel appears in the list, and the number of configured VPN tunnels appears adjacent to the VPN Tunnels section title.
If you add more tunnels than your license allows, a warning message that you have exceeded your licensed number of tunnels appears. You must remove enough VPN tunnel routes from your configuration to return to your licensed limit.
For more information about the Add VPN Wizard, go to Make Managed Tunnels Between Devices.
Edit a VPN Tunnel
After you have added a VPN tunnel, you can use WSM to change the tunnel configuration. You cannot change either of the tunnel endpoints. If you want to change the Firebox that is at one or both ends of the VPN tunnel, you must create a new tunnel.
In the VPN Tunnels section:
- In the Name list, select a VPN tunnel.
- Click Edit.
The VPN Properties dialog box appears. - Make the changes to your VPN tunnel.
For more information on the changes you can make to your VPN tunnel, go to Edit a Tunnel Definition.
- Click OK.
The updated VPN tunnel appears in the Name list.
Remove a VPN Tunnel
In the VPN Tunnels section:
- In the Name list, select a tunnel.
- Click Remove.
A confirmation message appears. - If you do not the configuration changes to occur immediately, clear the Restart devices now to expire leases and download new configuration check box.
- Click Yes.
The VPN tunnel is removed from the list and the device is restarted.
Add a VPN Resource
You can configure, and put a limit to, the networks that have access through your VPN tunnels. You can make a VPN between hosts or networks. You can also define VPN resources to configure the networks that are available through a given VPN device.
The Device Management tab lists all of your currently defined VPN resources.
For detailed instructions to add VPN resources, go to Add VPN Resources.