Applies To: WatchGuard Data Control
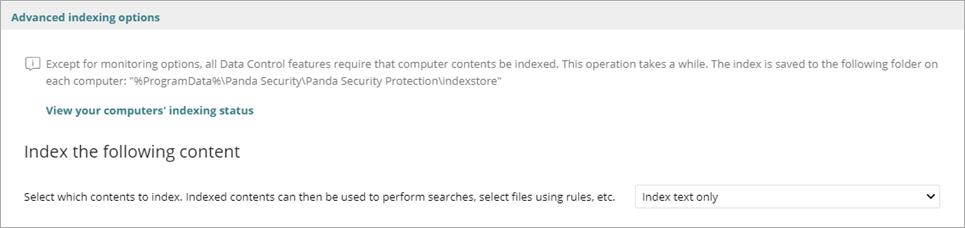
In the Advanced Indexing Options section of a Data Control settings profile, you control what content WatchGuard Data Control indexes and searches, and specify when the indexing process runs.
For more information on the indexing process, see About Data Control Indexing.
To configure advanced indexing options:
- In WatchGuard Cloud, select Configure > Endpoints.
- Select Settings.
- From the left pane, select Data Control.
- Select an existing security settings profile to edit, copy an existing profile, or in the upper-right corner of the window, click Add to create a new profile.
The Add Settings or Edit Settings page opens.
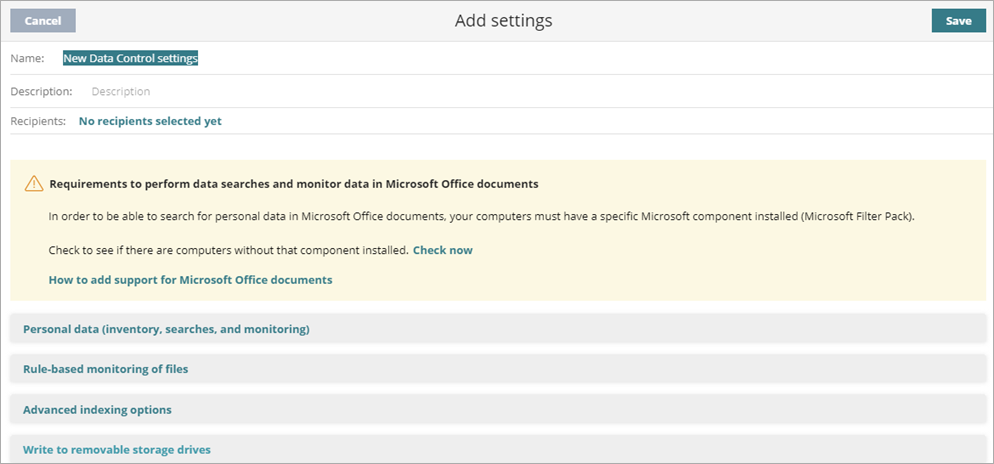
- Enter a Name and Description for the profile, if required.
- In the Index the Following Content section, from the drop-down list, select the content you want to index.
-
Index text only — Data Control indexes text only, unless it is part of a data type recognized by Data Control. With this indexing option selected, content searches for are more limited. Select this option if you want to generate only an inventory of files with PII across the network.
-
Index all content — Data Control indexes both text and numeric characters. Select this option if you want to generate an inventory of files with PII on the network and perform accurate content searches.
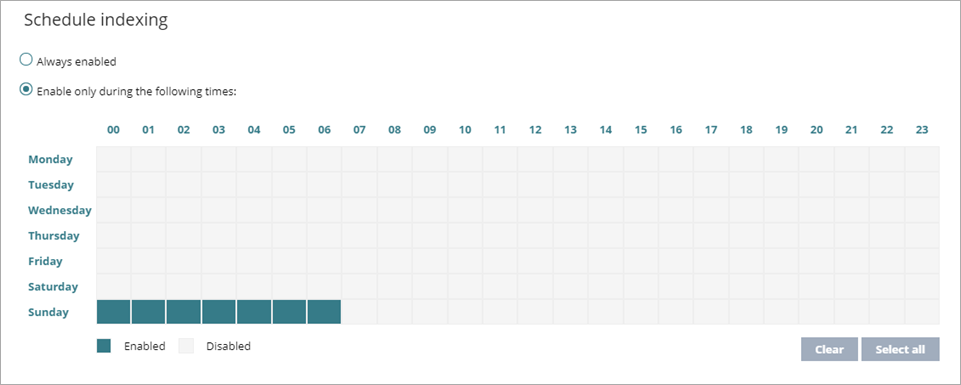
- Select when you want indexing to occur.
- To enable the indexing process to start when needed, in the Schedule Indexing section, select Always Enabled. There is no set schedule.
- To select when you want indexing to occur, select Enable Only During the Following Times.
- In the weekly calendar, click and drag to select the days of the week and hours of the day when you want indexing to occur.
The day and time appear blue when Data Control indexing is enabled. To select all days and times, click Select All. To remove all selected days and times, click Clear.
- In the weekly calendar, click and drag to select the days of the week and hours of the day when you want indexing to occur.
- Click Save.
- Select the profile and assign recipients, if required.
For more information, see Assign a Settings Profile.
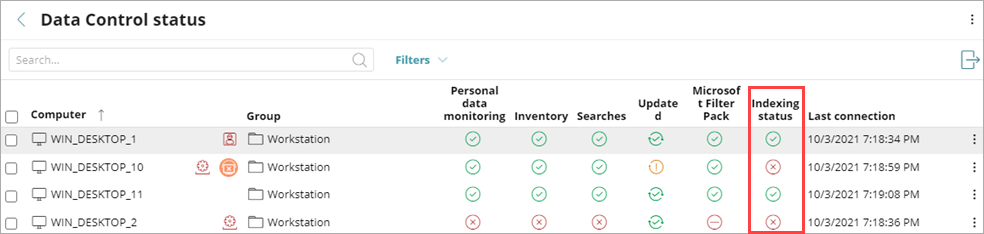
- In the Advanced Indexing Options section, click View Your Computer's Indexing Status to open the Data Control Status list.

The Data Control Status list shows all computers you manage and their Indexing Status.