Applies To: WatchGuard Advanced Reporting Tool and Data Control
Post filters are actions to take on triggered alerts when they meet specified conditions. They are processing rules that are applied when an alert is triggered. Post filters enable you to edit the features of the generated alerts before they are sent, as well as delete them when they meet specified conditions. For example, you could change the priority of an alert to Urgent if the triggering event contains a specified username. A single alert might have one or several post filters.
To create a post filter, from the Advanced Visualization Tool:
- In the left pane, select Alerts.
- In the Alerts History table, select the alert you want to create a post filter for.
- In the right side of the row, click
 .
. - Select New Filter.
The Filter List dialog box opens.
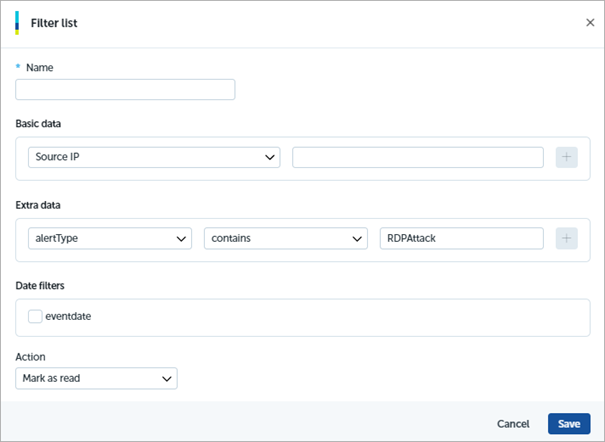
- In the Name text box, type a name for the post filter.
- In the Basic Data section, no information is needed.
These parameters are only for preconfigured alerts. - In the Extra Data section, specify the condition that activates the post filter (count or eventdate).
- To add more conditions, click
 .
.
Click to delete a condition.
 - To apply the post filter only to events whose eventdate value is within a specified time range, select the eventdate check box.
If the alert query contains other fields with timestamp data, they also appear in this form so that you can define the date range based on the fieldvalues instead of the eventdate values. - From the Action drop-down list, select the action you want to perform when the alert meets the criteria.
Mark as Read — Marks the alert as Watched.
Change Priority — Changes the priority to the selected priority level.
False Positive — Marks the alert as a false positive.
Change Notify Method — Changes the delivery method for the alert to selected method.
Delete — Do not distribute the alert and remove it from the alert history.
- Click Save.
The filter code shows in a dialog box. - Click Add Filter.
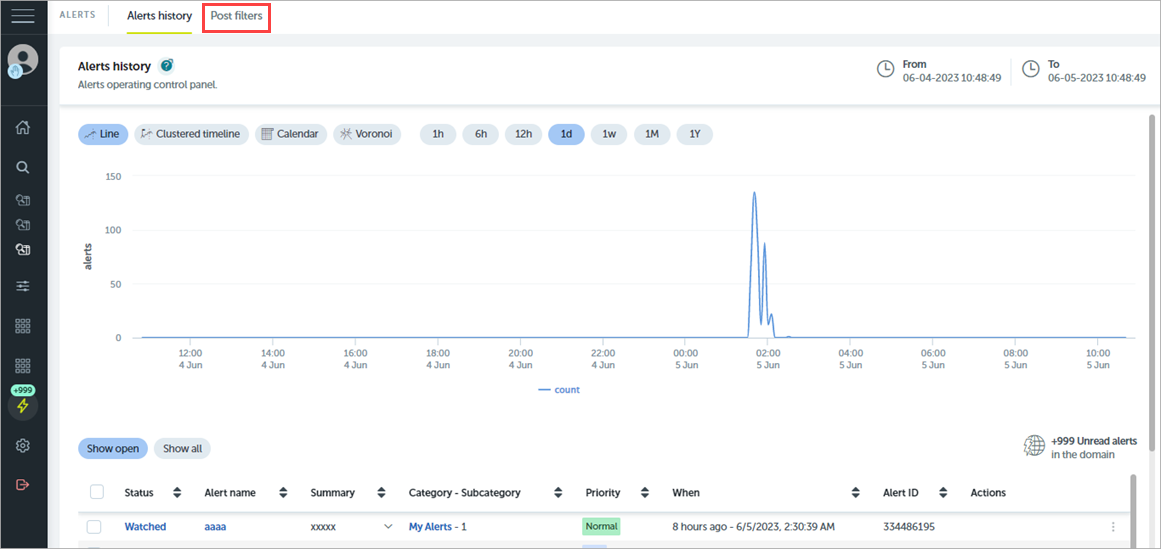
Manage Post Filters
On the Post Filters tab, you can review the list of established filters, stop a filter temporarily, restart it, or permanently delete it. You cannot modify post filters. You must delete them and then create them again.
This information is available for each post filter in the list:
- Status — Enabled or disabled.
- Name — Name given to the post filter when it was created.
- Category — Category that determines whether the post filter is applied.
- Context — Context that determines whether the post filter is applied.
- Priority — Alert priority that determines whether the post filter is applied.
- Conditions — Alert content that determines whether the post filter is applied.
- Action — Internal command that the alert will apply.
To stop or delete a post filter, from the Advanced Visualization Tool:
- In the left pane, select Alerts.
- Select Post Filters.
- In the Post Filters List, select the filter you want to stop or delete.
- Click .
- Select Stop or Delete.
To restart a post filter, from the Advanced Visualization Tool:
- Select the filter you want to run.
- Click .
- Select Run.
A confirmation message appears.