Ubuntu is a Linux distribution that includes various daemons, services, and utilities. One of the available services is Rsyslog, which builds on the features available in Syslog logging. This document describes the steps to integrate Ubuntu Rsyslog logging with your WatchGuard Firebox to view and search your Firebox Syslog messages.
Platform and Software
The hardware and software used to complete the steps outlined in this document include:
- Firebox or WatchGuard XTM device installed with Fireware v12.8.1
- Ubuntu Server 20.04 LTS
- Rsyslog 8.2001.0
Firebox Configuration
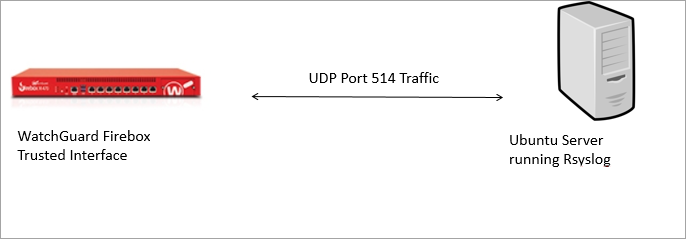
Syslog logging output from the WatchGuard Firebox is unencrypted. We recommend that you do not send unencrypted log messages on public networks.
This example uses the internal default trusted IP address of 10.0.1.1 and the Rsyslog server at 10.0.1.2. The configuration steps in this section use Fireware Web UI. The URL to connect to the Web UI in your browser is https://<Firebox-IP-address>:8080.
To configure your Firebox:
- Log in to Fireware Web UI at:
https://<your firebox IP address>:8080 - Select System > Logging.
The Logging page opens. - Select the Syslog Server tab.
- Select the Send Log Messages to These Syslog Servers check box.
- Click Add.
The Syslog Server dialog box opens.

- In the IP Address text box, type the IP address of your Rsyslog server.
- Leave the default Port and Log Format settings. You must keep UDP port 514 open to send syslog output through your internal networks.
- To include the date and time that the event occurs on your Firebox in the log message details, select the The Time Stamp check box.
- To include the serial number of the Firebox in the log message details, select the The Serial Number of the Device check box.
- Leave the default values for the Syslog Settings.
- Click OK.
- Click Save.
Find the Firebox Name
- Select System > Information.
- Find the Firebox Name.
Make sure this name is unique to this system and note it for later use. - To save any changes you made, click Save.

Ubuntu Server Rsyslog Configuration
- Download and install the Ubuntu 20.04 LTS Server distribution.
For more information and installation instructions, see the official Ubuntu documentation. - Configure a Fixed IP Address for the Ubuntu server.
- To verify Rsyslog is installed, run rsyslogd -v at the command line.
This is an example of the results:rsyslogd -v
rsyslogd 8.2001.0, compiled with:PLATFORM: x86_64-pc-linux-gnu
PLATFORM: (lsb_release -d):
FEATURE_REGEXP:Yes
GSSAPI Kerberos 5 support: Yes
FEATURE_DEBUG (debug build, slow code): No
32bit Atomic operations supported: Yes
64bit Atomic operations supported: Yes
memory allocator: system default
Runtime Instrumentation (slow code):
uuid support: Yes
Number of Bits in RainerScript integers: 64If Rsyslog is not installed, you can use this command to install it manually:
sudo aptitude install rsyslog
- To create a backup of the original rsyslog.conf file, run the command sudo cp /etc/rsyslog.conf /etc/rsyslog.conf.orig.
- Edit the /etc/rsyslog.conf file with the VI Editor or your Linux editor.
The module loads the receiver for UDP input. The input tells the server to accept connections on port 514.
|
Change From |
Change To |
|---|---|
| #provides UDP syslog reception | #provides UDP syslog reception |
|
#module(load="imudp") |
module(load="imudp") |
|
#input(type="imudp" port="514") |
input(type="imudp" port="514") |
- To create a folder to redirect your firewall logs to, run the command sudo mkdir /var/log/firewall-logs.
- This folder must have correct ownership to write syslog output to. Run the command sudo chown syslog:syslog /var/log/firewall-logs.
You can include more configuration files in the /etc/rsyslog.d folder with the current version of Rsyslog. Use the $IncludeConfig /etc/rsyslog.d/*.conf. command to add these files to the rsyslog.conf file. A 10-custom.conf file in this folder must be created to redirect the firewall log messages to a different folder. In the same folder you might notice 20-ufw.conf and 50-default.conf files. These numeric prefixes determine what order these files are concatenated. Because you name the file 10-xxxx, the execution comes before those other files.
- To create the 10-custom.conf file with the VI Editor, run the command sudo vi /etc/rsyslog.d/10-custom.conf.
- To redirect to the appropriate folder and label correctly, the 10-custom.conf file must have directives. Add these lines to the file and save.
if $hostname == 'WatchGuard-XTM' then {
/var/log/firewall-logs/WatchGuard-XTM.log
~
}
The tilde (~) notifies Rsyslog to drop the log message immediately, so those firewall logs are not caught by other filters. For more firewalls, add more if/then statements to the 10-custom.conf file.
- To modify the Rsyslog file under /etc/logrotate.d for automatic maintenance, run the command sudo vi /etc/logrotate.d/rsyslog.
- To allow for log rotation, type this statement at the end:
/var/log/firewall-logs
{rotate 120
daily
missingok
notifempty
delaycompress
compress
postrotate
invoke-rc.d rsyslog rotate > /dev/null
endscript
}
Variable Descriptions:
- rotate — Rotate log files the specified number of times before they are removed or mailed to the address specified in a mail directive. If the count is 0, old versions are removed rather than rotated. In this example, log messages are rotated once a day for 120 times.
- daily — Log files are rotated every day.
- missingok — If there is no log file, go on to the next one and do not issue an error message.
- notifempty — Do not rotate the log file if it is empty.
- delaycompress — Postpone compression of the previous log file to the next rotation cycle. This only takes effect when used in combination with compression. It can be used when some programs cannot be told to close their log file and could therefore continue to write to the previous log file for some time.
- compress — Old versions of log files are compressed with gzip(1) by default.
- postrotate / endscript — The lines between postrotate and endscript (both of which must appear on lines by themselves) are executed (with /bin/sh) after the log file is rotated. In this example, log files are redirected to the empty folder of /dev/null after 120 days and deleted. To keep these files, redirect them to a folder for long term storage.
- To restart the Rsyslog service for all the changes to take effect, run the command sudo service rsyslog restart.
Test the Integration
This section describes how to test and troubleshoot the integration.
Troubleshoot Rsyslog Setup
Verify the Rsyslog service runs:
$ service rsyslog status
rsyslog.service - System Logging Service
Loaded: loaded (/lib/systemd/system/rsyslog.service; enabled; vendor preset: enabled)
Active: active (running) since Mon 2022-07-11 06:20:13 UTC; 8min ago
TriggeredBy: syslog.socket
Docs: man:rsyslogd(8)
http://www.rsyslog.com/doc/
Main PID: 759 (rsyslogd)
Tasks: 5
(limit: 4612)
Memory: 3.5M
CPU: 16ms
CGroup: /system.slice/rsyslog.service
└─759 /usr/sbin/rsyslogd -n
-iNONE
Verify UDP port of 514 is open:
netstat -na | grep :514
udp 0 0 0.0.0.0:514 0.0.0.0:*
udp6 0 0 :::514 :::*
Verify UDP traffic on port 514 is present on the receiving interface:
sudo tcpdump -c10 port 514
tcpdump: verbose output suppressed, use -v or -vv for full protocol decode
listening on eth0, link-type EN10MB (Ethernet), capture size 262144 bytes
12:31:05.193268 IP 10.55.55.1.37506 > 10.55.55.3.syslog: SYSLOG local3.info, length: 125
Search Rsyslog Output
Use the less pager program to scroll through the log messages. The less pager can scroll forward and backward and provides basic search options.
less /var/log/firewall-logs/WatchGuard-XTM.log
Forward search:
- / — Search for a pattern going forward to the next occurrence
- n — Next match forward
- N — Previous match backward
Backward search:
- ? — Search for a pattern going backward
- n — Next match backward
- N — Next match in forward direction
Beginning, end, and exit:
- g — Go to start of file
- G — Go to end of file
- q — Exit the less pager
- ZZ — Exit the less pager
Use the Linux grep command to search for character strings.
- Search for a single user:
grep 'Dave' /var/log/firewall-logs/WatchGuard-XTM.log - Search for multiple users:
grep -E 'Dave|Mary|Joe' /var/log/firewall-logs/WatchGuard-XTM.log - Search for an IP address:
grep '10.55.54.66' /var/log/firewall-logs/WatchGuard-XTM.log - Search for an IP address subnet:
grep -E '10.0.?.?' /var/log/firewall-logs/WatchGuard-XTM.log - If the grep search output is too big, pipe the output to the less pager to scroll:
grep -E '10.0.?.?' /var/log/firewall-logs/WatchGuard-XTM.log | less - To search through multiple firewall log files in the folder, use the recursive option:
grep -r 'Unhandled' /var/log/firewall-logs/