WatchGuard Fireware OS integrates with GuestAir® to turn your Wi-Fi hotspot into a secure and highly-customizable captive portal. This integration enables additional authentication methods to capture guest information. In this case, when a client tries to get access to a web page, the Firebox redirects the request to the GuestAir authentication system.
Platform and Software
The hardware and software used to complete the steps outlined in this document include:
- Firebox or WatchGuard XTM device installed with Fireware v11.10.5
- GuestAir Guest Authentication System
Set Up a GuestAir Zone
- Log in to the GuestAir admin UI.

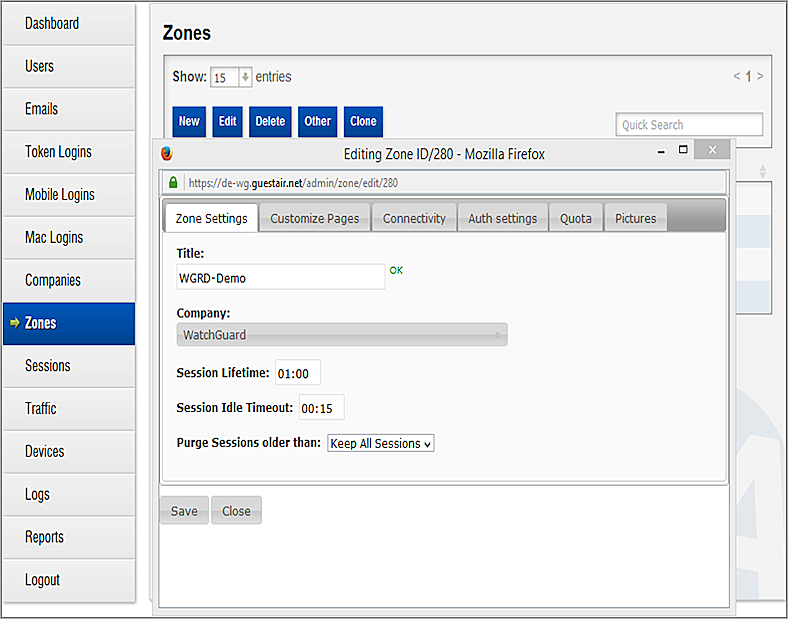
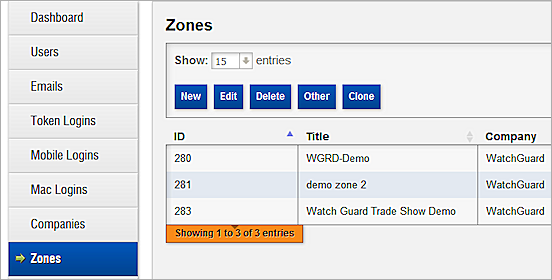
- Select Zones and click New.
- In the Title text box, type the name of your zone.
- Select the Connectivity tab.
- Type a Shared Secret and a Post Authentication URL.
- Specify a Management IP Override address only if the Firebox is behind another firewall or NAT device that will NAT its IP address before its packets reach GuestAir.

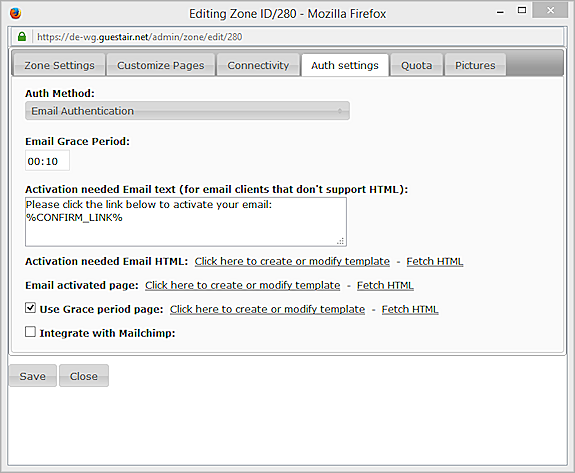
- Select the Auth Settings tab.
- From the Auth Method drop-down list, select the authentication method to use.
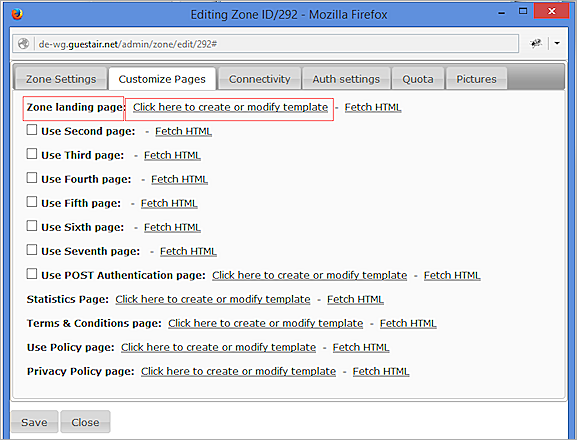
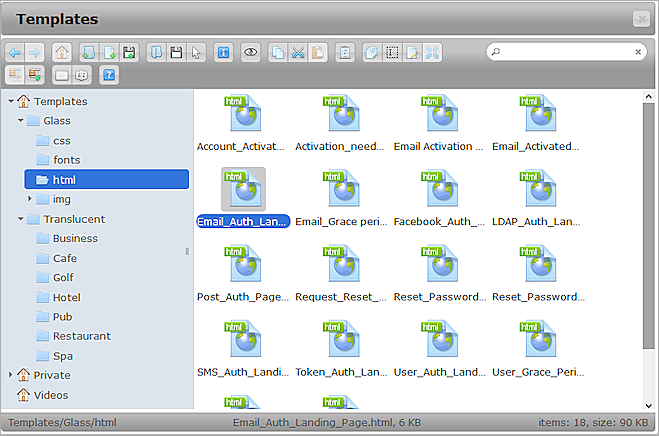
- On the Customize Pages tab you can create a hotspot template for the Zone. Click Click here to create or modify template to create a Zone Landing Page.
- Click the Load New Template icon
 from the menu bar to load a new template.
 - From the File Browser list, double-click one of the pre-loaded templates available to you to select and load it.
- Click
 (Apply Changes).
 - Save the changes to the Zone page.
- Click Save and close. The Zone is created. In this example, you can see that the ID is set to 280.
Set Up Firebox External Guest Authentication
-
Connect to your Firebox with WatchGuard System Manager and open Policy Manager.
You can also use Fireware Web UI to complete this procedure.
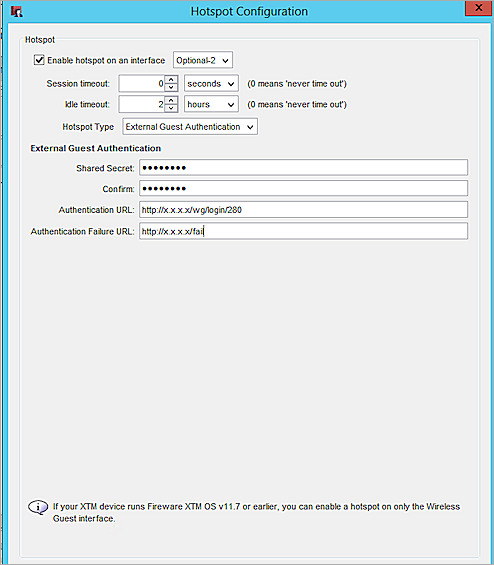
- Select Setup > Authentication > Hotspot.
- Click Enable hotspot on an interface and select the interface you want to use from the drop-down list. In this example, we use Optional-2.
- From the Hotspot Type drop-down list, select External Guest Authentication.
- Type and confirm a Shared Secret. This must be same shared secret you used on the GuestAir Zone Connectivity tab.
- In the Authentication URL text box, type the URL of the authentication page on the external GuestAir web server.
- In the Authentication Failure URL text box, type the URL of the authentication failure page on the external GuestAir web server. In the screenshot below, x.x.x.x represents the GuestAir server the user has access to, for example: 46.165.252.180 in Germany.
- Save the configuration to your Firebox.
Test Hotspot External Guest Authentication
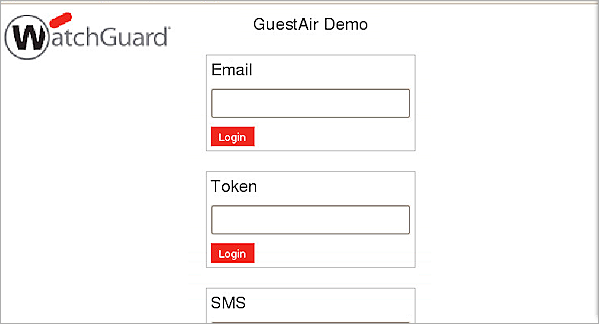
To make sure that external guest authentication is working through GuestAir, open a web browser and connect to any web page. The GuestAir authentication page appears in the hotspot user’s browser. Users do not see this authentication page unless a template has been loaded as described in steps 6-8 of the previous section.