Applies To: ThreatSync+ NDR
This feature is only available with a ThreatSync+ NDR or Total NDR license. For more information, go to About ThreatSync+ NDR Licenses and About Total NDR Licenses.
To monitor and detect threats in your IONOS workloads, ThreatSync+ NDR requires access to your IONOS flow log data. To collect this data and monitor the IONOS log traffic, you must add and configure a cloud integration in WatchGuard Cloud.
Configuration of an IONOS flow logs integration is a two-step process. You must first complete configuration in the IONOS Cloud UI, and then create the IONOS flow logs integration in the ThreatSync+ Integrations UI.
Before You Begin
To configure IONOS in the IONOS Cloud UI, make sure:
- You have an IONOS Cloud user account with an Administrator role.
- You can connect to the IONOS Portal.
- Workloads are running in IONOS Cloud and can generate flow logs.
For more information, go to Configure Flow Logs in the IONOS Cloud documentation.
Before you can create a ThreatSync+ NDR cloud integration with IONOS flow logs, you must:
Create a Bucket in IONOS Cloud
In IONOS Object Storage, a bucket is the primary container for data and where flow logs are stored. Each object is stored in a bucket and is identified by a unique key.
To create a bucket in IONOS Cloud:
- Log in to IONOS Cloud at https://dcd.ionos.com/latest/.
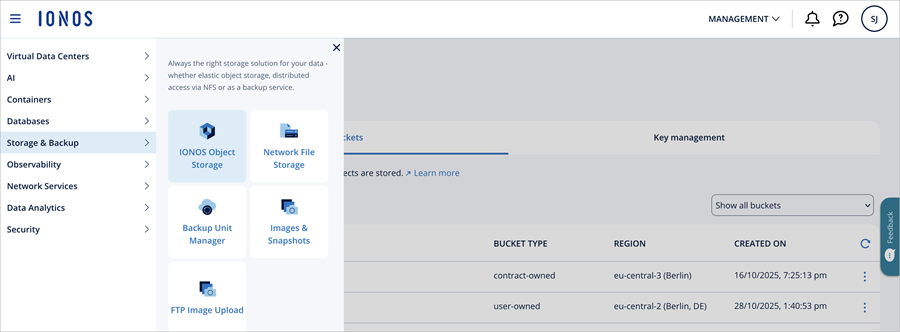
- In the navigation menu, select Storage & Backup > IONOS Object Storage.
- Click Create bucket to create a bucket where IONOS flow logs will be stored.
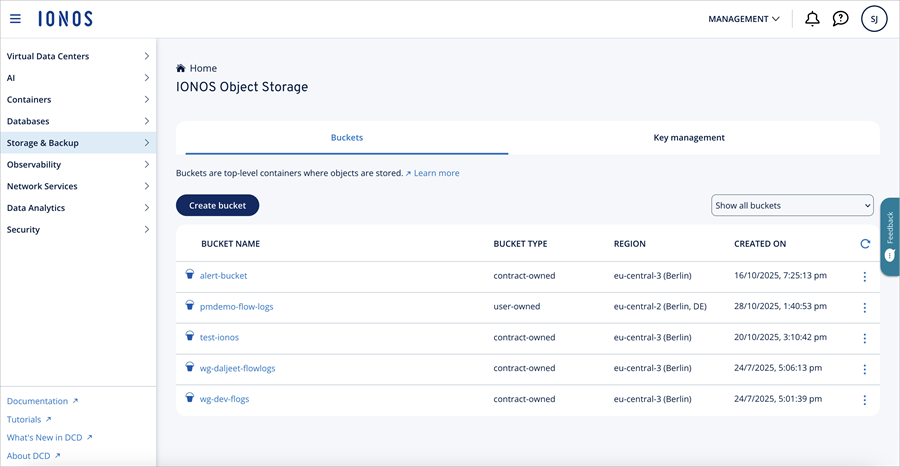
- In the User-owned bucket section, select a region and enter a bucket name.
IONOS flow logs only work with the User-owned bucket. Do not select a region in the Contract-owned bucket section.
- Click Create bucket.

- Click Bucket Settings.
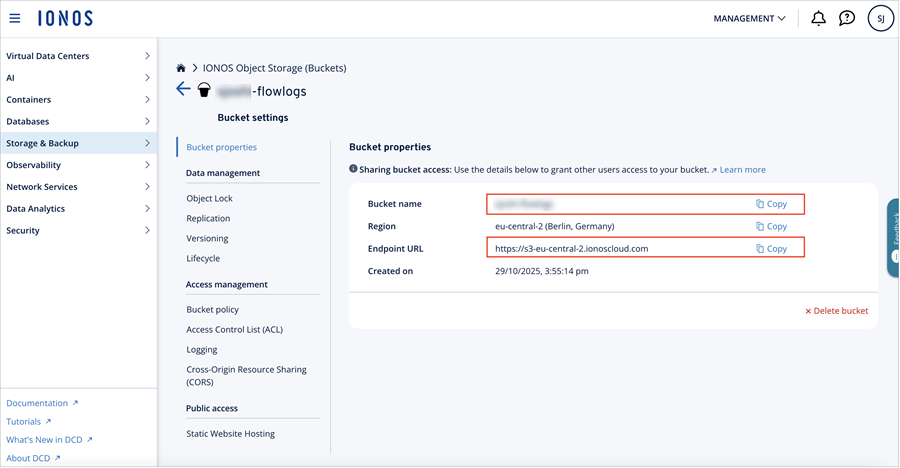
- In the Bucket properties section, copy the values of Bucket name and Endpoint URL and save it. You will need these values when you create an IONOS flow logs cloud integration in ThreatSync+ NDR.
For more information, go to Create a Bucket in the IONOS Cloud documentation.
Generate Access Keys
ThreatSync+ NDR collects IONOS flow logs from the IONOS bucket. Access keys are required to access logs stored in the IONOS bucket.
To generate access keys:
- From the navigation menu, select Storage & Backup > IONOS Object Storage.
- On the IONOS Object Storage page, select the Key management tab.
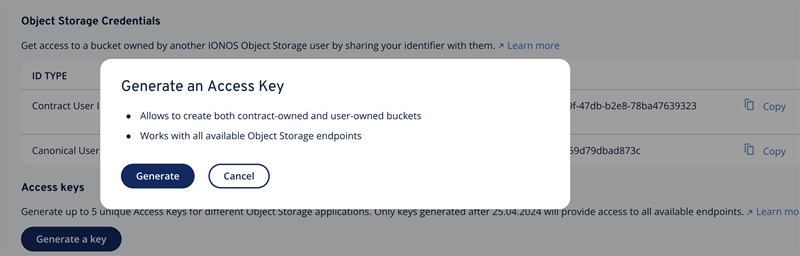
- Click Generate Key.

- In the Generate an Access Key dialog box, click Generate.
The new access key is generated and shows in the Admin key section.
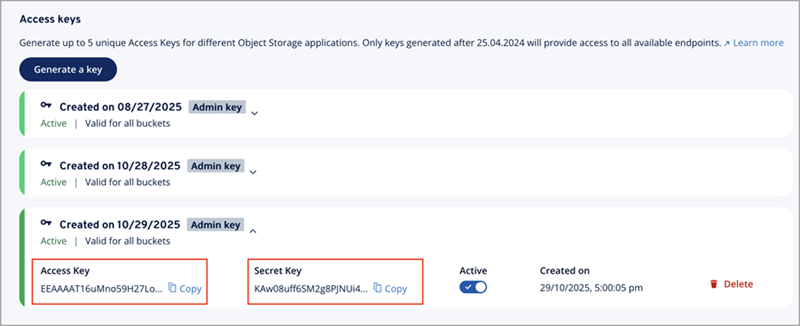
- Expand the Admin key section that corresponds to the date that you created the Admin key.
- Copy the Access Key and Secret Key and save it. You will need these keys to create the IONOS flow logs cloud integration in ThreatSync+ NDR.
For more information, go to Generate a Key in the IONOS Cloud documentation.
Configure Flow Logs in IONOS Workloads
Configure IONOS workloads to send flow logs to the User-owned bucket.
To configure IONOS flow logs:
- From the navigation menu, select Virtual Data Centers.
- In the Search text box, enter and select the data center name.
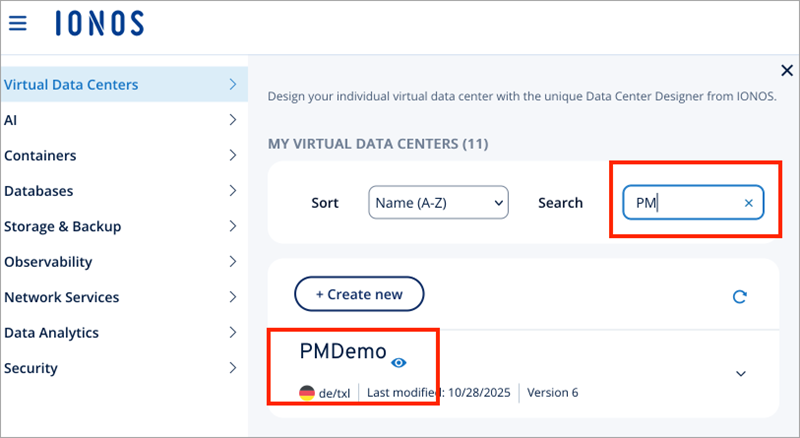
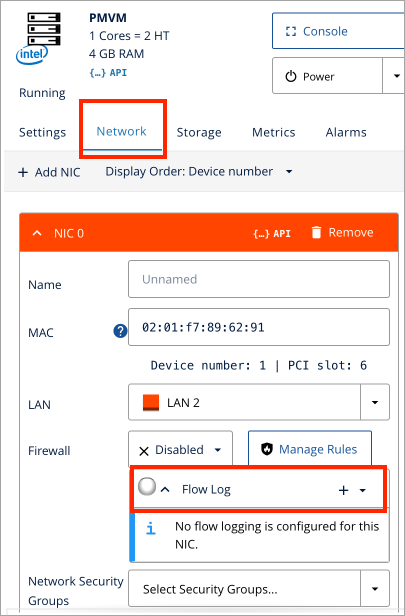
- On the Data Center Diagram page, select the VM where you want to enable the flow logs.

- Select the Network tab. Click + next to Flow Log.
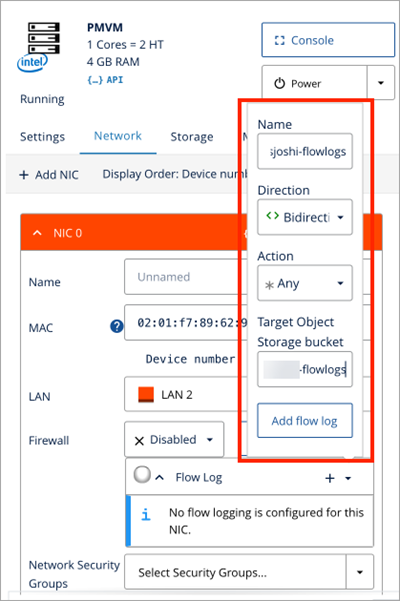
- Enter these details:
- Name — The name of the flow log.
- Direction — Select Bidirection.
- Action — Select Any.
- Target Object Storage bucket — Enter the bucket name where the flow logs will be stored.
- Click Provision Changes to save the changes to Data Center.
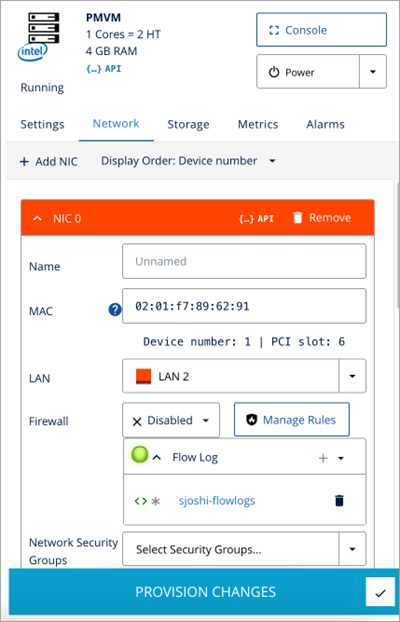
- Verify there are no pending changes and that the flow log settings are updated.
For more information, go to Configure Flow Logs in the IONOS Cloud documentation.
Create an IONOS Flow Logs Cloud Integration
To create an IONOS flow logs cloud integration, you must have the IONOS bucket name, endpoint name, and access keys.
To add a cloud integration, from WatchGuard Cloud:
- Select Configure > ThreatSync+ Integrations > Cloud Integration.
The Cloud Integrations page opens. - Click Add Cloud Integration.
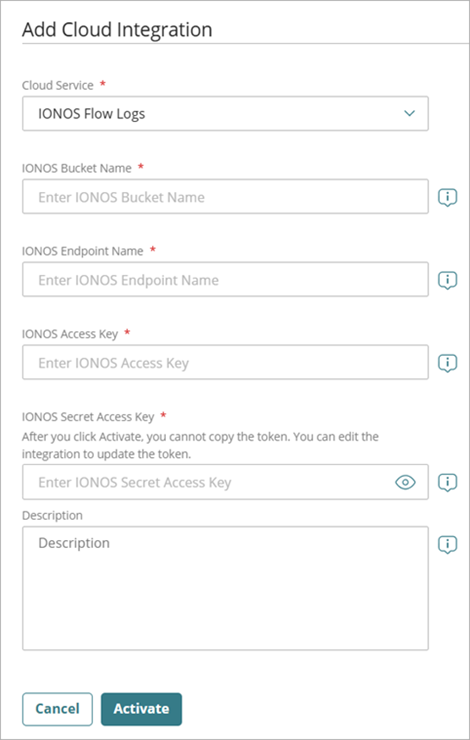
- From the Cloud Service drop-down list, select IONOS Flow Logs.
- In the IONOS Bucket Name text box, enter your IONOS bucket name where IONOS flow logs will be stored.
- In the IONOS Endpoint Name text box, enter the IONOS bucket endpoint URL.
- In the IONOS Access Key text box, enter the IONOS access key. This key, together with the secret access key, is used to connect to the IONOS cloud service.
- In the IONOS Secret Access Key text box, enter the IONOS secret access key to complete the key pair.
IONOS Object Storage authenticates users with a key pair — Access Key and Secret Key. For more information, go to Key Management in the IONOS Cloud Documentation.
- (Optional) In the Description text box, add a description to describe what this cloud integration is used for.
- Click Activate.
- After the status changes to Active, the cloud integration configuration is complete. It might take up to 30 minutes for the status to change to Active.
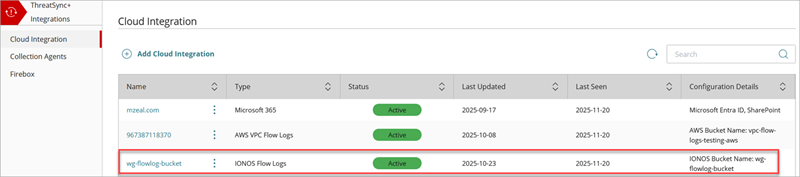
- To view the IONOS Flow Logs Collection Status and Conversations Flow Count charts, click the cloud integration name in the Name column.
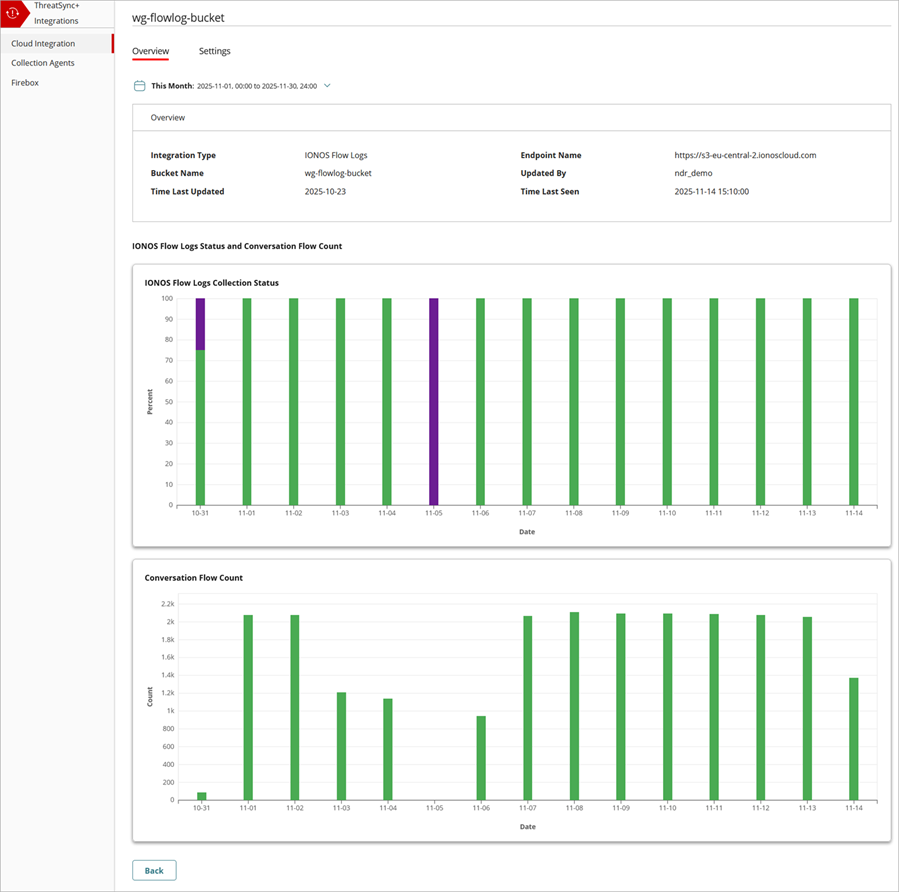
It might take up to 90 minutes for ThreatSync+ NDR to learn your environment and start to show alerts in the Monitor menu.
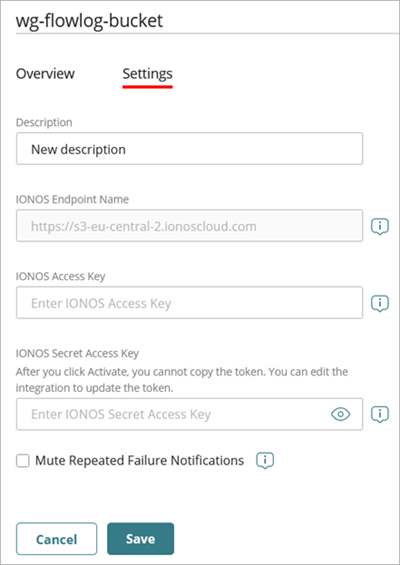
Edit an IONOS Cloud Integration
You can edit an existing, active IONOS cloud integration to change the description, update the Access Key and Secret Access Key, or mute repeated failure notifications.
To edit an IONOS cloud integration:
- Select Configure > ThreatSync+ Integrations > Cloud Integration.
The Cloud Integrations page opens. - Click the name of the cloud integration you want to edit.
The Cloud Integration Details page opens, with the Overview tab selected by default. - (Optional) In the Description text box, edit the description of the cloud integration.
- (Optional) In the IONOS Access Key text box, update the access key.
- (Optional) In the IONOS Secret Access Key text box, update the secret access key.
- Select the Mute Repeated Failure Notifications check box if you only want a single notification sent for this cloud integration when a cloud integration failure occurs.
- Click Save.
About ThreatSync+ Cloud Integration — IONOS Flow Logs