Applies To: Cloud-managed Fireboxes
This document applies to Fireboxes you manage in WatchGuard Cloud. For information that applies to Fireboxes managed in Fireware Web UI or WatchGuard System Manager, go to: Create Schedules for Firebox Actions.
Overview
In WatchGuard Cloud, you can configure a schedule for a cloud-managed Firebox and use that schedule in multiple places in the Firebox configuration. For example, if you want to restrict specific types of network traffic during normal business hours, you can create a schedule that is active on weekdays, then apply it to multiple firewall policies.
You configure a schedule on the Schedules page first, then apply the schedule to the firewall policies you want to use the schedule. This workflow enables you to manage schedules in a central location, rather than make changes in each individual firewall policy. For example, if you have multiple policies aligned to the hours of operation at your organization and then the hours of operation change, you only have to update the schedule in one place. For information about how to apply a schedule to a firewall policy, go to Configure a Schedule for a Firewall Policy in WatchGuard Cloud.
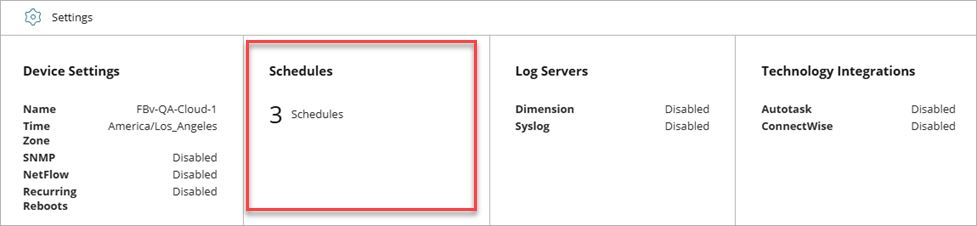
On the Device Configuration page for a cloud-managed Firebox and in a Firebox template, the Schedules widget shows the number of configured schedules. To view and configure schedules, click the Schedules widget.
The Schedules page shows a list of configured schedules, which are based on the time zone configured for the Firebox. The list includes schedules configured for the device as well as schedules inherited from Firebox templates the device subscribes to.
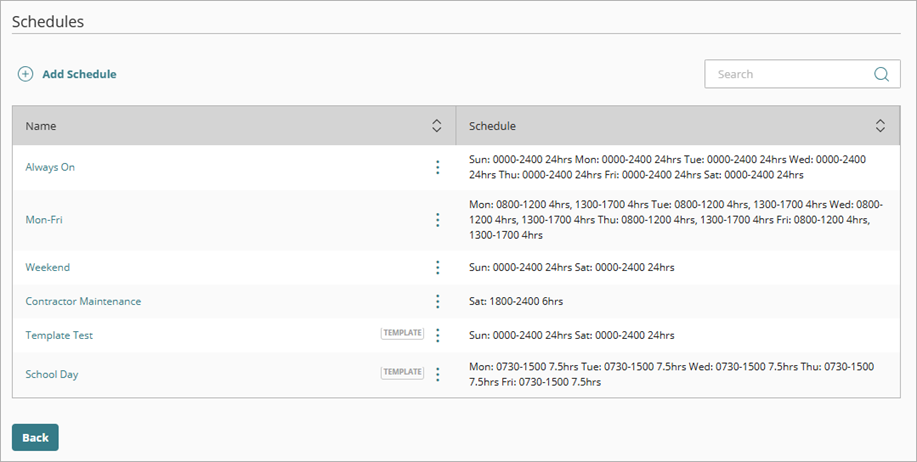
In the Firebox configuration, you can edit, copy, or delete schedules configured for the Firebox. You can also copy schedules inherited from Firebox templates. To edit or delete an inherited schedule, you must manage the schedule in the template. You cannot delete a schedule that is in use by a policy, so you must first remove the schedule from the policy.
The predefined Always On schedule is the system default and is active 24 hours a day, 7 days a week. You can copy the Always On schedule but you cannot edit or delete it.
Your operator role determines what you can see and do in WatchGuard Cloud. Your role must have the Devices permission to view or configure this feature. For more information, go to Manage WatchGuard Cloud Operators and Roles.
Add a Schedule
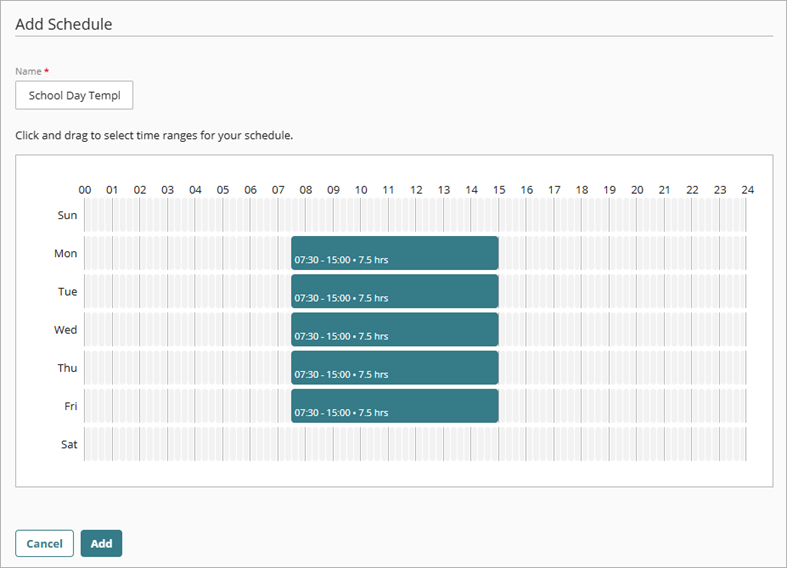
To build a schedule, you use the calendar tool in the Schedules widget. The calendar tool has a row for each day of the week. Each row spans 24 hours and you can click and drag within each row to create as many time slots as you want for that day. You can increase and decrease time slots by 15 minute increments.
To add a schedule for a cloud-managed Firebox:
- In WatchGuard Cloud, select Configure > Devices.
- Select the cloud-managed Firebox.
- Click Device Configuration.
- Click the Schedules widget.
The Schedules page opens. - Click Add Schedule.
- In the Name text box, enter a unique, descriptive name for the schedule.
- In the calendar, click and drag to select the time ranges you want to include in the schedule.
- Click Add.
The schedule is saved and added to the list on the Schedules page.
The schedule is based on the time zone configured for the Firebox. Make sure that the dates and times you select correspond to the local time of the Firebox. For information about the Firebox time zone configuration, go to Configure System Settings for a Cloud-Managed Firebox.
The schedule has no effect until you apply it to a policy. For more information, go to Configure a Schedule for a Firewall Policy in WatchGuard Cloud.